- BoostSolutions
-
Products
-
- Microsoft Teams
- HumanLike Alert Reminder
- View All Apps
- Pricing
- Support
- Company
After you collect lists from different SharePoint sites on a BoostSolutions’ List Collection web part. You can configure a Choice Filter Web Part to connect to the List Collection Web Part and filter the items by a choice value.
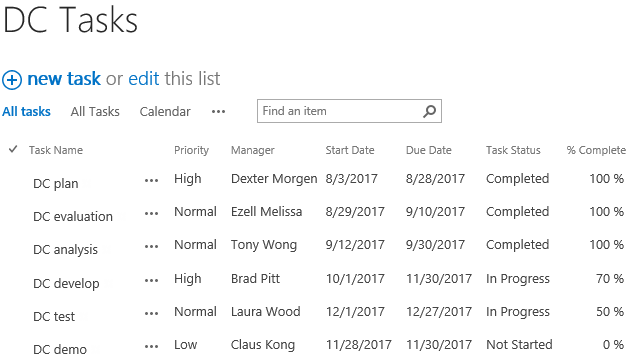
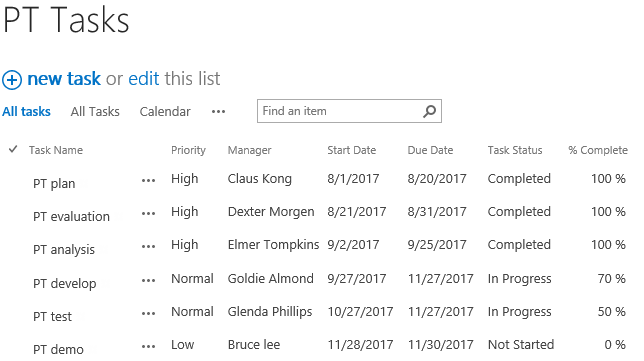
In the example, there are two SharePoint task lists belong to two different sites, and each list contains several tasks, we plan to roll up these tasks into one place and filter the items by Choice Filter Web Part.
Now, let’s demonstrate how to configure a Choice Filter Web Part and filter items by a choice value.
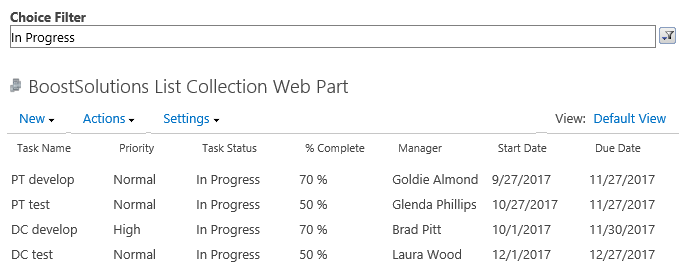
Choose a choice value in Choice Filter Web Part and filtered items are shown on the List Collection Web Part.
There is another SharePoint list named as PT Tasks with following columns and tasks on a SharePoint site – PT Project.
Download the trial version of List Collection and install it to your SharePoint server.
Navigate to page or site where you want to add the List Collection web part to, click the Edit command in the top right of the page.

Or click Settings  and then click
Edit Page.
and then click
Edit Page.
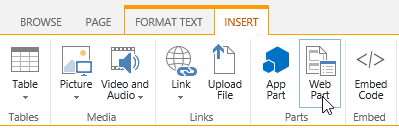
Click the Insert tab, and then click Web Part.
Under Categories, select BoostSolutions Web Parts; then select BoostSolutions List Collection Web Part; lastly click Add.
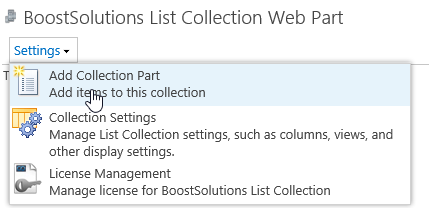
On the Web Part, click Add Collection Part from Settings menu.
On the Add Collection Part page, in Collection Information From Site section, select site Project PT; select list PT Tasks, and keep other options as default.

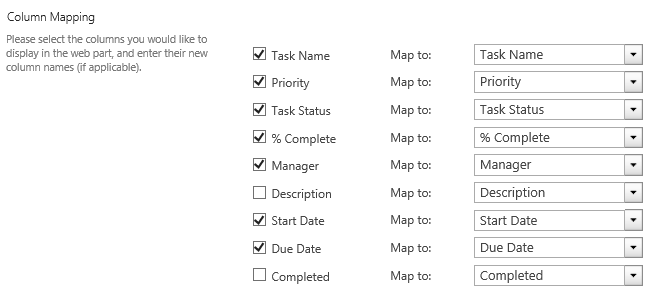
In Column Mapping section, select the following columns.
Then click OK.
Repeat step 5 to 8 to add another SharePoint list DC Tasks on List Collection Web Part.
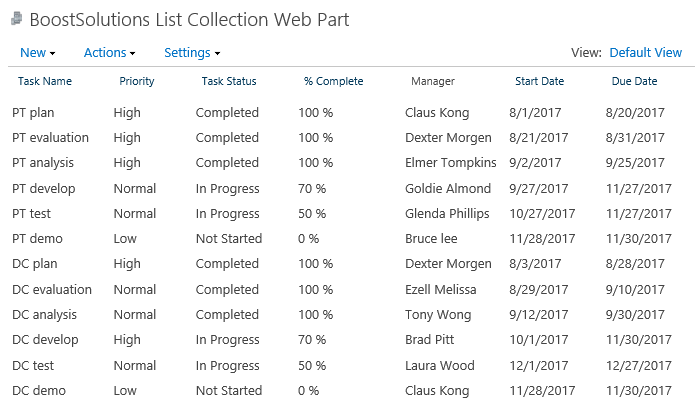
And then, you will find that the items of above two lists are shown on the List Collection Web Part as following.
Navigate to page where the List Collection web part located, click the Edit command in the top right of the page.
Or click Settings
and then click
Edit Page.
Click the Insert tab, and then click Web Part.
Under Categories, select Filters; then select Choice Filter; lastly click Add.
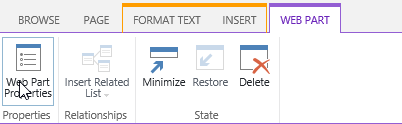
Select the Choice Filter web part, and click Web Part Properties command in WEB PART tab.
A configuration tool pane will appear as following on the right side; enter a name in the Filter Name box to identify the Web Part. Enter a list of values as followings.
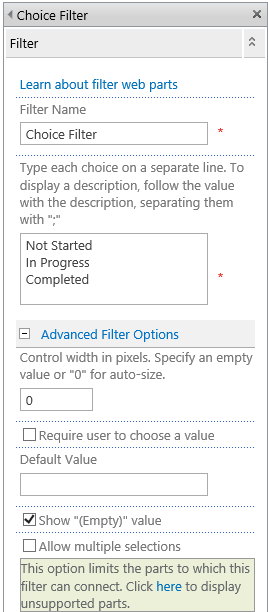
Click OK to save your changes.
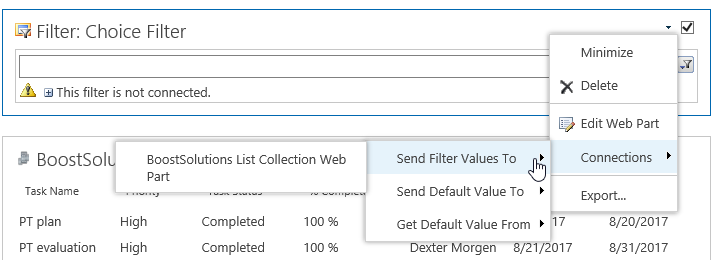
To connect to the Choice Filter Web Part, open the Choice Web Part drop down menu and click Connections > Send Filter Values To > BoostSolutions List Collection Web Part.
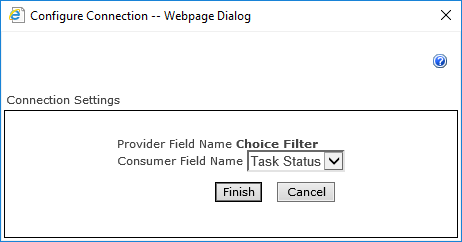
In the Configure Connection dialog box, set the Consumer Field Name as Task Status, and then click Finish.
When you are done configuring the connection, in the Page tab, click Save & Close to save and view the page.
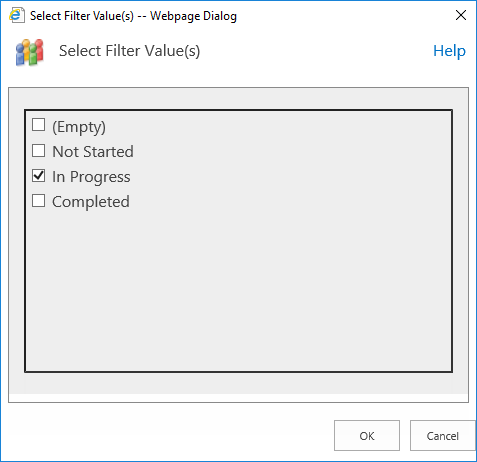
In the Choice Filter Web Part, click Filter, select a value such as In Progress and then click OK.
And then the filtered items are shown on the list collection web part as following.
