- BoostSolutions
-
Products
-
- Microsoft Teams
- HumanLike Alert Reminder
- View All Apps
- Pricing
- Support
- Company
On SharePoint AD Self Service Web Part, Users can quickly change properties, including telephone, email, department, address and so on. Users can also update some customized properties on the AD Self Service Web Part. In this article we will demonstrate to you how to do it.
Administrator can add customzied properties in settings page.
Add AD Self Service Web Part to a site which is called BoostSolutions, and connected to Active Directory. You can refer to another article to see how to do it.
Download the trial version of AD Self Service, and install it to your SharePoint server.
Browse to Central Administration > BoostSolutions Software > AD Self Service Settings.
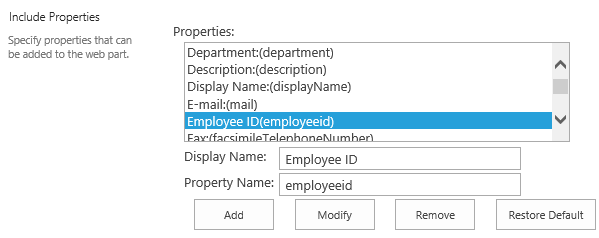
In Include Properties section, click Add button.
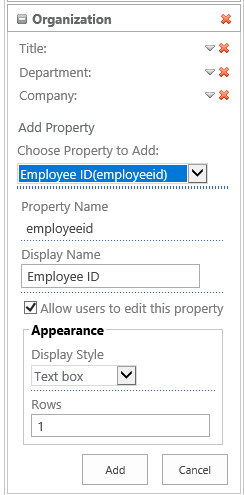
When Add New Property window appears, fill-in the property name. Here we type Employee ID (employeeId). You can also add other properties as you need.
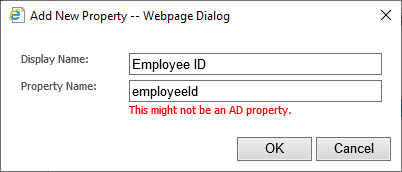
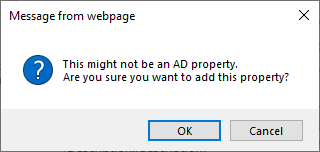
Click OK to save the add the property. Then a confirmation dialog will appear, click OK.
Now the Employee ID is added in the Properties box.
Click OK to save the settings.
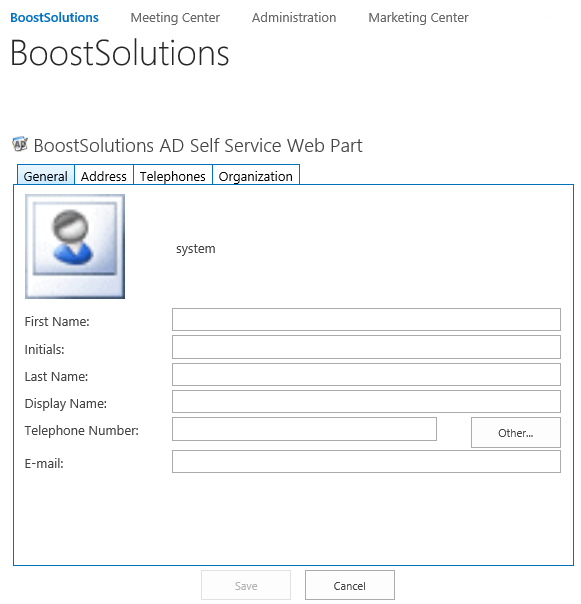
Navigate to BoostSolutions site which is appeared above.
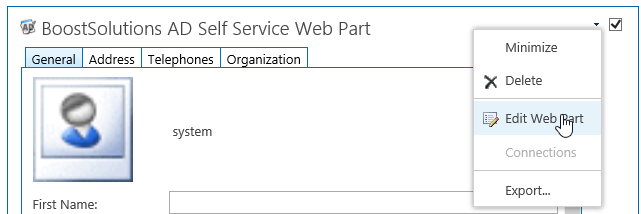
Edit the AD Self Service Web Part, open the control panel.
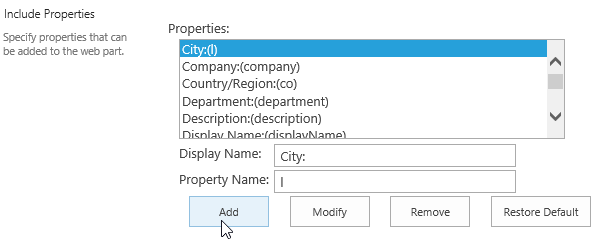
Under Organization tab, click Add New Property.
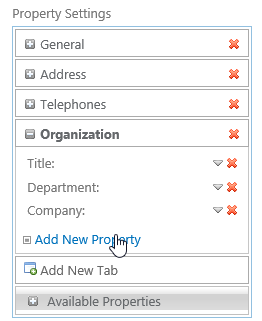
Select Employee ID from the drop-down list and click Add button.
Then click Save button to exit the edit mode from the site page.
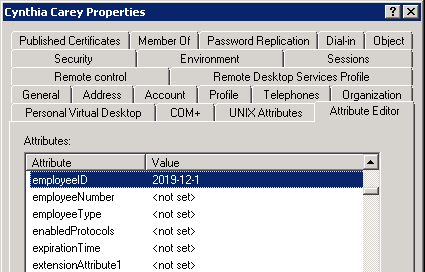
Now, log in as user Cynthia Carey, change the Employee ID to 2019-12-1 and save the changes.
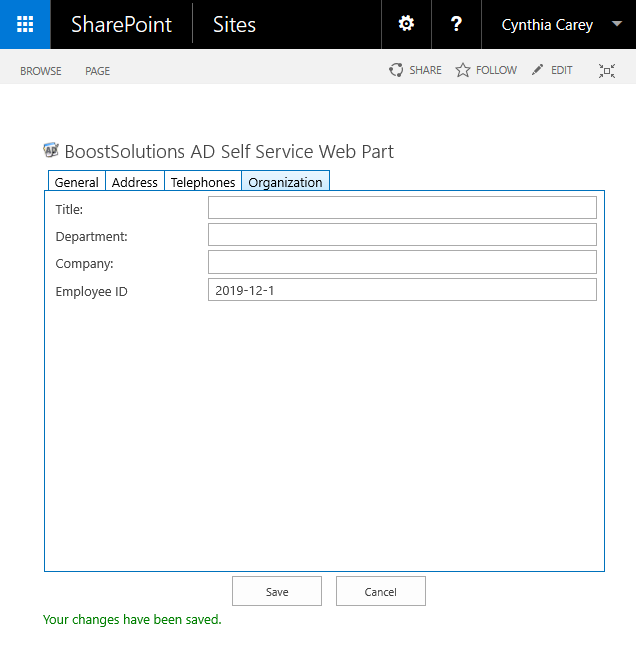
Check the user's properties in active directory, the employee id has been updated as Web Part.