- BoostSolutions
-
Products
-
- Microsoft Teams
- HumanLike Alert Reminder
- View All Apps
- Pricing
- Support
- Company
BoostSolutions’ Calculate Boost Field provides Year(), Month(), Week() and Day() functions, which enables you to calculate year, month, week and day from the specified field.
In this article, we will demonstrate how to use above functions in Calculated Boost Field in a SharePoint list.
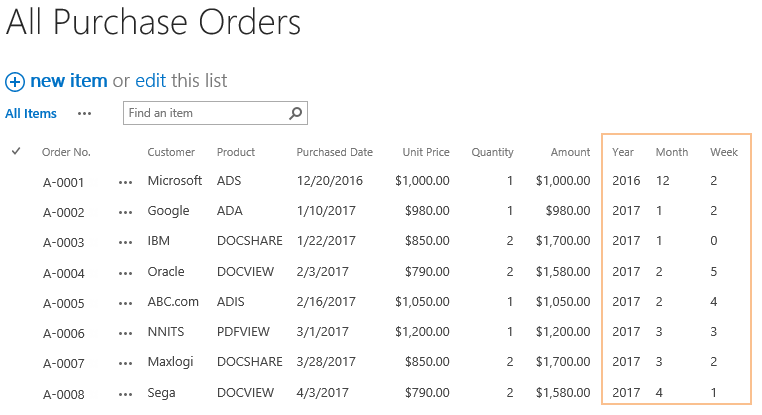
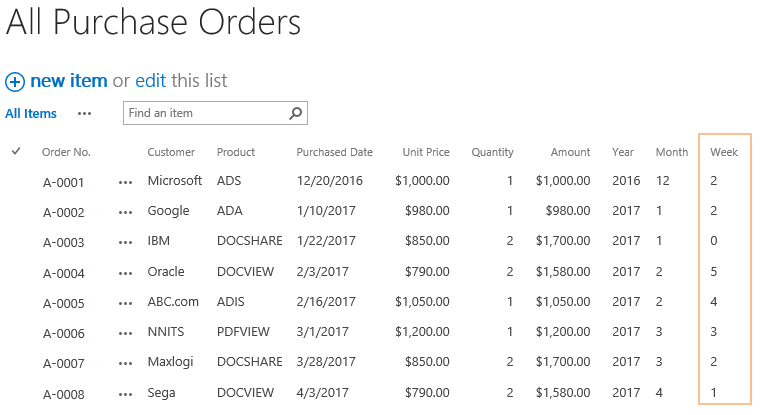
Year, Month and Week all calculated boost field, which shows the year of Purchased Date, the month of Purchased Dateand the weekday of Purchased Date.
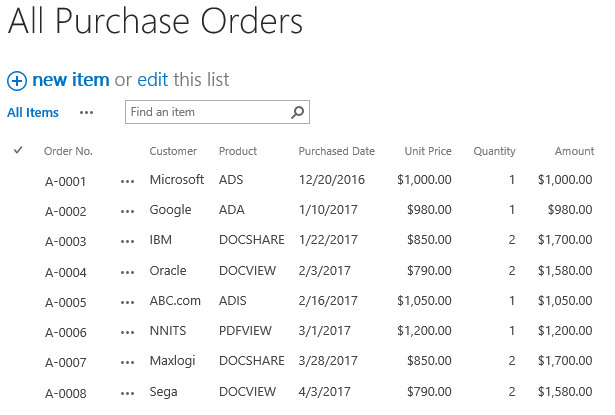
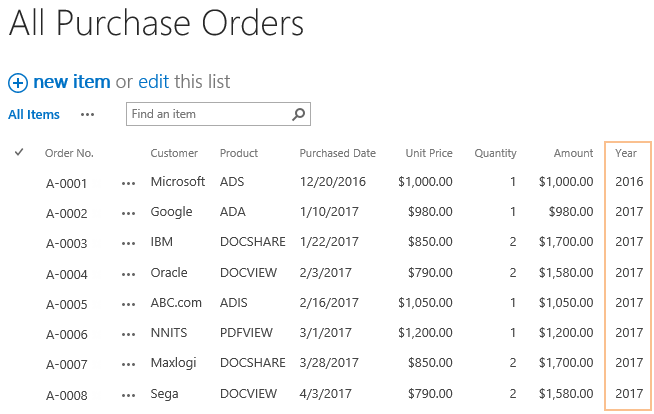
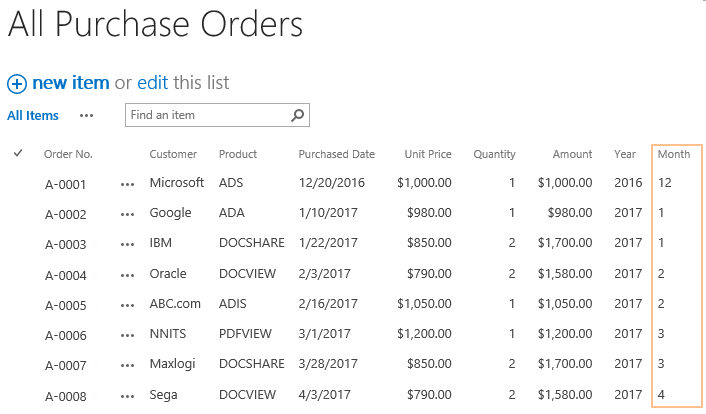
There is a SharePoint list named as All Purchase Orders with following columns and items on a SharePoint site.
Download the trial version of Calculated Boost and install it to your SharePoint server.
Navigate to the All Purchase Orders list, click List tab. In the Manage Views group, click Create Column.

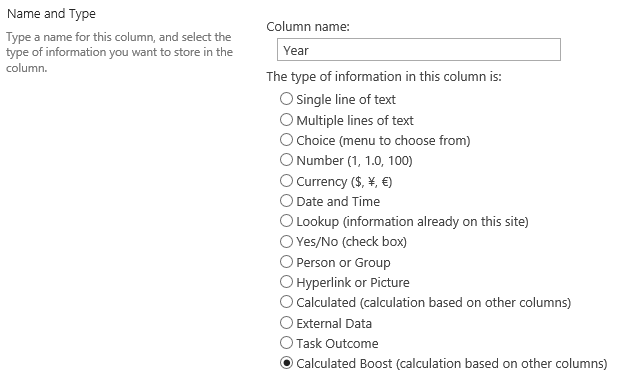
In the Name and Type section, enter a name in the Column Name field to give it a meaningful name such as Year, then select Calculated Boost as the type of information in this column.
In the Additional Column Settings section, type this expression in the Formula box.
ToText(Year([Purchased Date]))
This expression will catch the year from the Purchased Date column and turn it to text type.
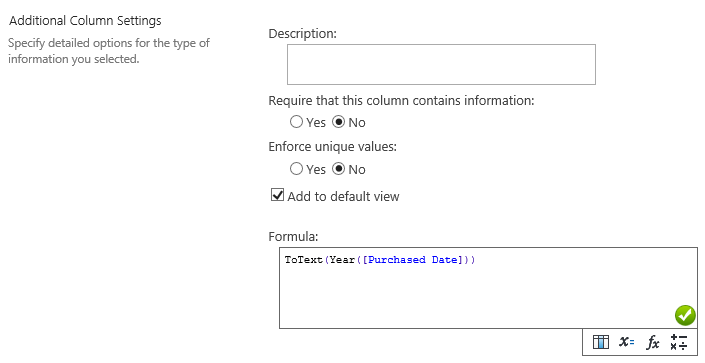
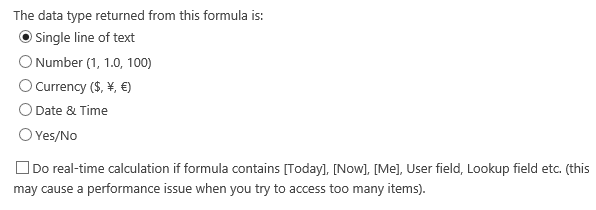
Specify the data type from this formula as Single line of text.
Keep other settings as default and click OK to create column.
Navigate to All Purchase Orders list and you will find that a column named as Year is created in the list and it shows the year of Purchased Date as following.
Navigate to the All Purchase Orders list, click List tab. In the Manage Views group, click Create Column.
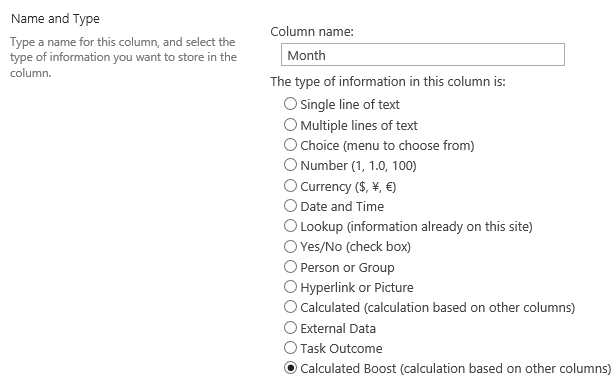
In the Name and Type section, enter a name in the Column Name field to give it a meaningful name such as Month, then select Calculated Boost as the type of information in this column.
In the Additional Column Settings section, type this expression in the Formula box.
ToText(Month([Purchased Date]))
This expression will catch the month from the Purchased Date column and turn it to text type.
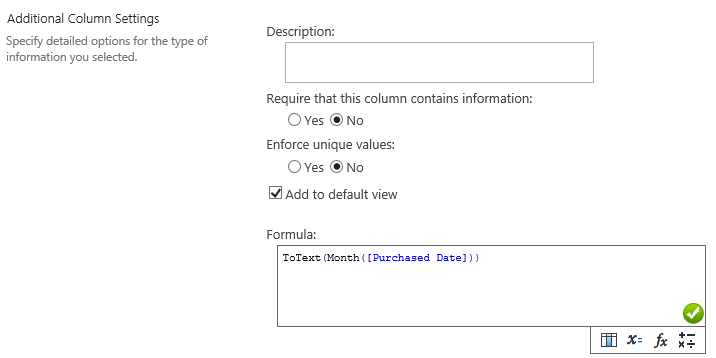
Specify the data type from this formula as Single line of text.
Keep other settings as default and click OK to create column.
Navigate to All Purchase Orders list and you will find that a column named as Month is created in the list and it shows the month of Purchased Date as following.
Navigate to the All Purchase Orders list, click List tab. In the Manage Views group, click Create Column.
In the Name and Type section, enter a name in the Column Name field to give it a meaningful name such as Week, then select Calculated Boost as the type of information in this column.

In the Additional Column Settings section, type this expression in the Formula box.
ToText(Weekday([Purchased Date]))
This expression will catch the day of week from the Purchased Date column and turn it to text type.
0 represents Sunday; 1 represents Monday; 2 represents Tuesday; 3 represents Wednesday; 4 represents Thursday; 5 represents Friday and 6 represents Saturday.
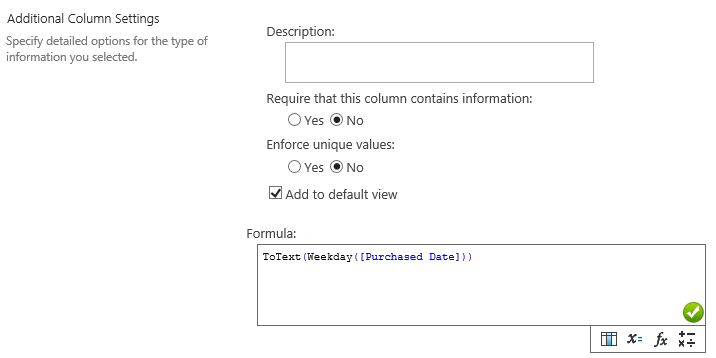
Specify the data type from this formula as Single line of text.
Keep other settings as default and click OK to create column.
Navigate to All Purchase Orders list and you will find that a column named as Week is created in the list and it shows the weekday of Purchased Date as following.