- BoostSolutions
-
Products
-
- Microsoft Teams
- HumanLike Alert Reminder
- View All Apps
- Pricing
- Support
- Company
Displaying related columns for a lookup item can make end-users learn more about the relevant information and easy to locate target item(s). Related columns are the same as SharePoint’s native additional fields, but they are just shown along with the lookup column instead of creating new lookup columns.
This article will demonstrate how to display related columns for a lookup item using Cascaded Lookup.
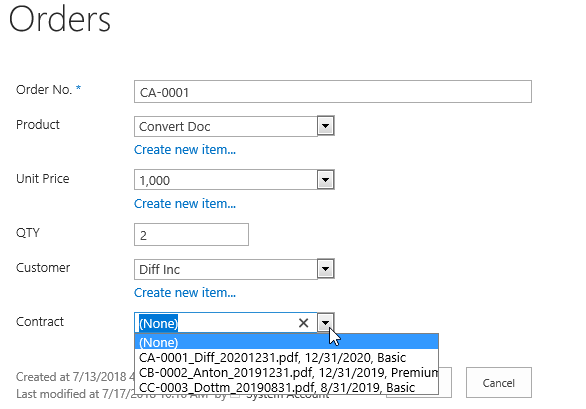
The related columns [Expiration date] and [Support Type] (Basic/Premium) are shown along with the document Name.
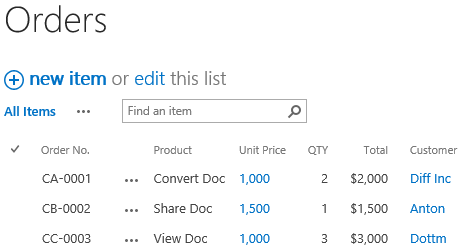
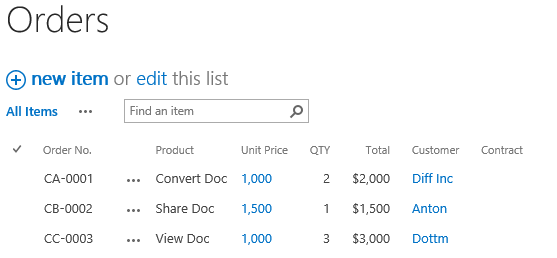
Then create a list named as Orders from the custom list template with following columns and items on a SharePoint site.
Download the trial version of Cascaded Lookup, and install it to your SharePoint server.
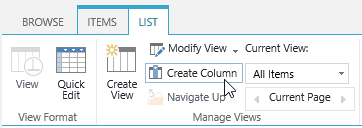
Navigate to the Orders list prepared above, click List tab. In the Manage Views group, click Create Column .
Or go to the List Settings page and click the Create column link in Columns section.
If you already created a Cascaded Lookup column, please skip to step 6.
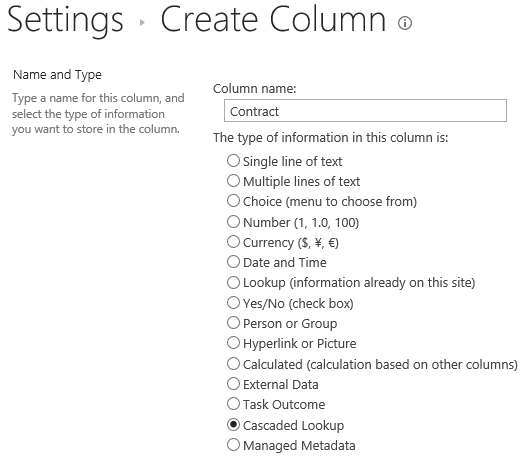
In the Name and Type section, enter a name in the Column Name field to give it a meaningful name such as Contract, then select Cascaded Lookup as the type of information in this column.
In the Additional Column Settings section, keep all settings as default.
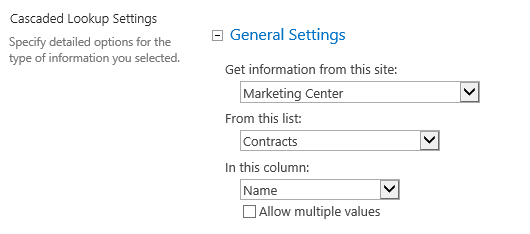
In the General Settings section, configure settings as following.
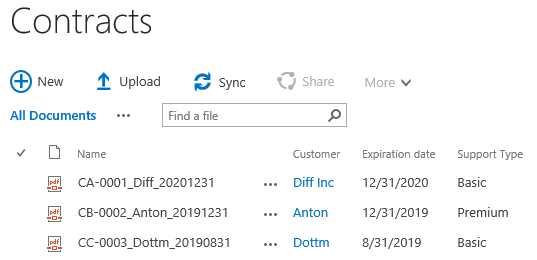
In the Get information from this site box, select Marketing Center, because in our example the Contracts list is located in a SharePoint site named as Marketing Center. You need to select the corresponding SharePoint site in which your Contracts list is located.
In the From this list box, select Contracts.
In the In this column box, select Name.
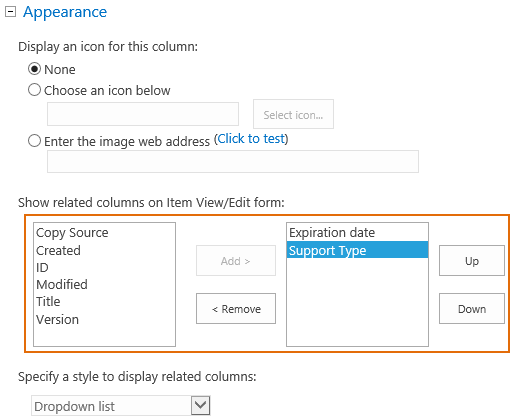
In the Appearance section, select Expiration date and Support Type columns as following.
These two selected columns will be shown along with Name column in Item Edit form or View Item form using the following format:
[Name], [Expiration date], [Support Type]
Keep other settings as default and click OK.
And then you will find that a Cascaded Lookup column named as Contract has been added to Orders list as following.
Select order CA-0001 and click Edit Item. In the Item Edit Form, for Contract column, the related columns are shown as following.
