- BoostSolutions
-
Products
-
- Microsoft Teams
- HumanLike Alert Reminder
- View All Apps
- Pricing
- Support
- Company
List Advanced Filter provides an entry for administrator to set up default filter settings for end users on the List Settings page, and for convenience, end users are also allowed to customize their own filter settings right on the list view page. In this article, we will show how to allow end users to change filter settings, overwrite the default filter settings made by the administrator.
The Configure Filter Panel on the List View Page enables end users to make modifications of the filter settings.
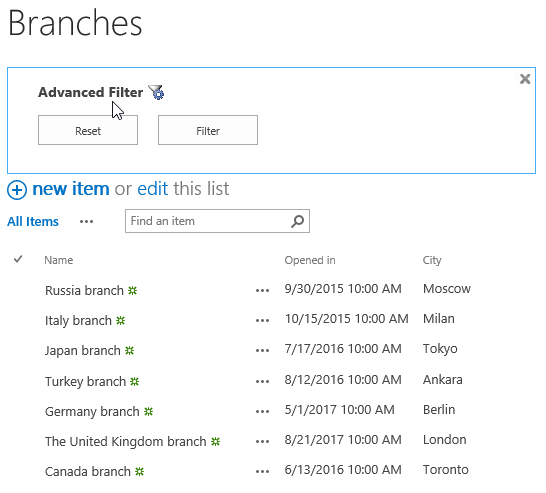
List Advanced Filter works for both SharePoint List and Document Library. For following up the feature we demonstrate in this article, you can create a SharePoint List or a Document Library on your SharePoint site. Here we create a SharePoint list named as Branches with several columns and items as shown below.

Download the trial version of List Advanced Filter, and install it to your SharePoint server.
Navigate to the Branches list prepared above (or navigate to the Document Library in case you create a Document Library as the sample data).
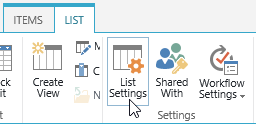
Click ITEMS on the Ribbon, and then click List Settings in Settings group. (Or click LIBRARY, then click Library Settings in Settings group.)
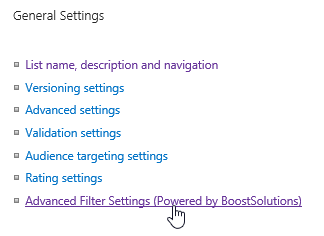
Then you will be navigated to the List Settings page of the Branches list. On the List Settings page, click Advanced Filter Settings (Powered by BoostSolutions) under General Settings.
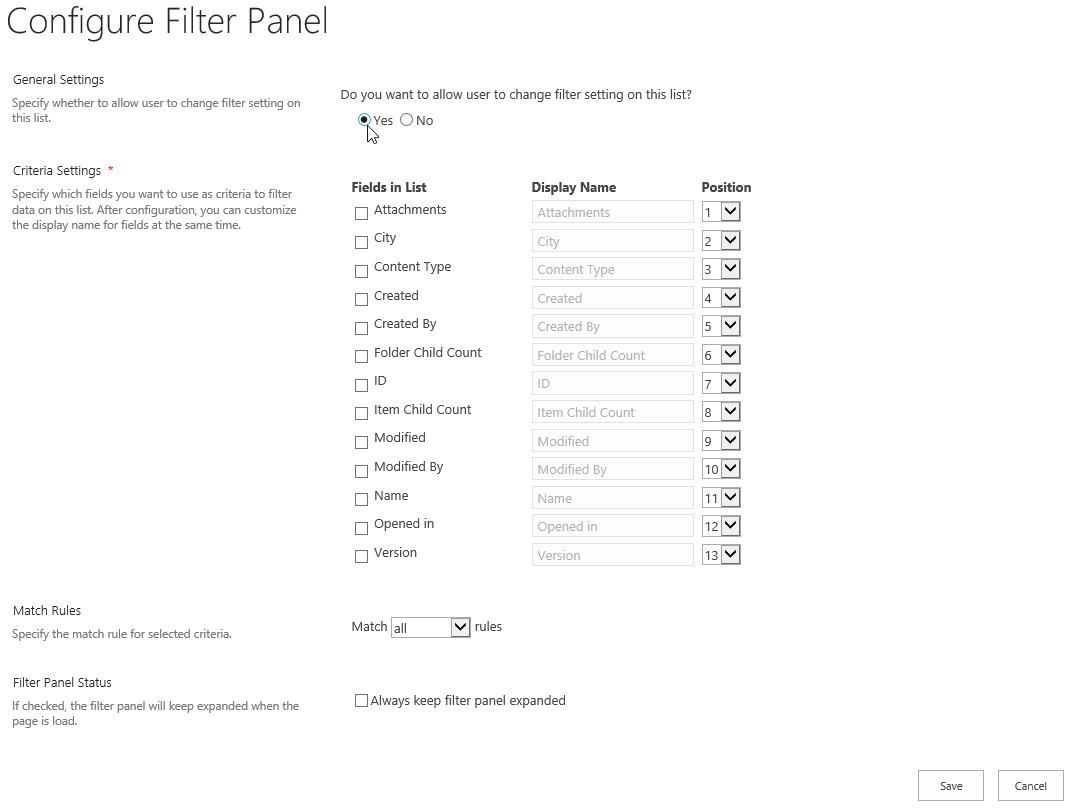
Then, you will be navigated to the Configure Filter Panel to configure the default behavior of List Advanced Filter for the current list/library. On the Configure Filter Panel, focus on the first section General Settings, in this section you will specify whether to allow user to change filter settings on this list. It’s selected as Yes by default. Let’s keep the default settings and click Save.
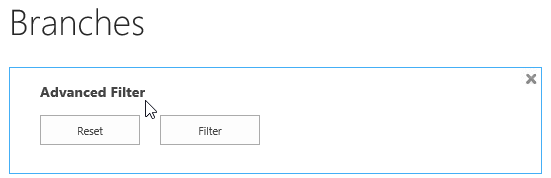
Now, navigate to the Branches list again, click ITEMS on the Ribbon, and then click Advanced Filter in Filter group to show the filter panel.

Then, the Advanced Filter panel will appear above the Branches list as shown below.
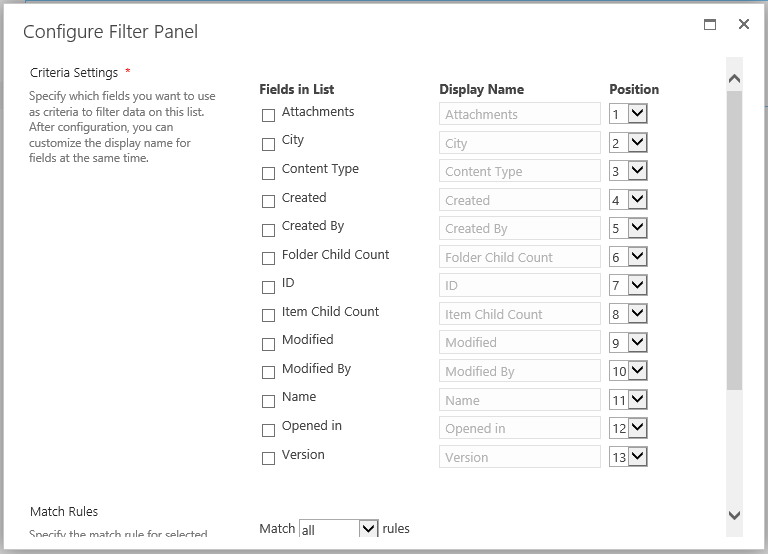
Pay attention to the
 icon, let’s click on it, then the Configure Filter Panel will pop up as shown below to allow end users
to change the filter settings. It looks very similar as the Configure Filter Panel we reached through
the entry on the List Settings page, but it doesn’t have the first section, the General Settings, that’s
because the Configure Filter Panel here is for end users to make modifications of the filter settings,
and the Configure Filter Panel through the entry on the List Settings page is for administrators to
set up the default filter settings.
icon, let’s click on it, then the Configure Filter Panel will pop up as shown below to allow end users
to change the filter settings. It looks very similar as the Configure Filter Panel we reached through
the entry on the List Settings page, but it doesn’t have the first section, the General Settings, that’s
because the Configure Filter Panel here is for end users to make modifications of the filter settings,
and the Configure Filter Panel through the entry on the List Settings page is for administrators to
set up the default filter settings.
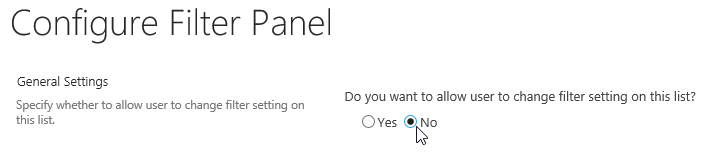
Now, let’s navigate to the Configure Filter Panel through List Settings page as we did. In the first section General Settings, let’s select No for Do you want to allow users to change filter settings on this list to see what will happen, click Save to save the change.
Now, navigate to the Branches list again, click ITEMS on the Ribbon, and then click Advanced Filter
in Filter group to show the filter panel. You will notice that the
icon has disappeared from the Advanced Filter panel. End users can’t access the Configure Filter Panel
to make changes of the filter settings any longer.