- BoostSolutions
-
Products
-
- Microsoft Teams
- HumanLike Alert Reminder
- View All Apps
- Pricing
- Support
- Company
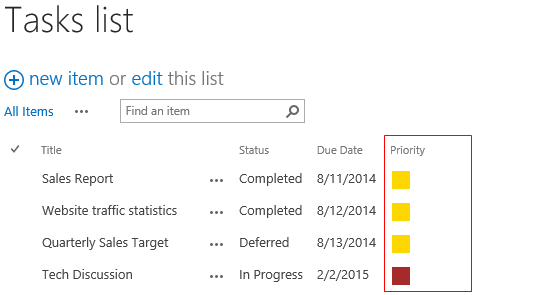
The SharePoint Choice Indicator feature allows users to classify list elements by assigning a color to each element in the list.
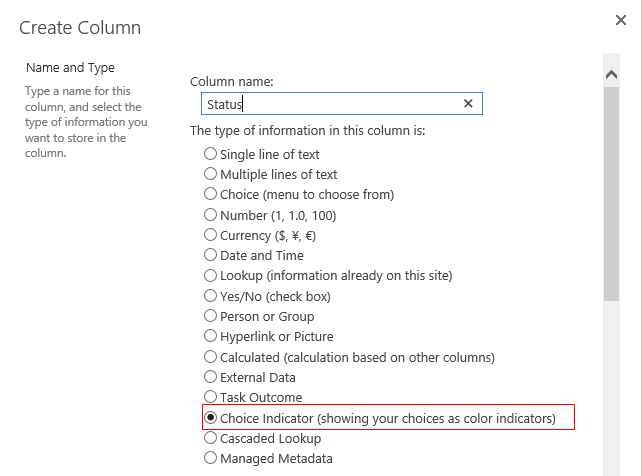
a. Open the list or library where you want to apply the Choice Indicator feature. In the ribbon, click the List or Library tab. And click Create Column under the Manage Views group.
b. In the Name and Type section, type a column name of your choosing (e.g. Status) and select Choice Indicator.
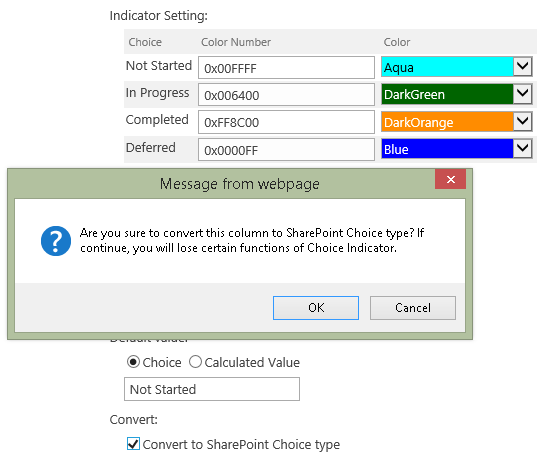
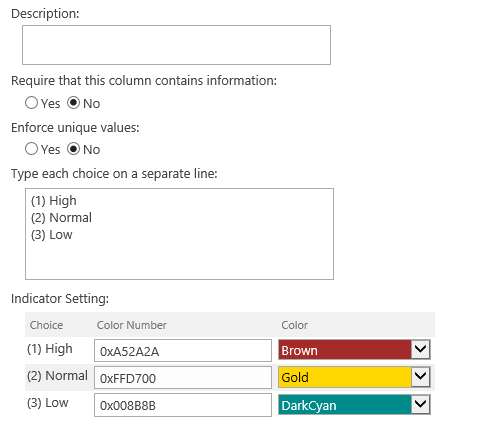
c. In the Additional Column Settings section, enter your choice types and assign a color to each of them. In the below example, "Not Started", "In Progress", "Completed", etc. were entered as choice types (classification types).
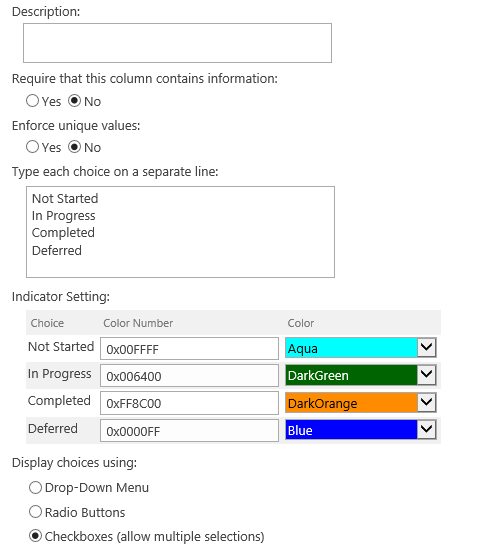
d. Configure any additional settings in the Additional Column Settings section, and then click OK to save the configuration.
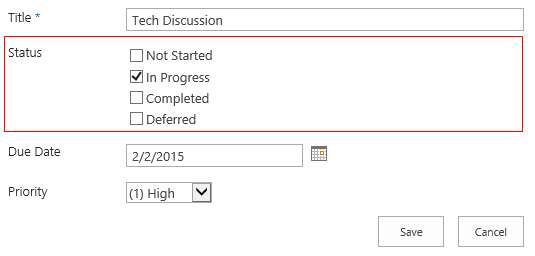
After you have completed configuration, create a new item and set a status for it.
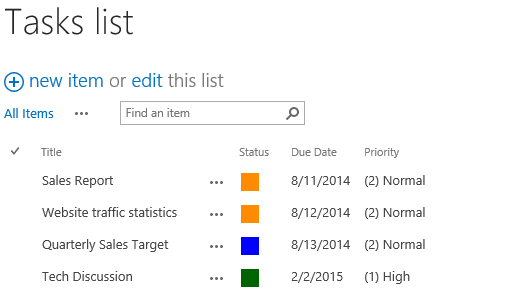
After saving the item, the Choice Indicator will appear in the list as a colored square corresponding to the criteria you specified on the indicator settings list. When you mouse over the color indicator, the choice value will be displayed.
a. Go to the Choice Indicator configuration page, check the Convert to SharePoint Choice type checkbox. You will be prompted to confirm you want to revert to SharePoint Choice type. After you confirm, click OK to save the configuration.
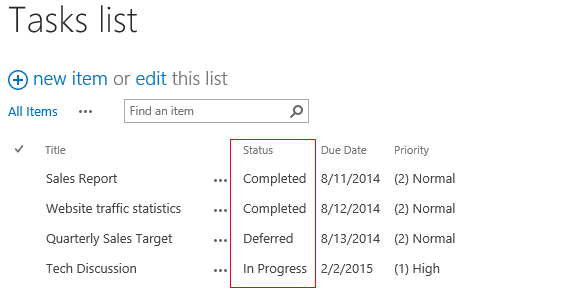
b. After saving the item, the SharePoint Choice value will appear in the list as text corresponding to the criteria you specified on the indicator settings list.
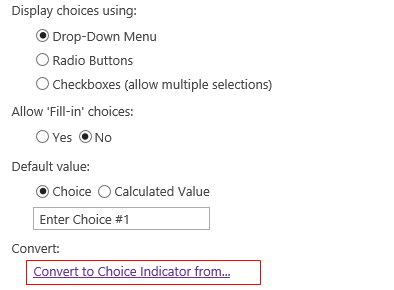
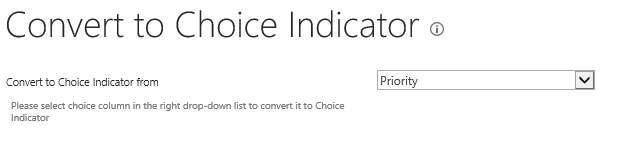
a. In the ribbon, click the List or Library tab. And click Create Column under the Manage Views group. And then select Choice Indicator. Then, in the Additional Column Information section, click the Convert to Choice Indicator from link.
b. On the Convert to Choice Indicator page, choose the appropriate column from the drop-down list, and click OK.
c. Assign your chosen colors to each list choice and click OK.
d. After saving, your SharePoint Choice Indicator settings will appear in the list view. The Choice Indicator will appear in the list as a colored square corresponding to the criteria you specified on the indicator settings list. When you mouse over the color indicator, the choice value will be displayed.