- BoostSolutions
-
Products
-
- Microsoft Teams
- HumanLike Alert Reminder
- View All Apps
- Pricing
- Support
- Company
SharePoint RichText Boost is an extension for multiple lines of text columns that are using rich text. It changes the user interface of these columns by providing an additional toolbar. This allows the user to:
RichText Boost allows you to configure the rich text toolbar according to your preferences. This can be done either in the List settings for each column that has rich text enabled in an individual list or globally in the Site Collection Settings.
2.1 RichText Boost Settings Center
To access the RichText Boost Settings Center you must be a Site Collection Administrator.
a. To enter the RichText Boost Settings Center, first navigate to Site Collection Settings.
b. Secondly, click RichText Boost Settings Center under the Site Collection Administration section.
c. You will then enter the RichText Boost Settings Center.
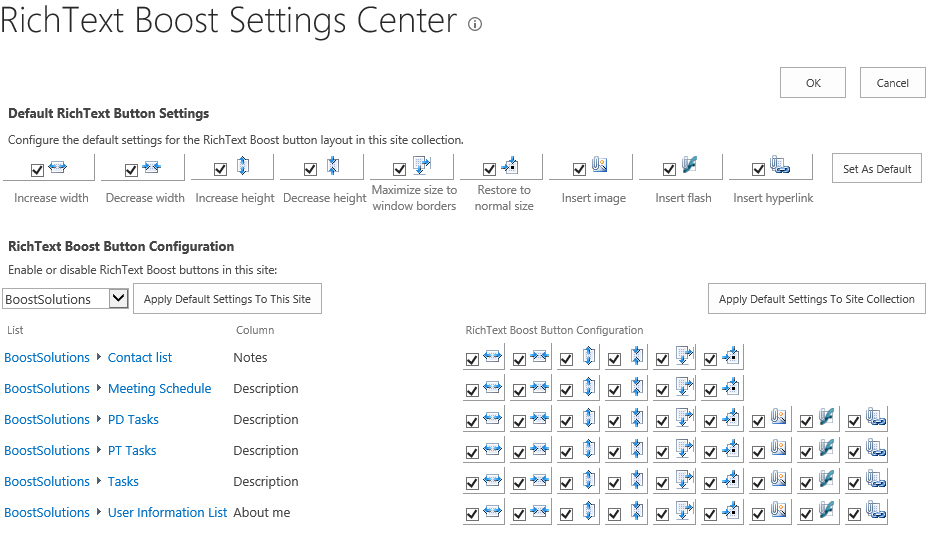
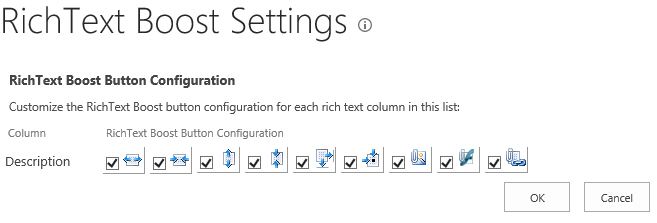
In the RichText Boost Settings Center you can enable or disabled the function buttons for all the lists in the current site collection. You can also configure and apply default function buttons for all the rich text columns.
| Icon | Note |
|---|---|
 |
This button enables users to increase the height for the rich text area. |
 |
This button enables users to decrease the height for the rich text area. |
 |
This button enables users to increase the width for the rich text area. |
 |
This button enables users to decrease the width for the rich text area. |
 |
This button enables users to maximize the size of the rich text area to the window borders. |
 |
This button enables users to restore the rich text area to normal size. |
 |
This button enables users to insert images in the rich text area. |
 |
This button enables users to insert flash in the rich text area. |
 |
This button enables users to insert hyperlinks in the rich text area. |
2.1.1 Default RichText Button Settings
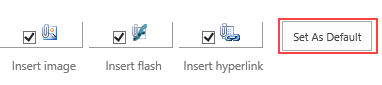
You can change the default settings by selecting or unselecting the checkbox next to the function buttons. The function button will not display in the RichText Boost Button Configuration section if you do not select it here. After you change the settings, confirm your changes by clicking the Set As Default button. Clicking OK will also save the default settings.
2.1.2 RichText Boost Button Configuration
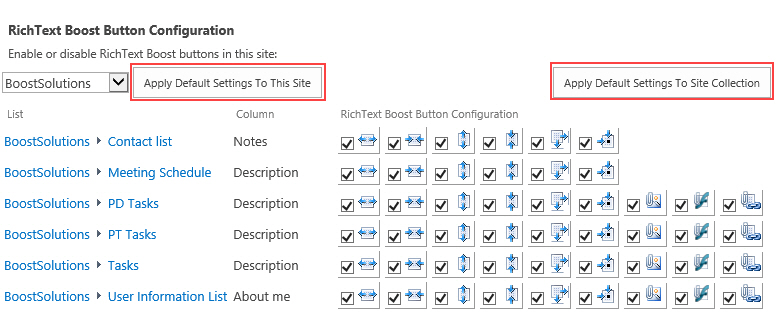
You can click the Apply Default Settings To Site Collection button to change the settings for all rich text columns in the current site collection. Alternatively, you can click Apply Default Settings To This Site to change the settings for a single site.
2.2 RichText Boost Settings for Individual List
The RichText Boost Settings for individual list can be found in List Settings page. Click RichText Boost Settings under the General Settings section. From there you will enter RichText Boost Settings.
To access RichText Boost Settings, you must have at least Design permission level.
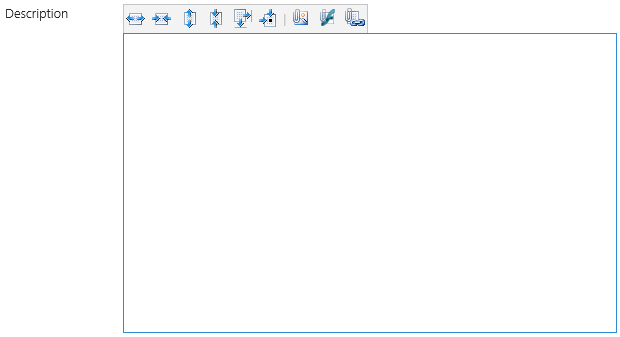
Every rich text column in the list will be displayed on this page with details about which function buttons are enabled or disabled. You can change the settings for every single column according to your preferences.
In the default SharePoint rich text editor, the editor box is very small. This makes editing and formatting text difficult.

RichText Boost gives the user the option to change the size of the text input area by clicking the buttons
,
,
or .
The changed settings of the textbox size will be saved so that it will remain the same size the next time it is edited by the same user and browser.
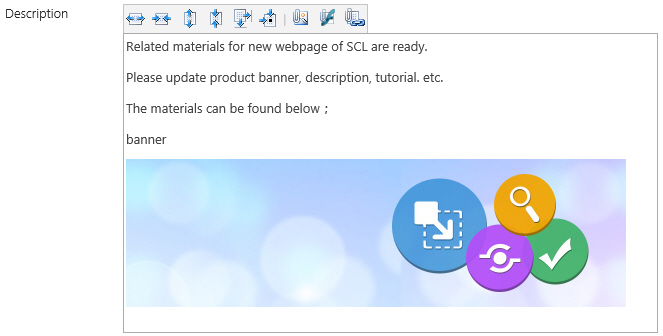
Click the button, and the "Insert attached image" dialog will pop up:
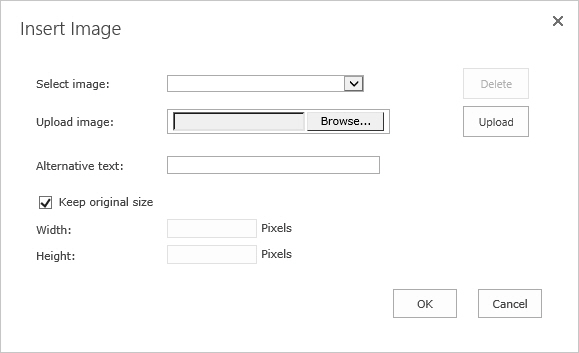
Click the Browse button to select an image from your computer. Then, click "Upload", so that the image can be uploaded to the server as an attachment to the item. The image name will be displayed in the "Select image" field. Next, specify the image width and height, or keep the original size by checking the "Keep original size" checkbox.
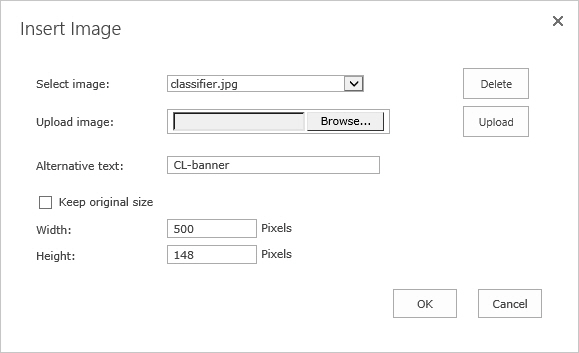
Click "OK" to confirm, and the picture will be inserted into the rich text editing area.
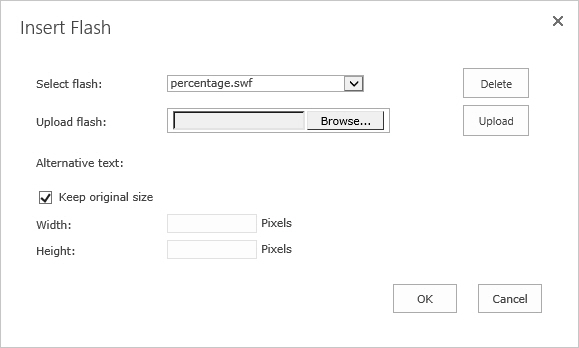
Click the button, and the "Insert attached flash" dialog will pop up:
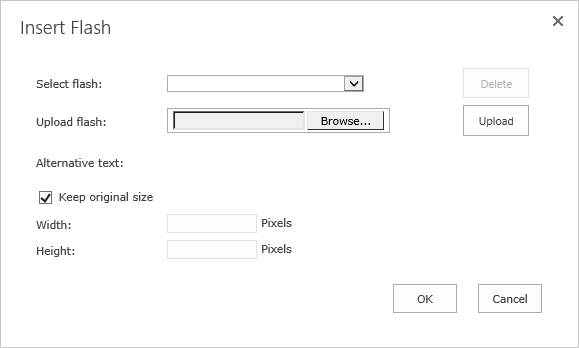
Click the Browse button, and select a flash file from your computer. Then, click "Upload" to upload the flash file to the server as an attachment to the item. The flash name will be displayed in the "select flash" box. Next, specify the width and height of the flash, or keep the original size by checking the "Keep original size" checkbox.
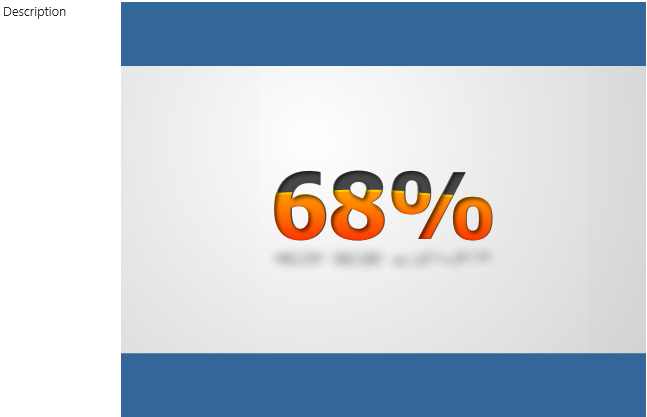
Finally, click "OK" to save the item you edit. The picture and flash you inserted will be displayed in the View Item form as shown below:
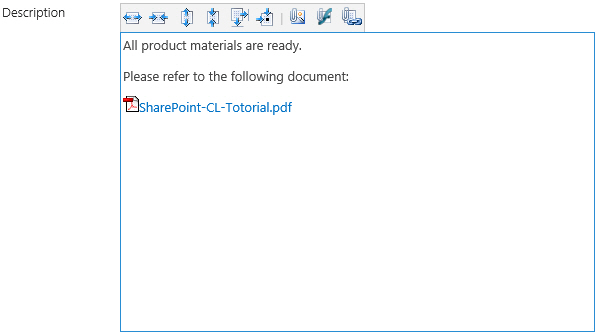
Click the button and the "Insert attached Hyperlink" dialog will pop up:
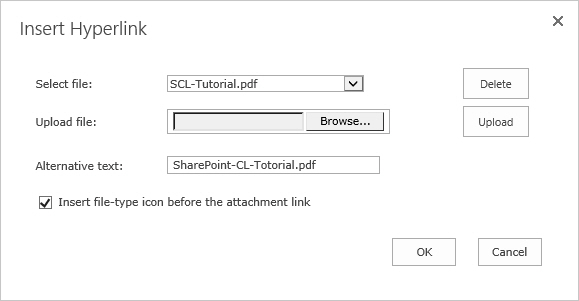
The inserted Hyperlink will be displayed as shown below: