
- BoostSolutions
-
Products
-
- Microsoft Teams
- HumanLike Alert Reminder
- View All Apps
- Pricing
- Support
- Company
SharePoint Cascaded Lookup greatly enhances default SharePoint's lookup functions. It reduces wait times as lookup results are filtered according to parameters that you set. Column relationships between parent and child columns can be established so that data selected in parent fields will determine options presented in the child fields.
In order to maximize the power of your Cascaded Lookup, you must set up several things:
Target List - list where Cascaded Lookup will refer to for information. The Target List can be in any site in the current site collection.
Target Column - located in the Target List, contains data for your drop down menu.
Filter Column - located in the Target List, it is used to filter out irrelevant data from the Target Column and is also available as a drop down menu.
Parent Column - located in the current list (the list where you want to add look up information).
This is a sample scenario to better understand what Cascaded Lookup can do:
A marketing team needs to trend what types of companies - based on size, industry and global location they should focus their marketing on, based on past purchase orders.
We have the following lists:
Company Information list of all partner companies and their relevant information
Purchase Orders list of all purchase orders from these companies
Add a cascaded lookup column 'Company' in the Purchase Orders list to join with the Company Information list.
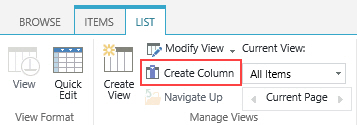
Go to the Purchase Orders list and click the 'Create Column' button.
3.1 Create a Relationship Using the Single-select Lookup Field
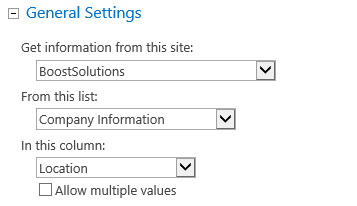
a. In the Purchase Orders list, create a Cascaded Lookup column called Location. This column is connected to the 'Location' column in the Company Information list.
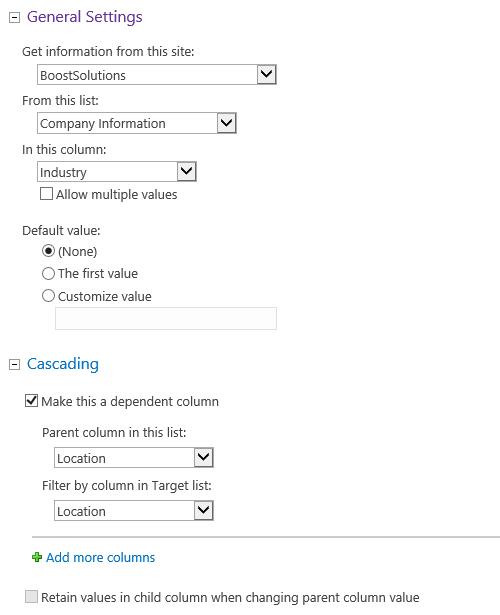
b. Create a Cascaded Lookup column called Industry in the Purchase Orders list. This column is connected to the 'Industry' column in the Company Information list.
Select Make this a dependent column option and select 'Location' both in the Parent column in this list and Filtered by column in the target list options.
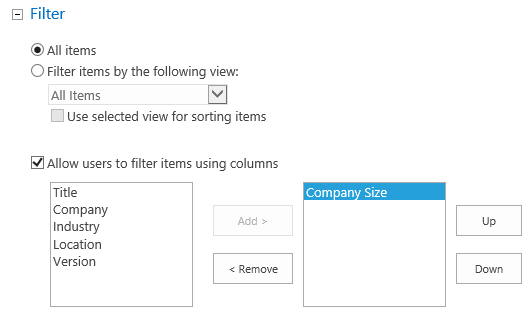
c. Create a Cascaded Lookup column called Company in the Purchase Orders list. This column is connected to the 'Company' column in the Company Information list.
In Filter section, select 'Company Size' in the Allow users to filter items using columns options. Note that the "Company Size" is a choice column.
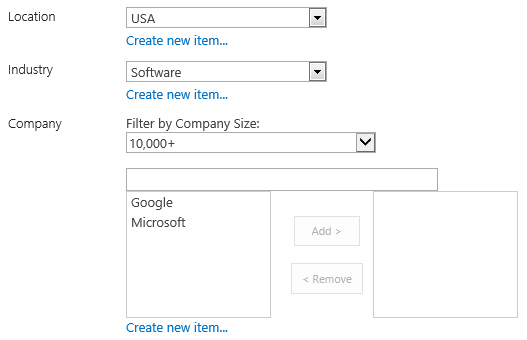
d. The lookup items of the child column (Company) can be filtered by parent columns (Location, Industry, and Company Size).
Note: Supported filter column type:
Supported parent column type:
3.2 Filter lookup items by multiple columns
a. In the Purchase Orders list, create a Cascaded Lookup column. In the General Settings section, select the Company Information list and select the Company column from the target list.
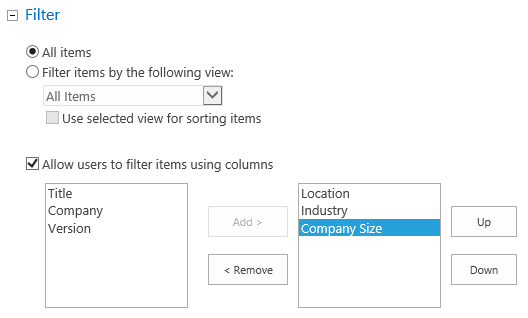
b. Under the Filter section, select the Allow users to filter items using columns option. Select one or more columns from target lookup list for filtering. In this scenario, we can specify the Location, Industry, and Company Size columns as filter columns in the target lookup list.
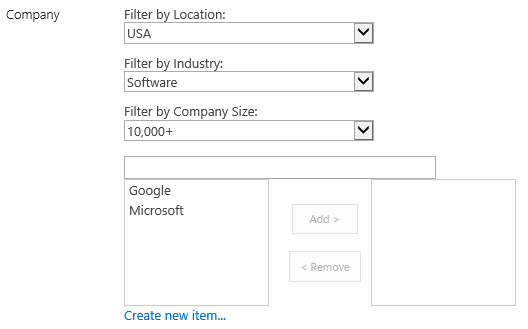
c. The lookup items in the Company column will be filtered by Location (USA), Industry (IT Services), and Company Size (10,000+) columns in the source lookup list, returning the filtered Companies.
In this section, you can select the related columns which you want to show on the View/Edit form and the style of displaying these columns.
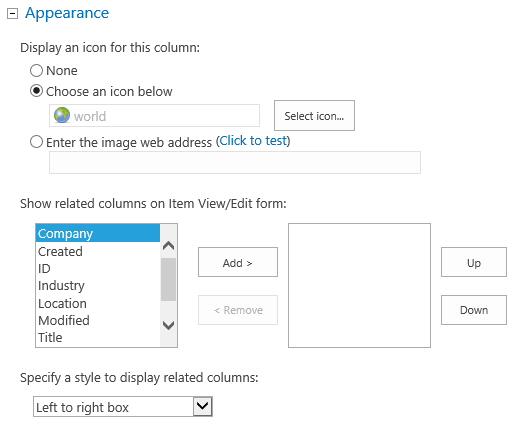
Display an icon along with the Cascaded Lookup column, making it easier to identify. After you specify an icon, it will be shown in the View Item form as follows:
None: Do not show any icons.
Choose an icon below: Choose a predefined icon.
Enter the image web address: Specify a URL of the image.
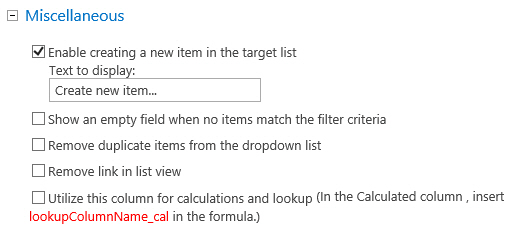
Enable creating a new item in the target lookup list
When you select this checkbox you can add new items in the target list. The following link will be added below the lookup field:

You can customzie the text of creating a new item link.
Show an empty field when no items match the filter criteria
Check this box to display an empty field when no items match the filter criteria.
Remove duplicate items from the dropdown list
Check this box to display one item when duplicate items exist.
Remove link in list view
Remove the Cascaded Lookup column link in list view and the View Item form.
Utilize this column for calculations
Specify if this cascaded lookup column can be used for calculations in the Calculated column. This option is only available for single value (unselect the Allow multiple values option).
Once you select this option, a new column (lookupColumnName_cal) will be created, and you can insert this column in the formula for Calculated column.
This setting enables you to define a bi-directional connection between the current list and the target list. Select Create a reverse lookup field in the target list if you want to create a reverse lookup column in the target list.
You need to configure the following settings in the Target column settings section:
a. Specify a column name for this reverse lookup column.
b. In the dropdown list, select a column which you want to look up from target list to current list.
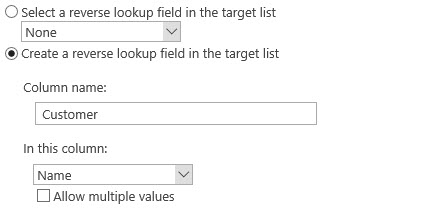
If you already create a Cascaded Lookup column in the target list, and plan to use it as the reverse lookup field. Select Select a reverse lookup field in the target list option, and select the existing Cascaded Lookup column as following.

By default, SharePoint only can manage out of the box column data in Microsoft Office applications. Cascaded Lookup 4.0 and above provides a new 'Data Adapter' Web Application feature that enhances the functionality of SharePoint with the ability to manage Cascaded Lookup columns in Microsoft Excel, Microsoft Access, Microsoft Word and SharePoint Workspace.
To activate the Cascaded Lookup Data Adapter feature go to the Web Application Management module of the SharePoint Central Administration site.
Click the Activate button on the 'Cascaded Lookup Data Adapter' feature in the feature list.

