- BoostSolutions
-
Products
-
- Microsoft Teams
- HumanLike Alert Reminder
- View All Apps
- Pricing
- Support
- Company
In multinational organizations, managing accurate employee location data across regions, countries, and cities is a common struggle. Manual data entry often leads to errors like "Paris, USA" or "Berlin, Canada"—mistakes that create inconsistencies in HR records, reporting, and operations.
The Solution? Cascading Lookups—a dynamic filtering system that enforces logical hierarchies, ensuring users select valid combinations (e.g., selecting a Region first, then a Country, and finally a City).
This guide provides a detailed, followable walkthrough for implementing cascading lookups in SharePoint Online using BoostSolutions' Cascaded Lookup App—from setup to testing—ensuring your global employee directory remains error-free.
| Source List: World Locations | Current List: Employee Directory |
|---|---|
|
Site: Reference Data Hub https://contoso.sharepoint.com/sites/ReferenceDataHub |
Site: Employee Records https://contoso.sharepoint.com/sites/EmployeeRecords |
| Columns: Region, Country, City | Columns: Employee Name, Employee Region, Employee Country, Employee City |
| Column | Type |
|---|---|
| Region | Single Line of Text |
| Country | Single Line of Text |
| City | Single Line of Text |
| Column | Type | Relationship | Cross-Site Reference |
|---|---|---|---|
| Employee Name | Single Line of Text | ||
| Employee Region | Cascaded Lookup | Parent of Employee Country | Cross-site lookup → Region in Source List |
| Employee Country | Cascaded Lookup | Child of Employee Region Parent of Employee City |
Cascaded Lookup → Country in Source List |
| Employee City | Cascaded Lookup | Child of Employee Country | Cascaded Lookup → City in Source List |
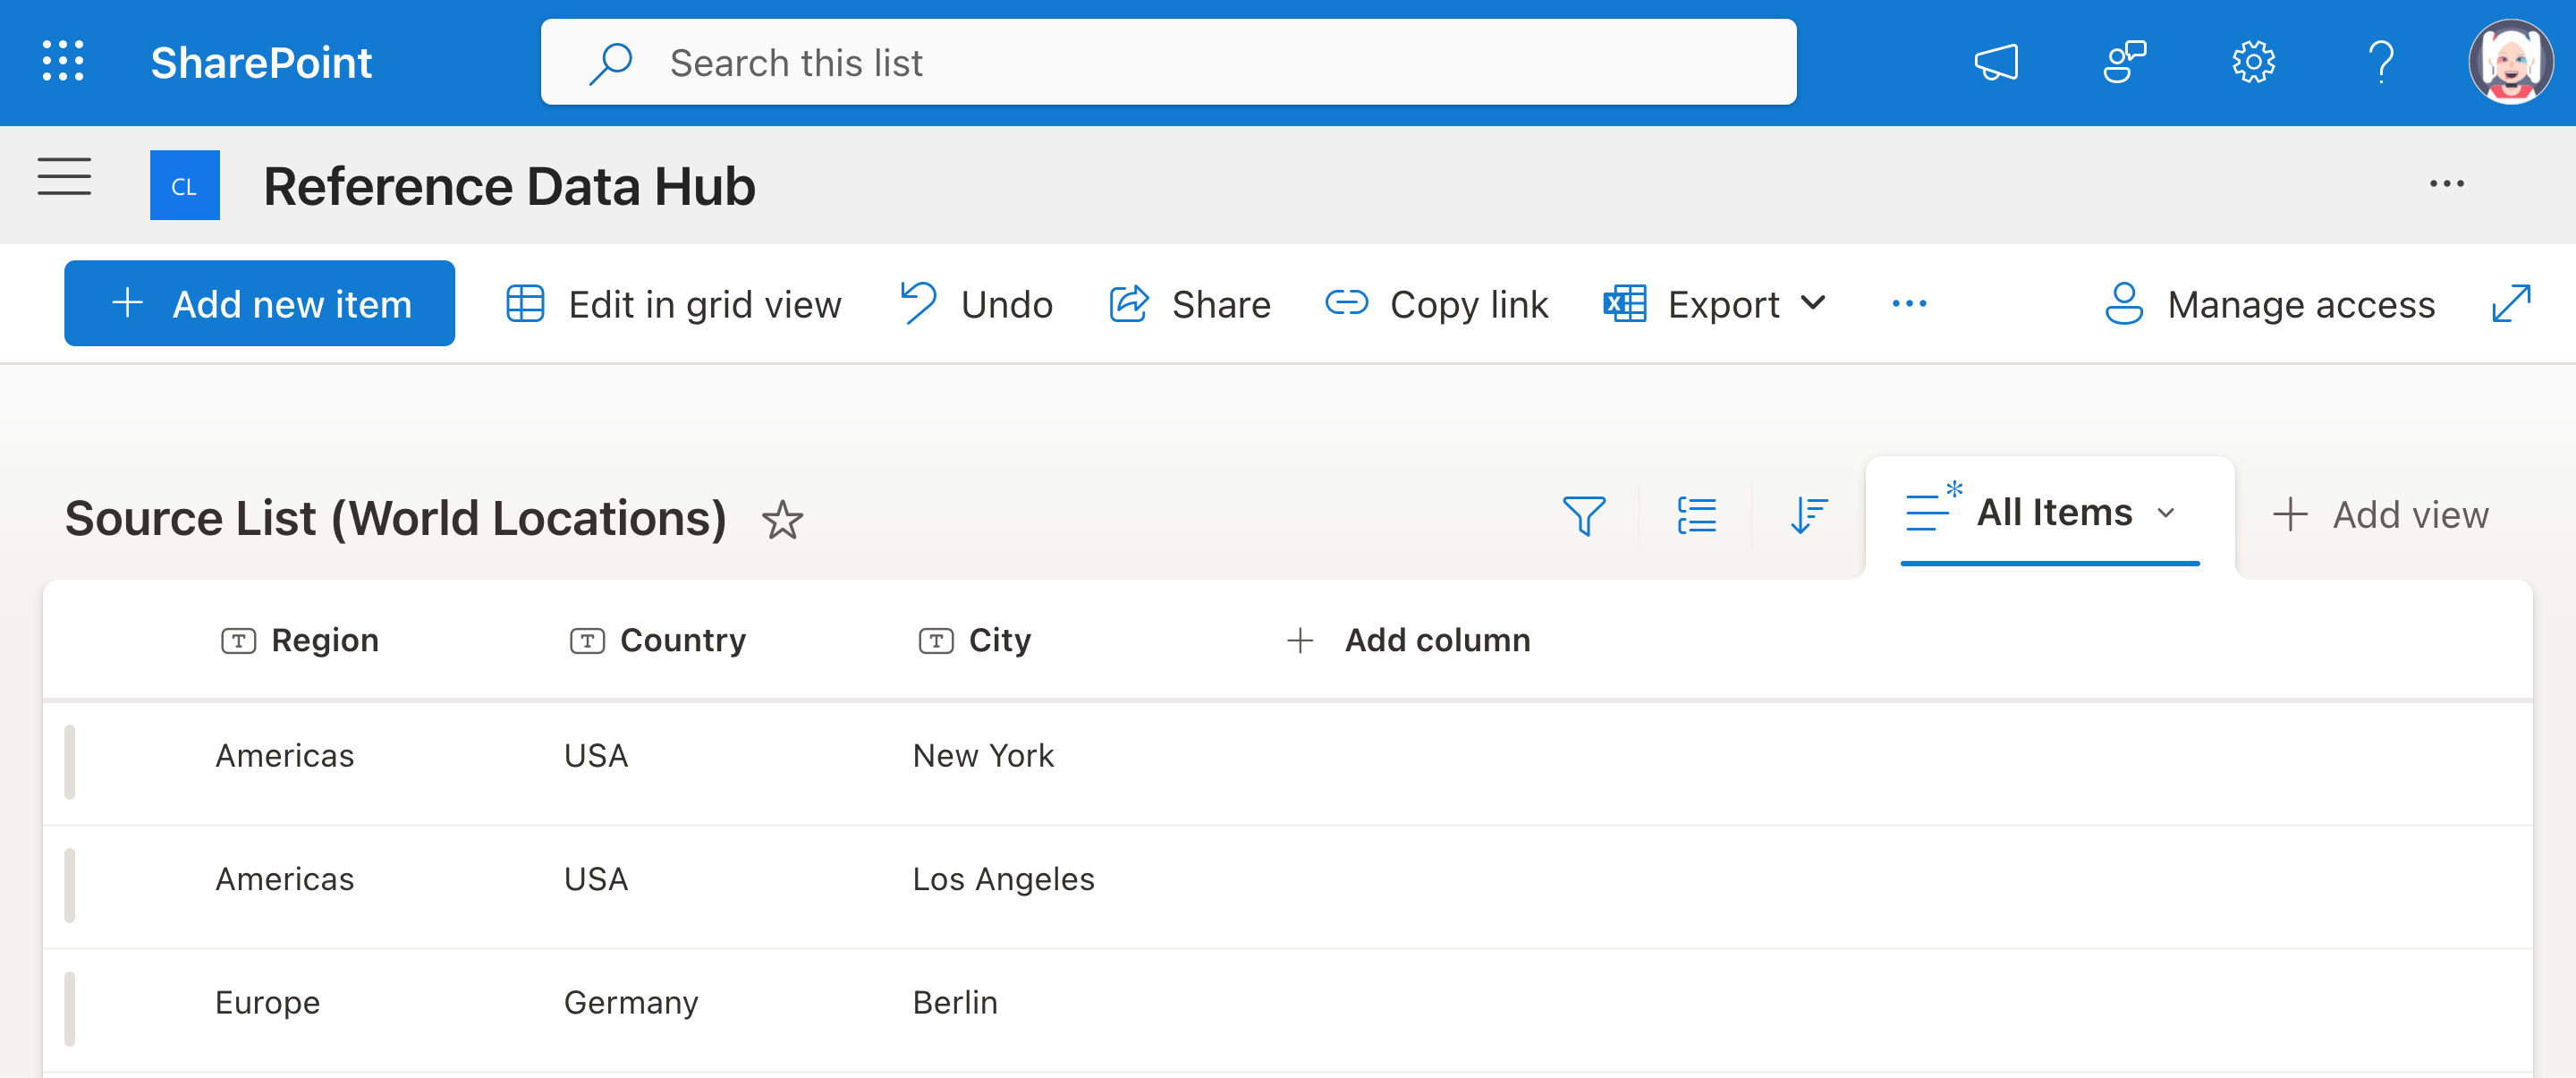
📍 Site: Reference Data Hub
Create the list:
Add columns:
Enter sample data:
| Region | Country | City |
|---|---|---|
| Americas | USA | New York |
| Americas | USA | Los Angeles |
| Europe | Germany | Berlin |
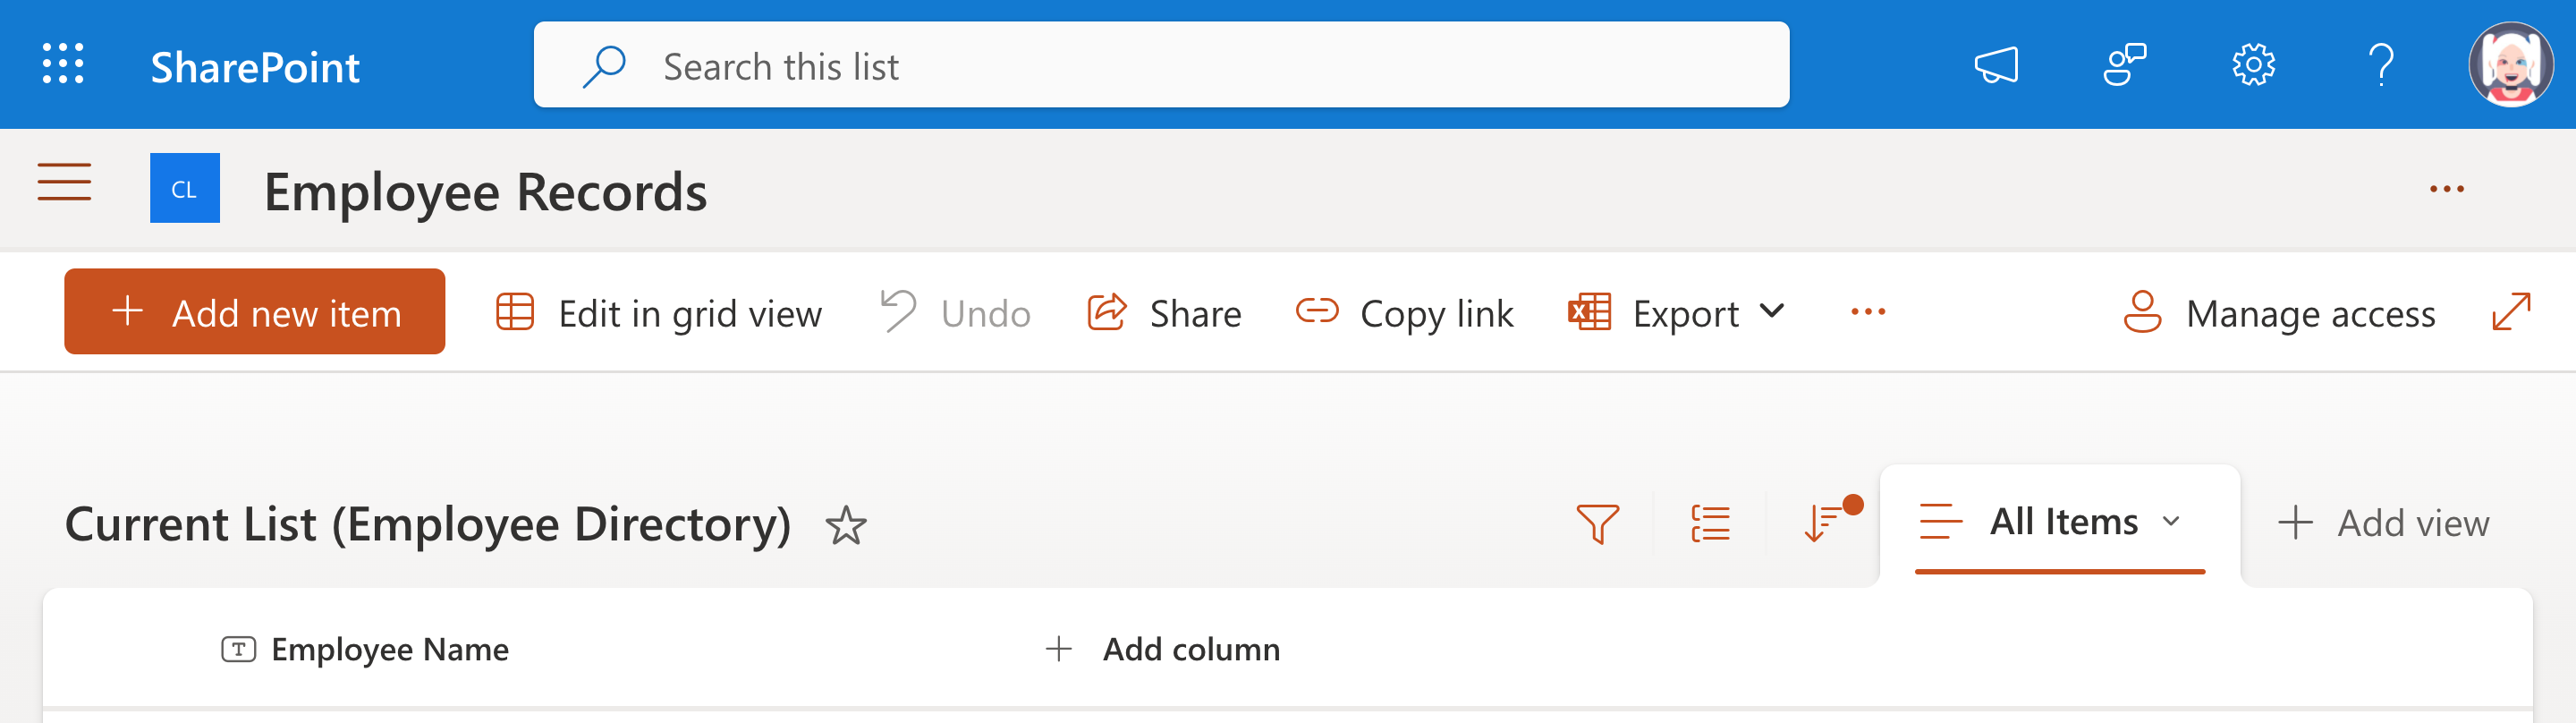
📍 Site: Employee Records
Add/Deploy BoostSolutions' Cascaded Lookup App:
Create the Employee Directory list with:
Employee Name (Single line of text)
| Employee Name |
|---|
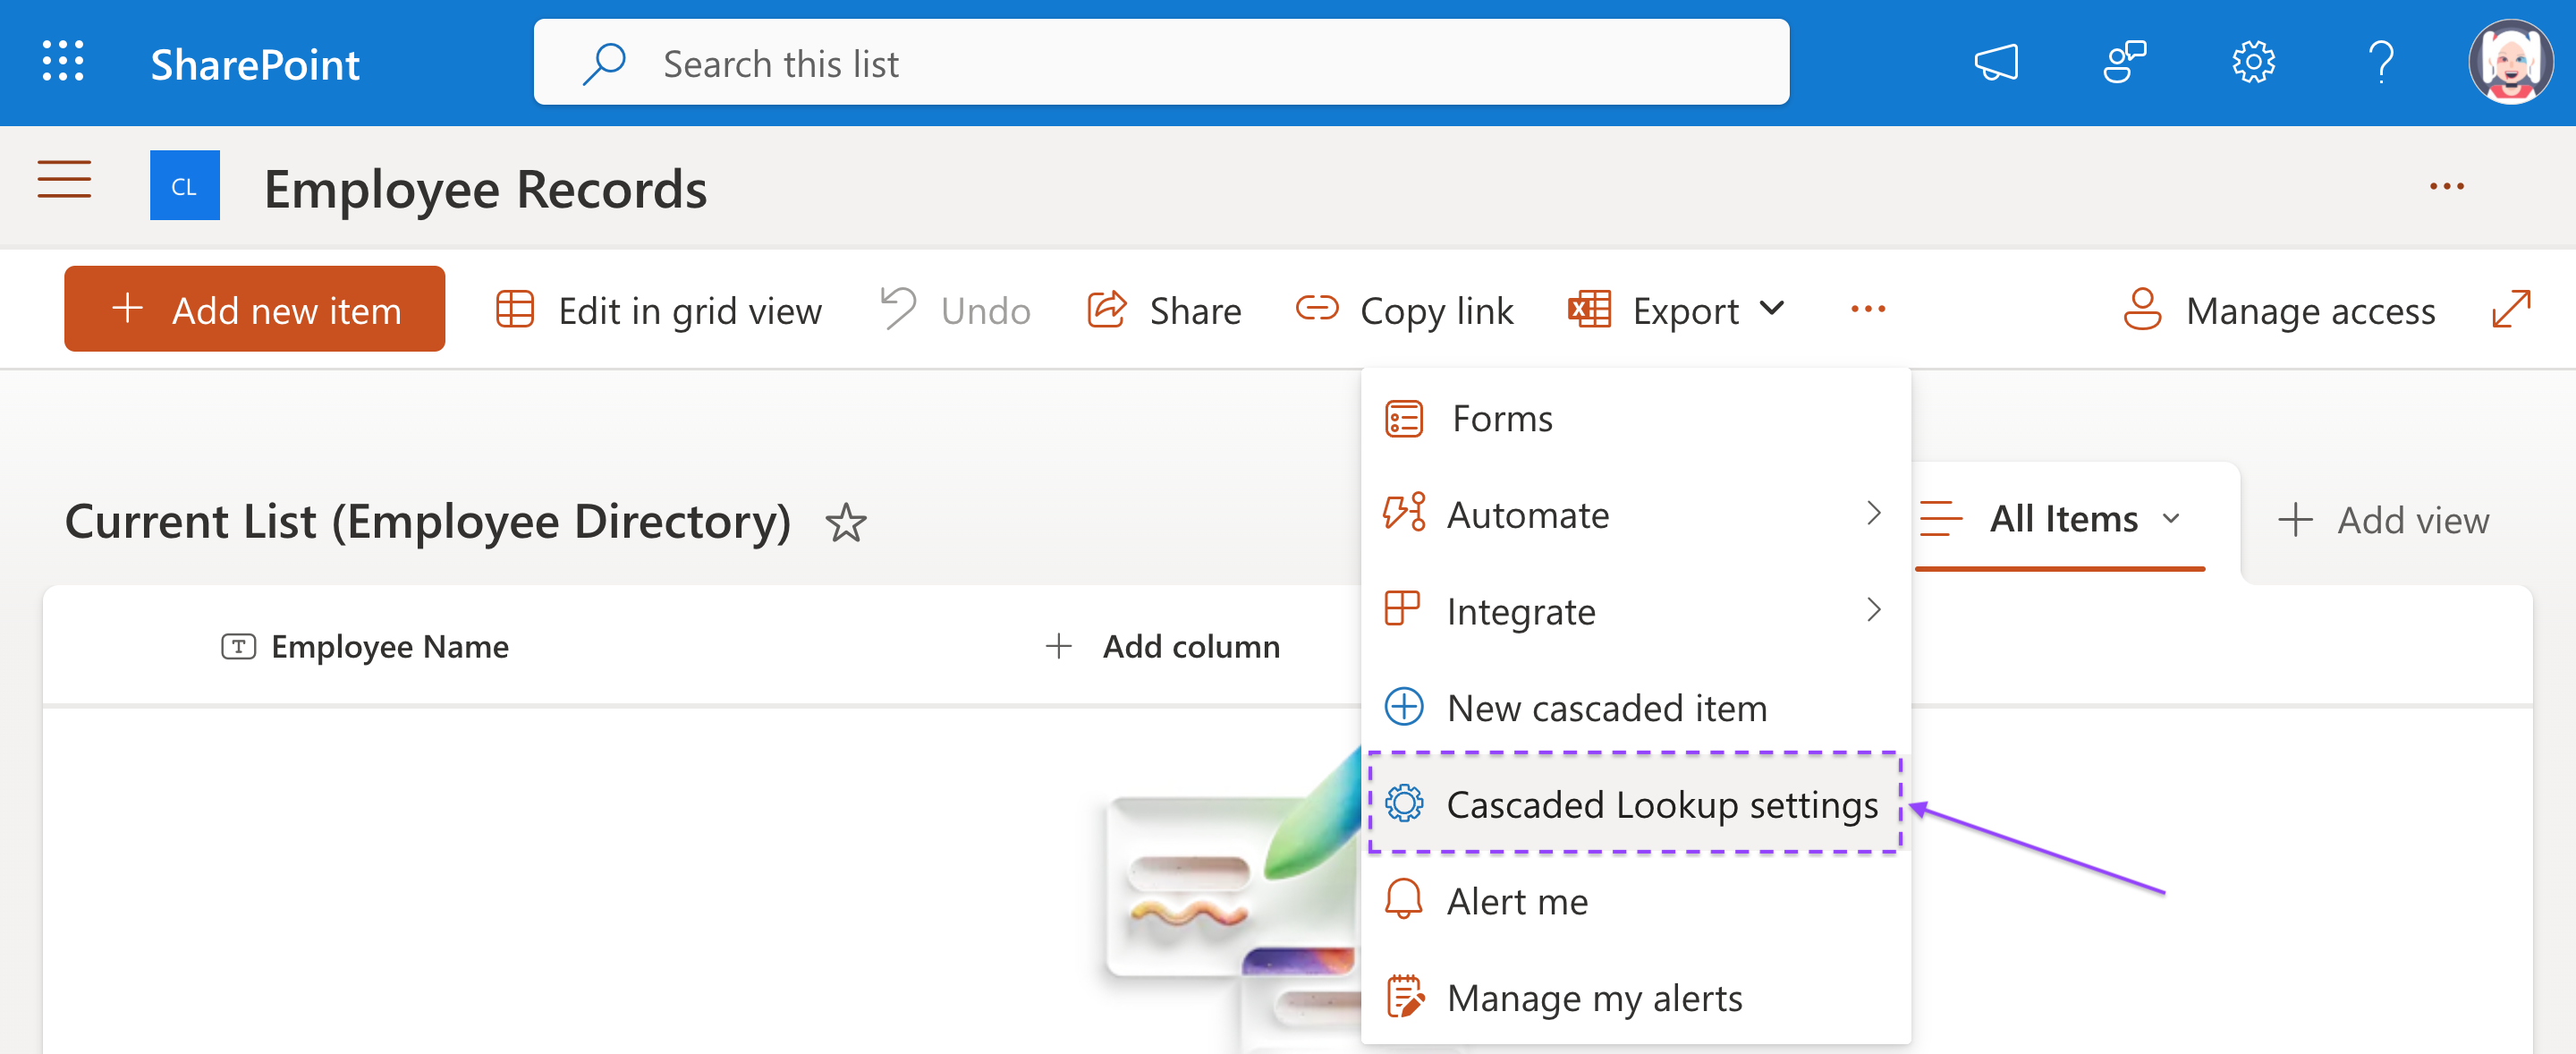
📍 Site: Employee Records
Navigate to the Employee Directory list
Access Cascaded Lookup Settings
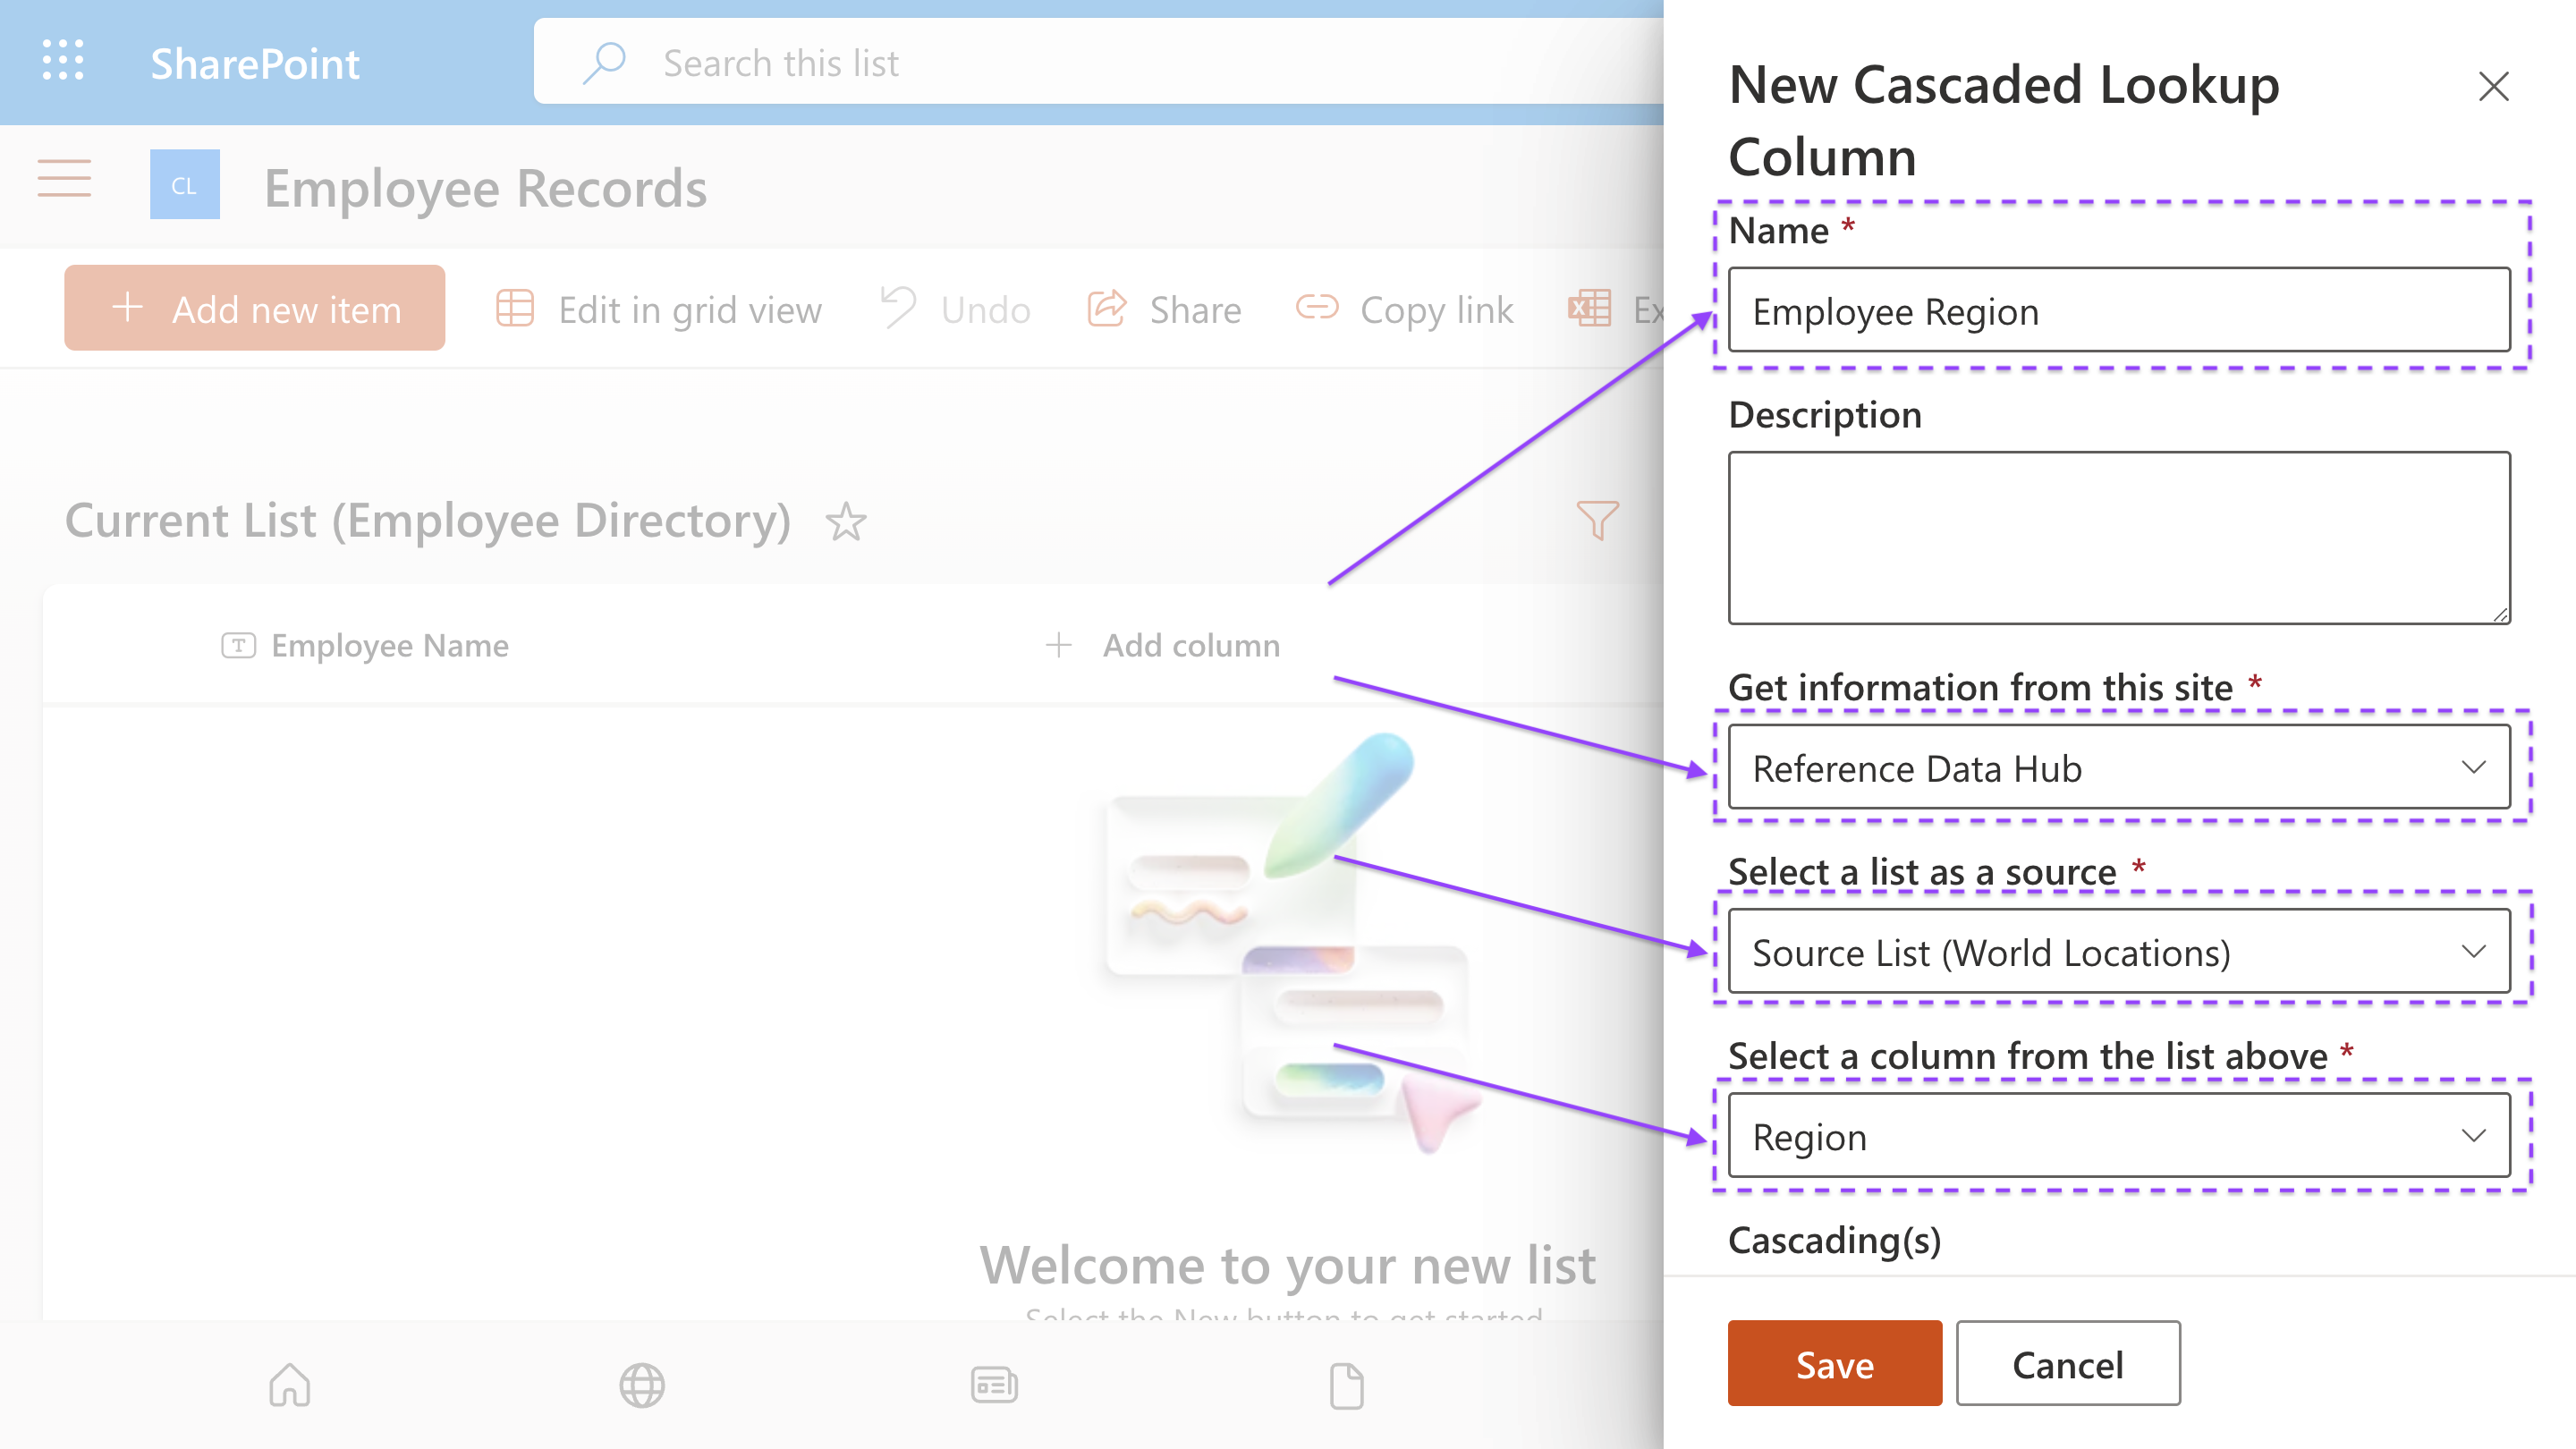
Create a new cascaded lookup column
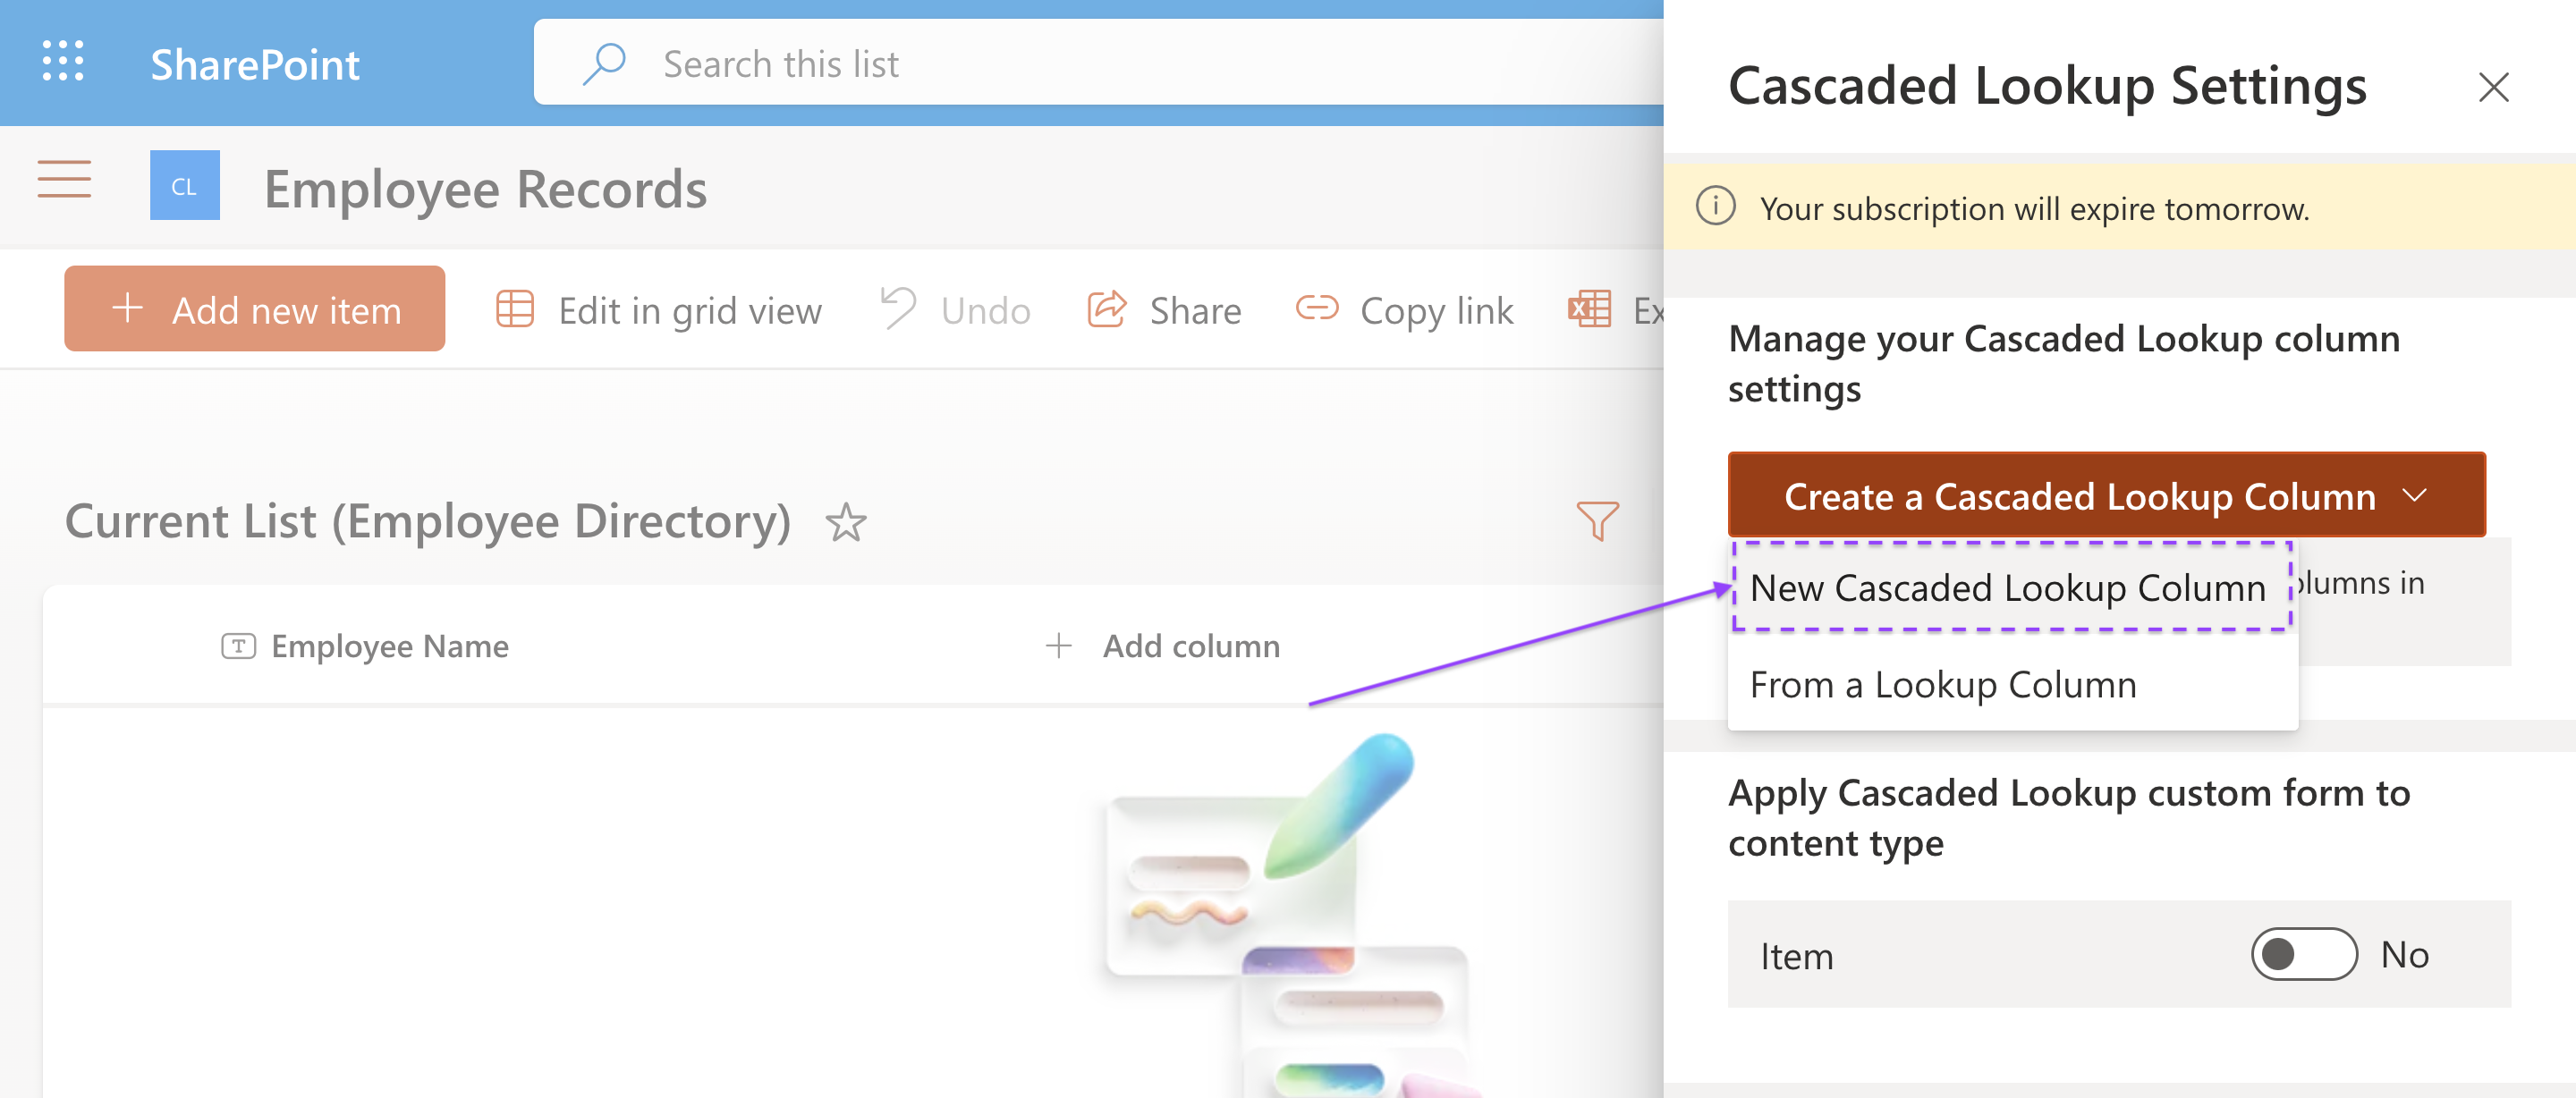
Configure the Employee Region column
Data Source Configuration:
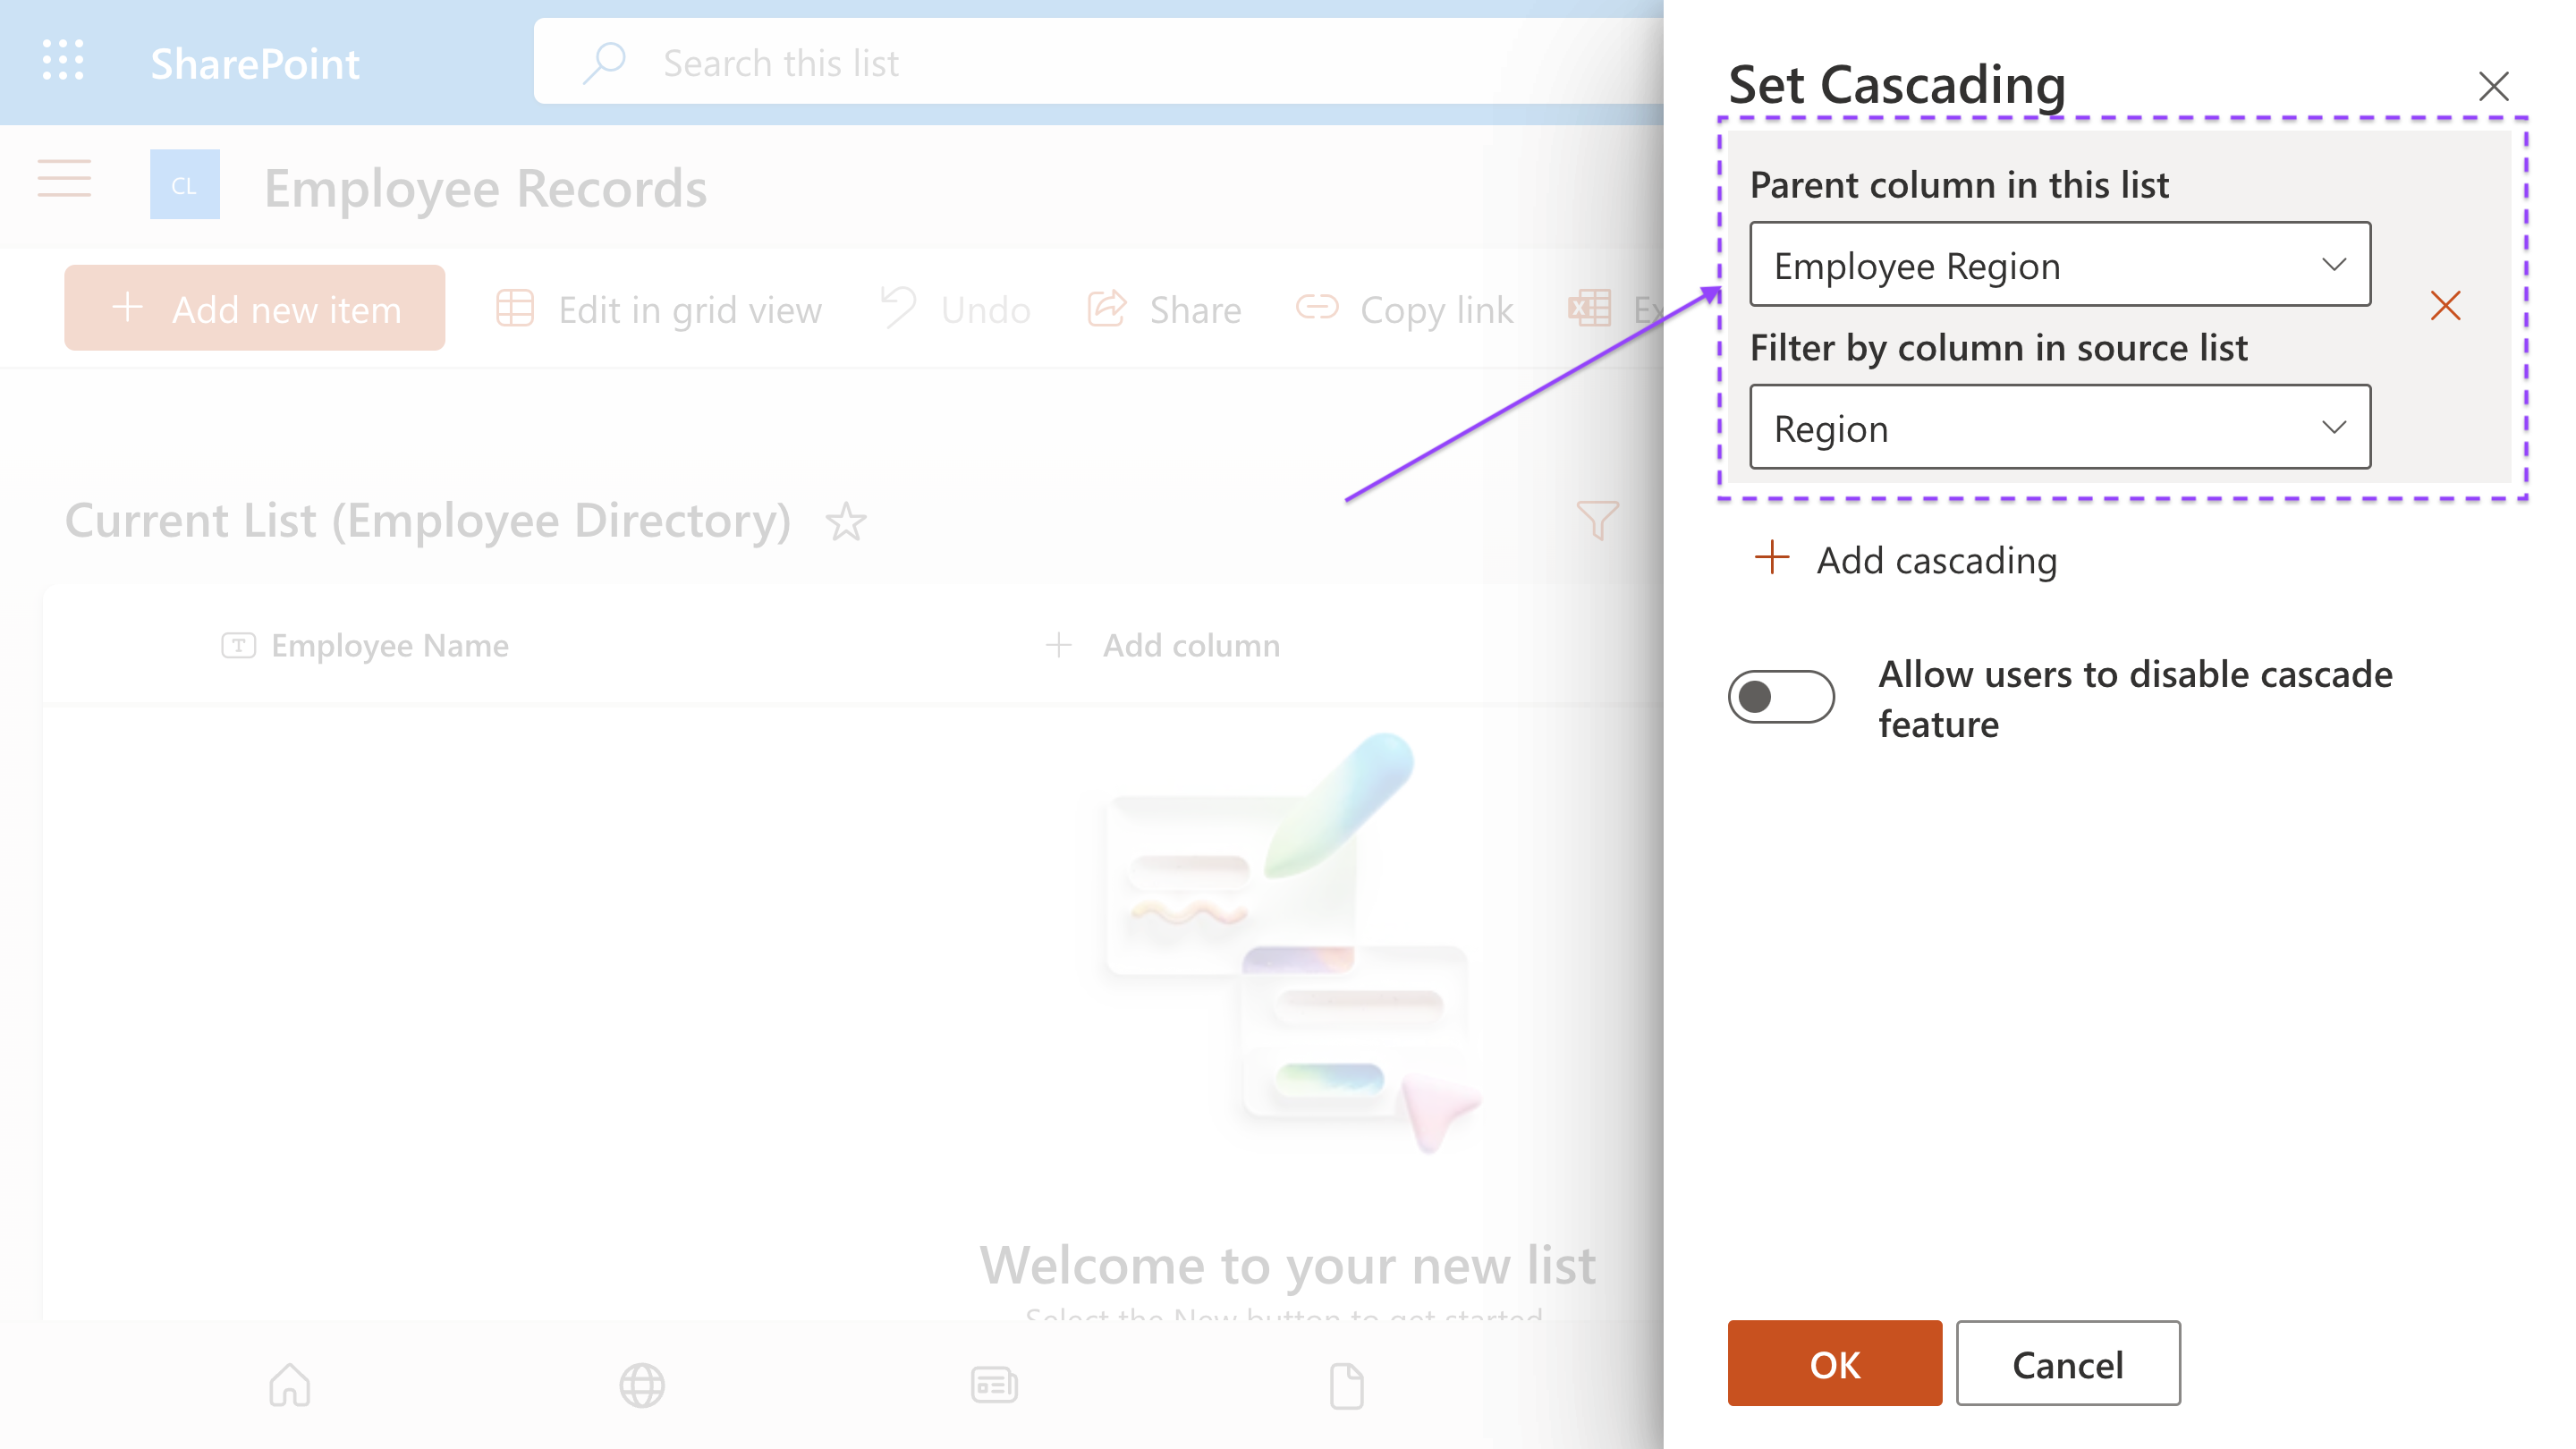
Cascading Settings:
Remove Duplicate Items:
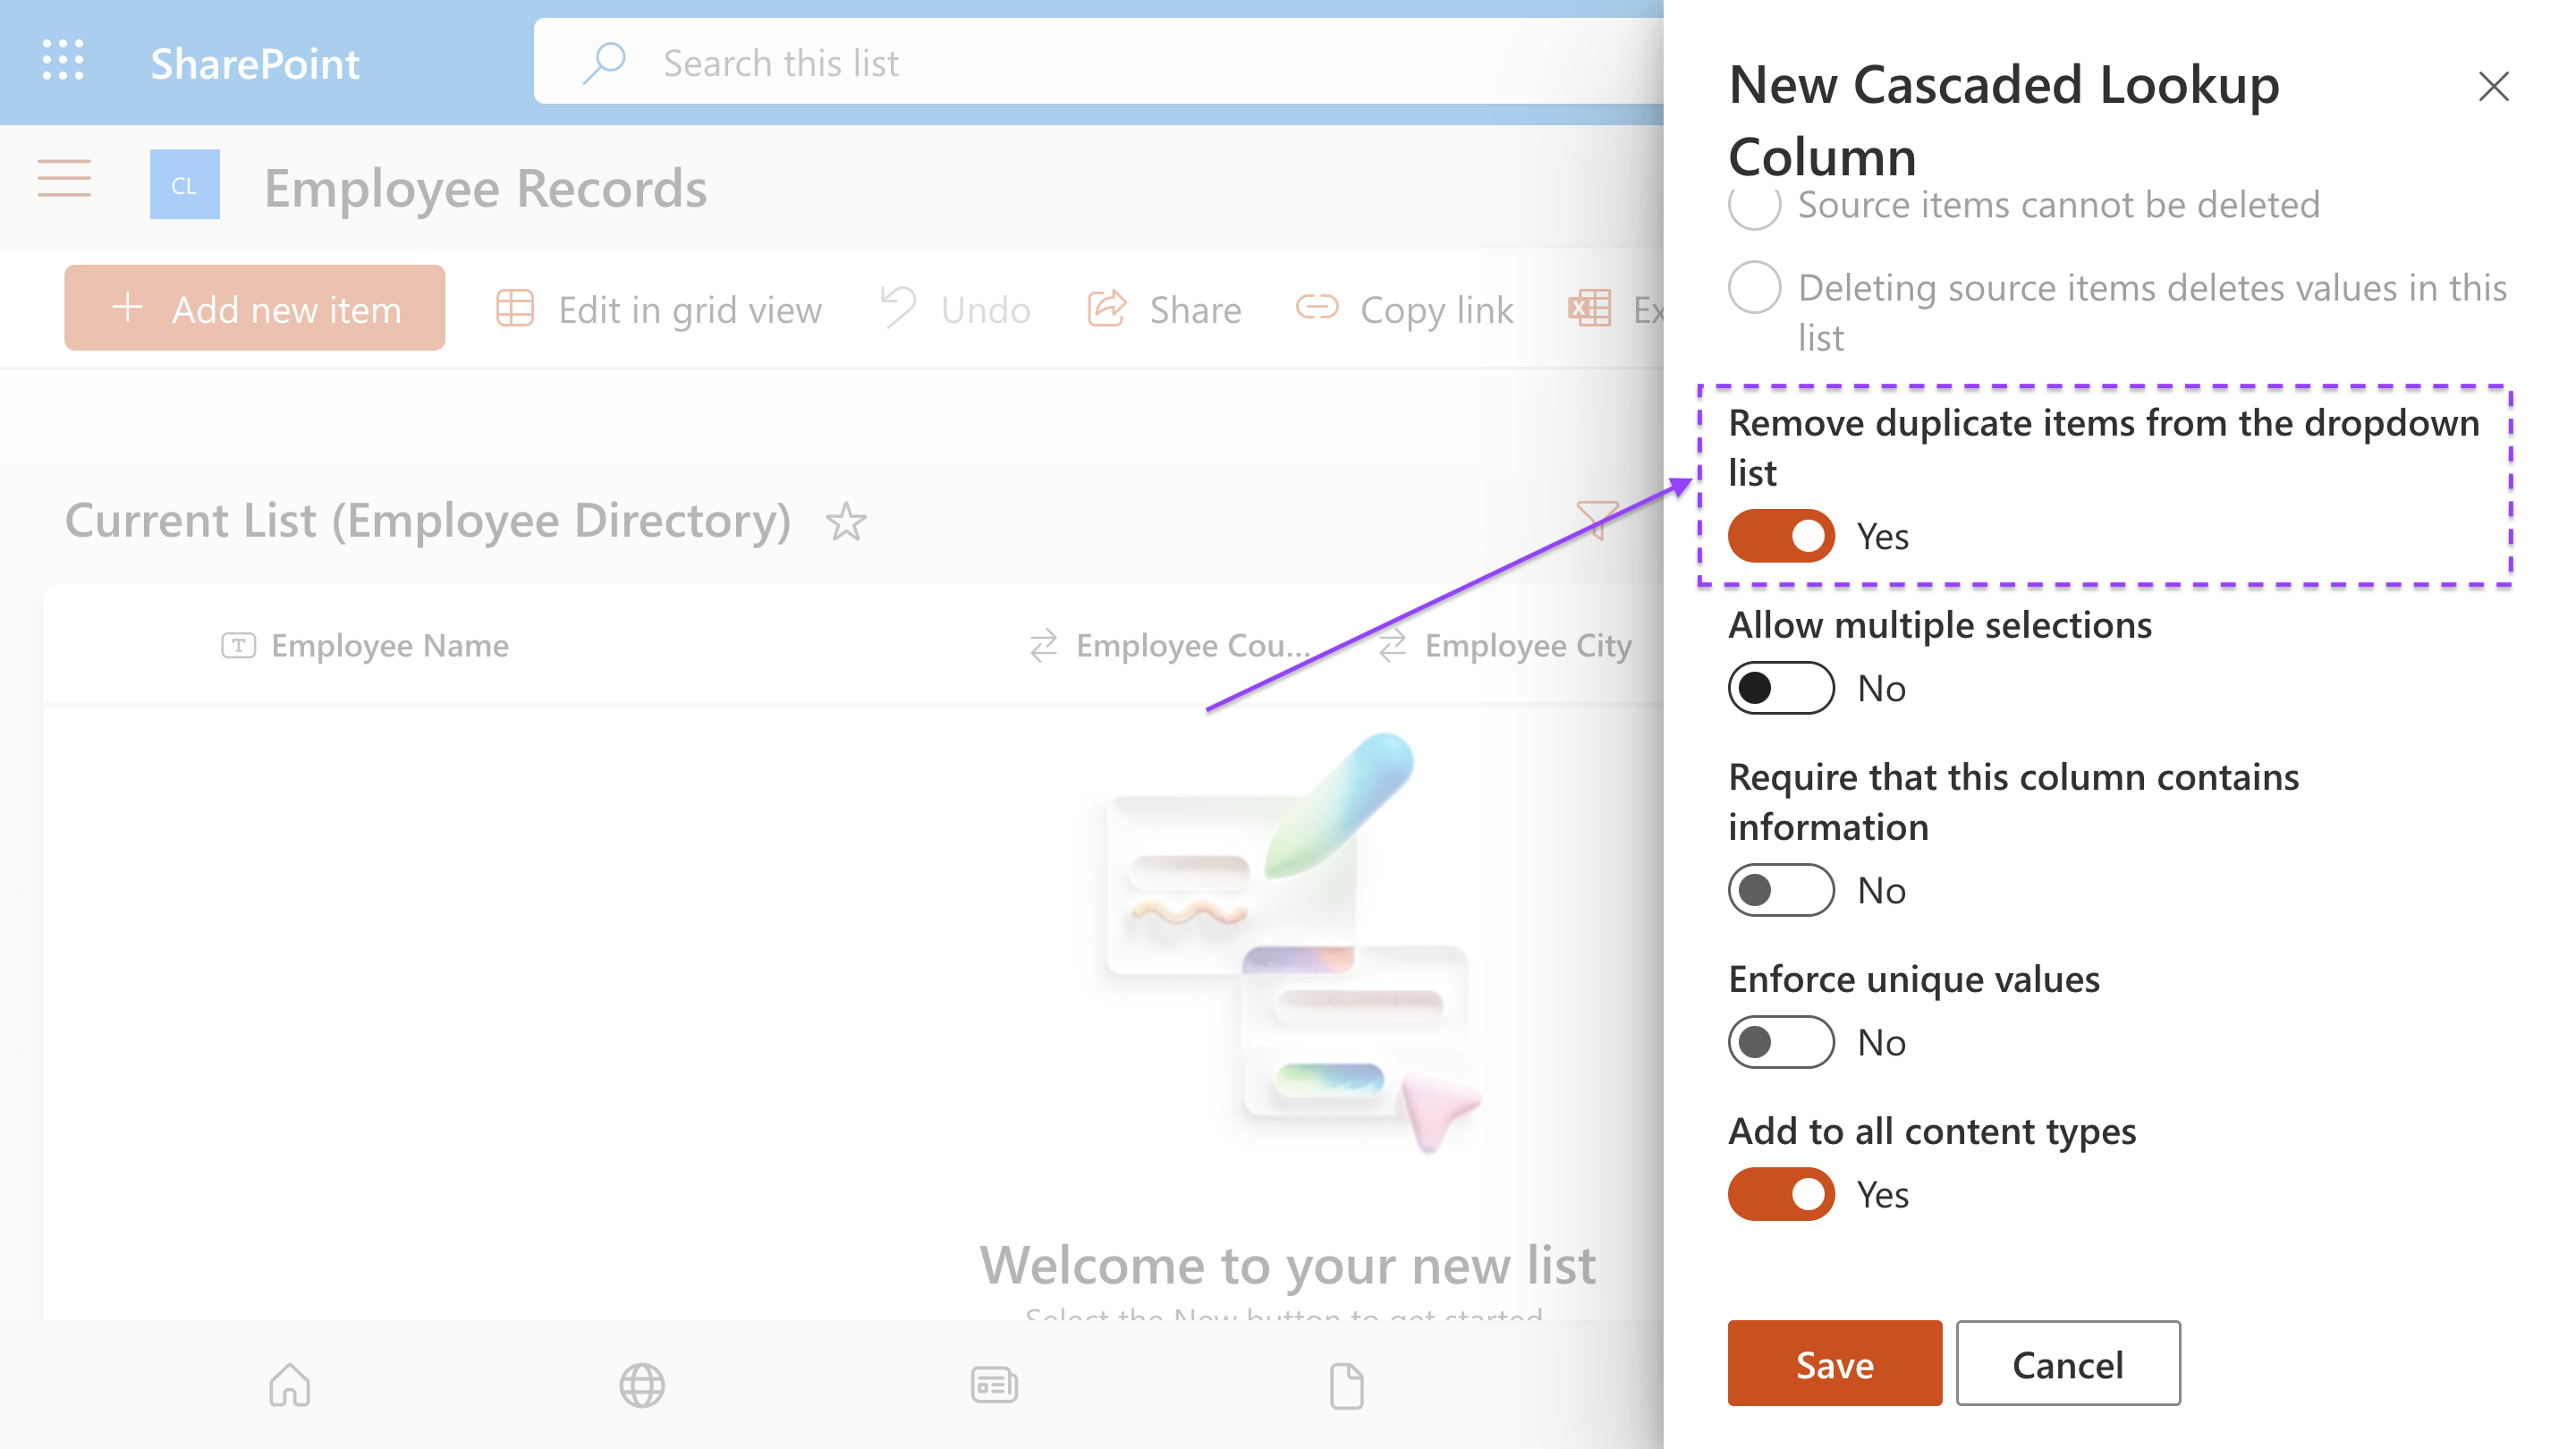
Additional Options:
Access the cascaded lookup settings again
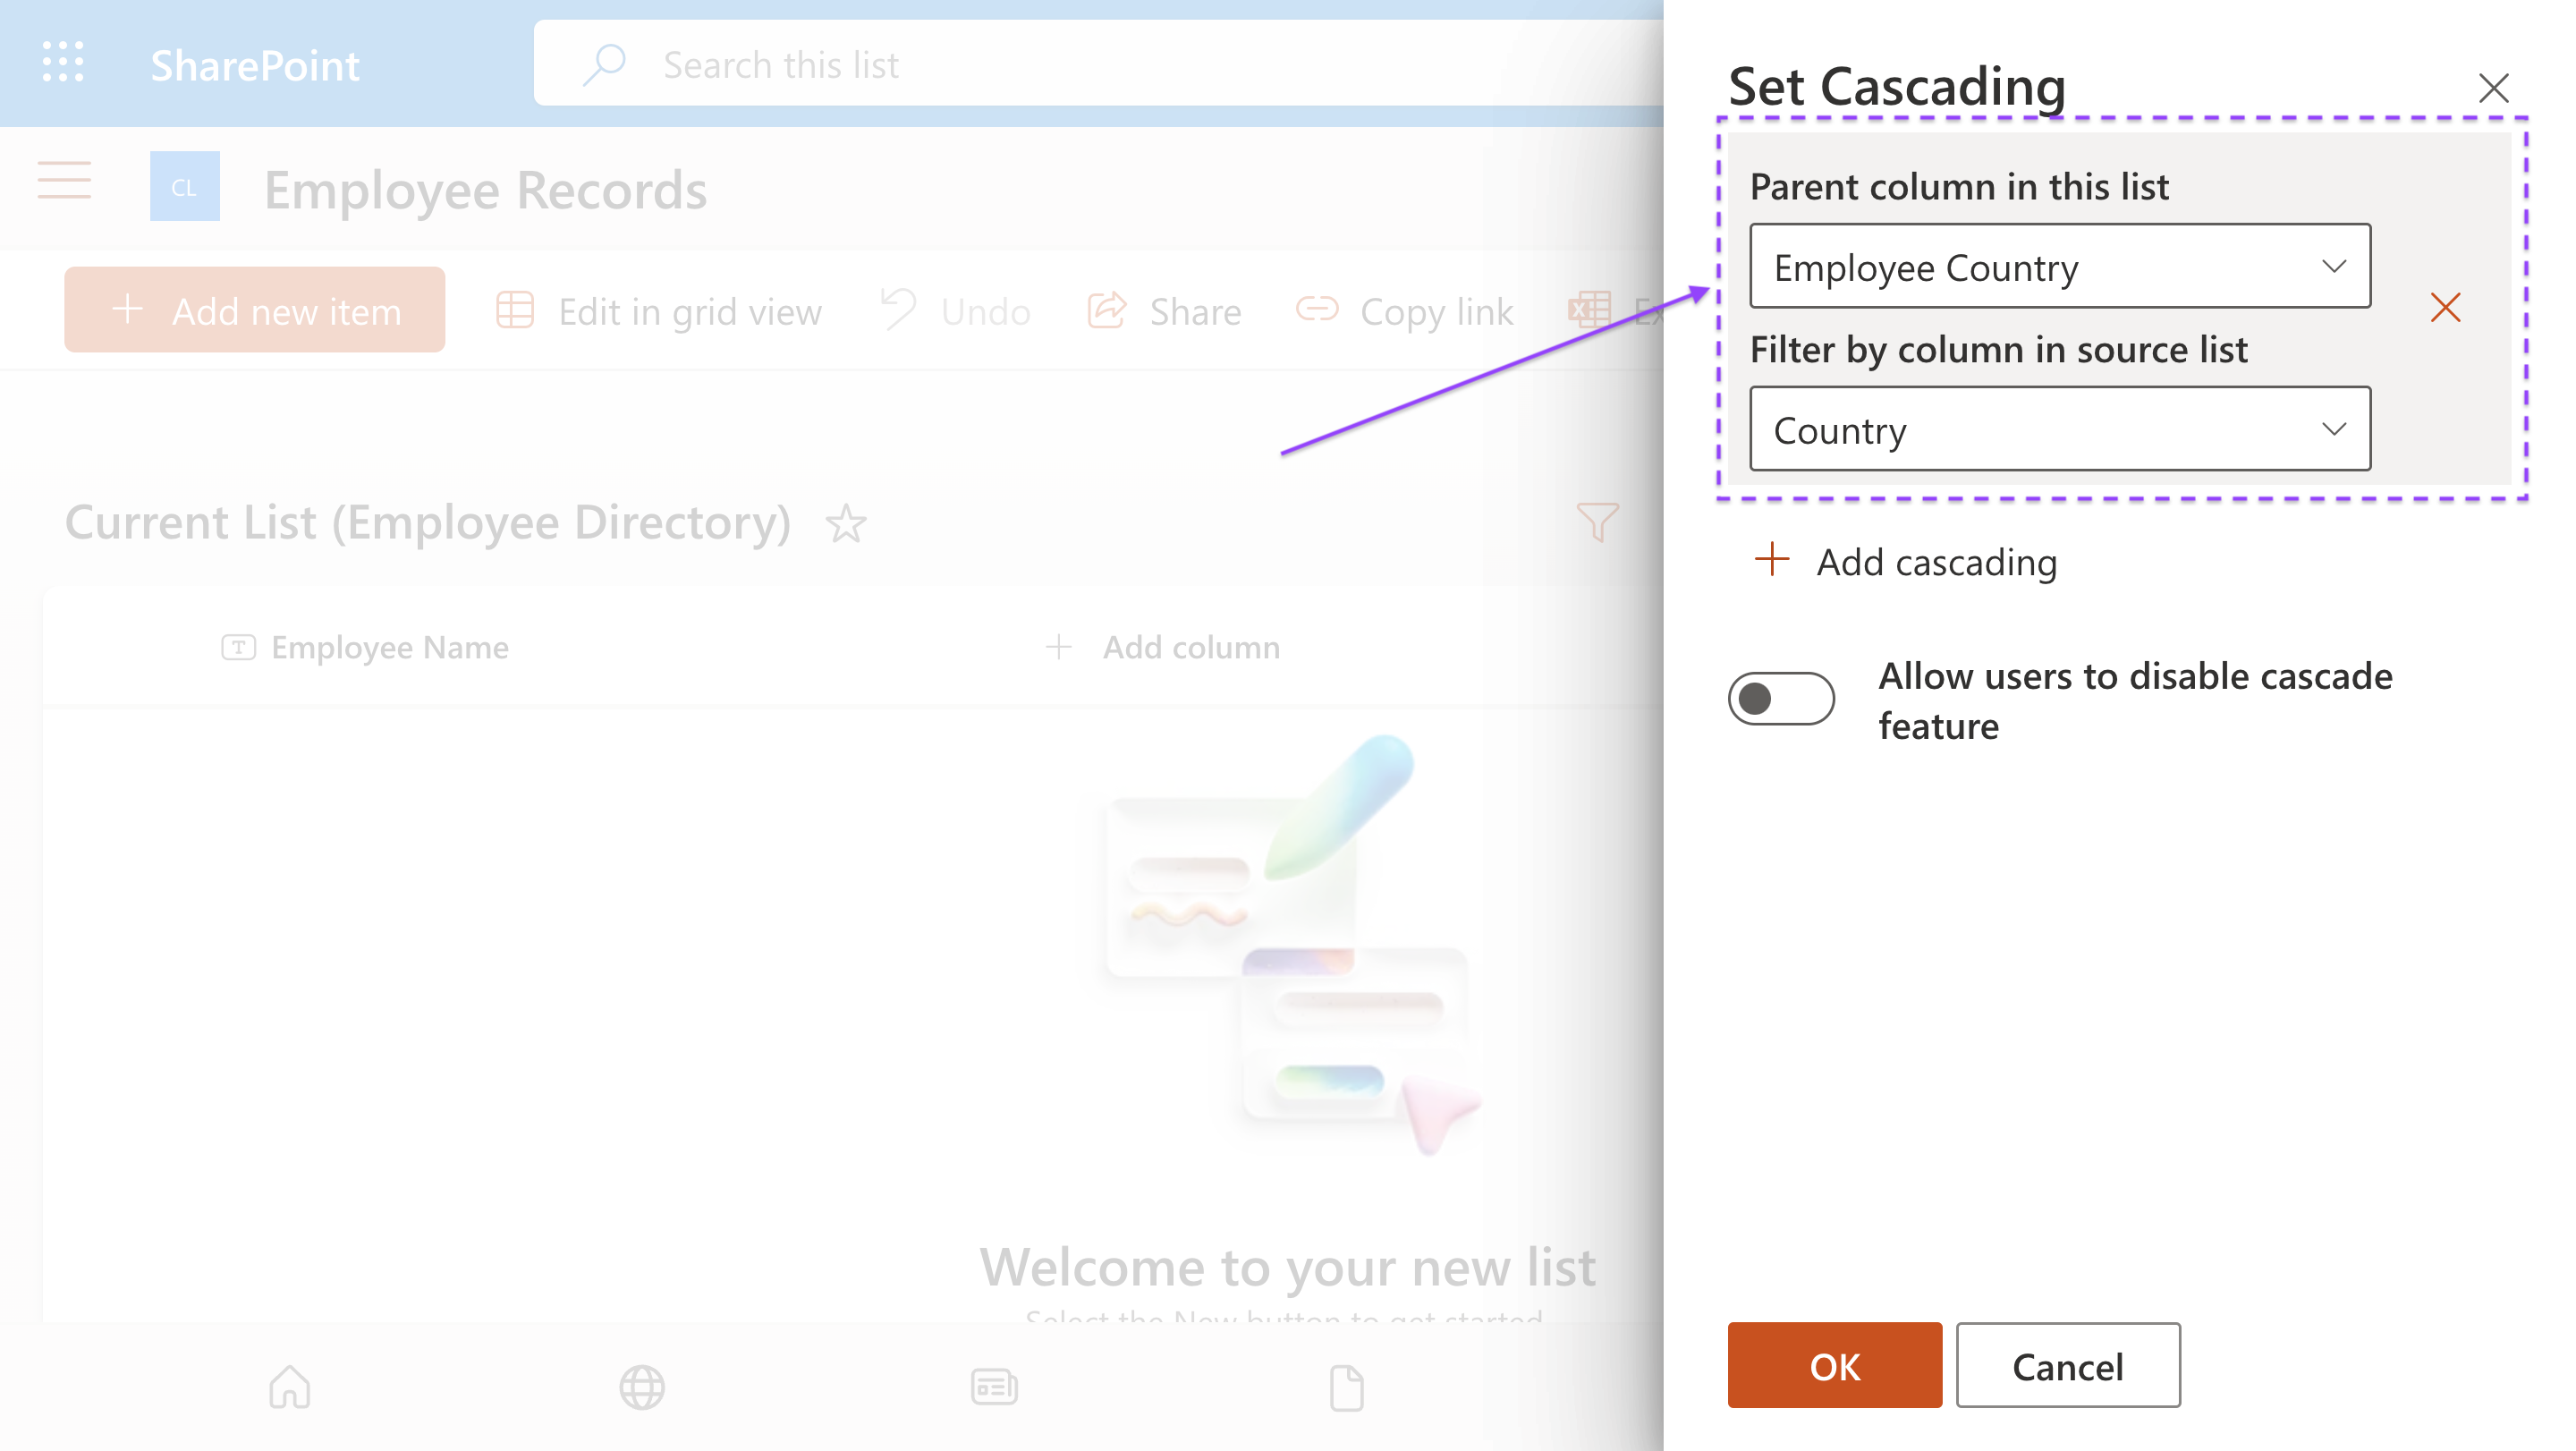
Configure the Employee Country column
Data Source Configuration:

Cascading Settings:
Remove Duplicate Items:
Additional Options:
Access the cascaded lookup settings again
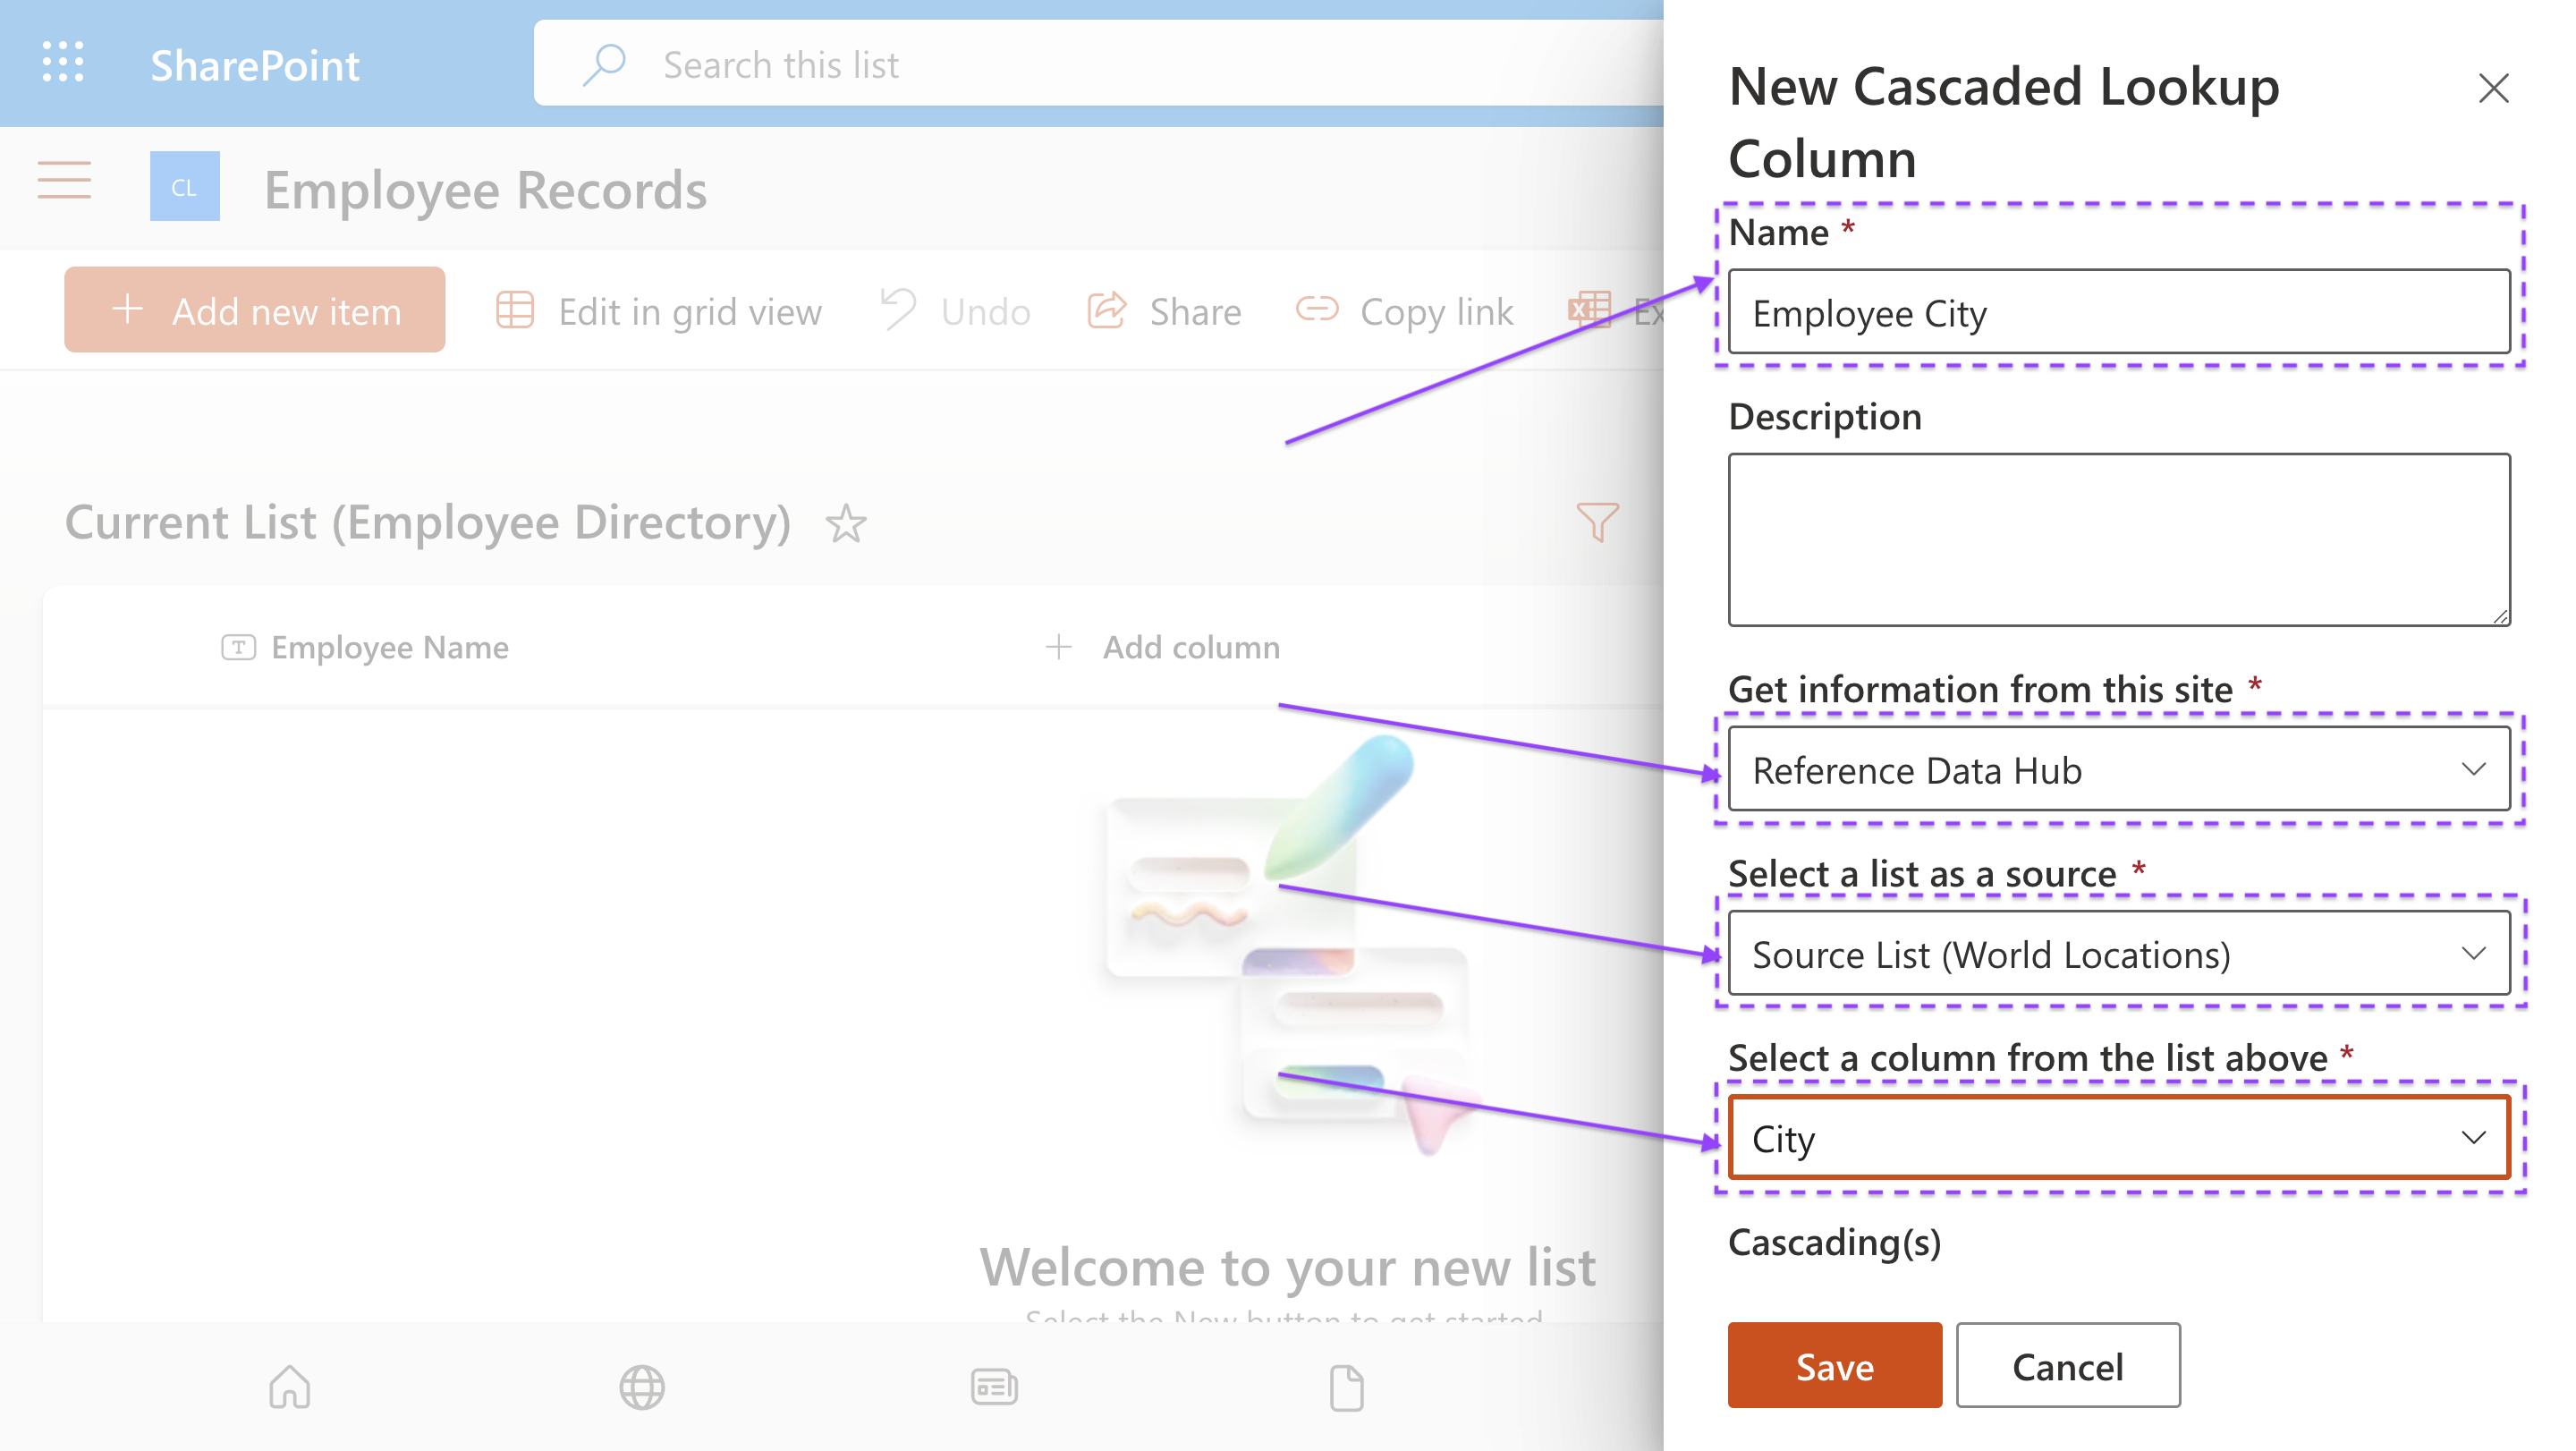
Configure the Employee City column
Data Source Configuration:
Cascading Settings:
Additional Options:
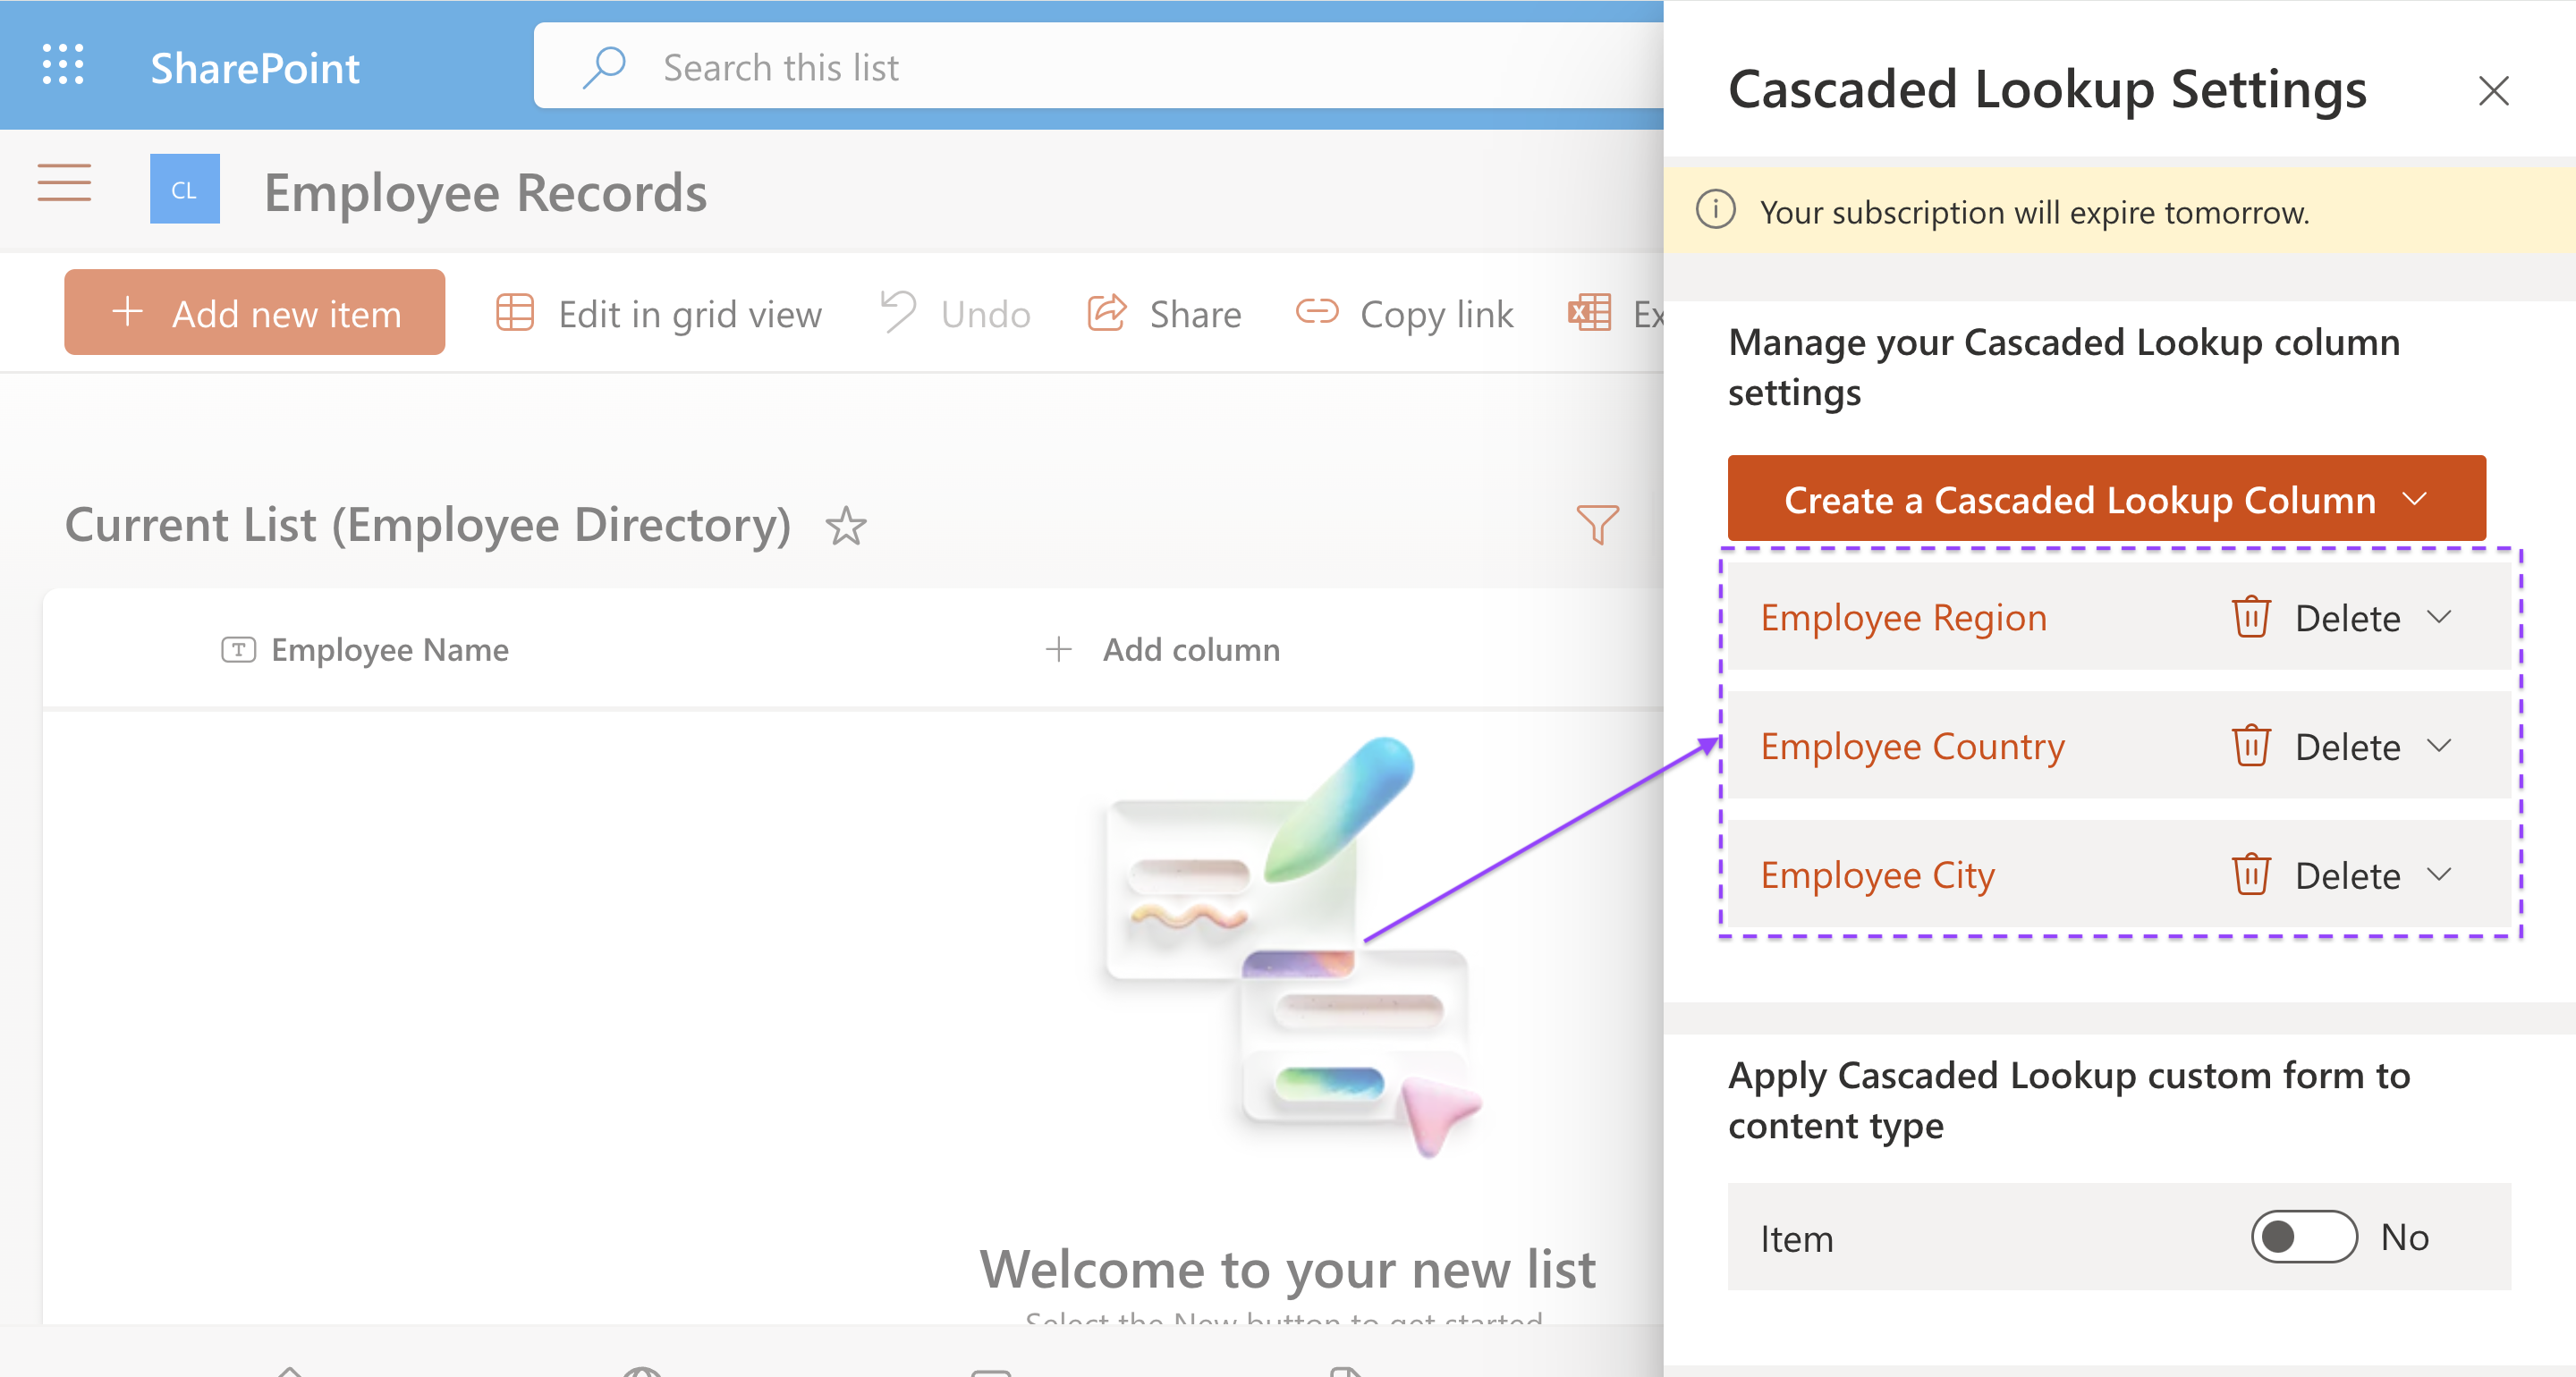
After creating all three columns, they will be listed below the Create a Cascaded Lookup Column dropdown in the Cascaded Lookup Settings panel:
Hierarchy Enforcement: The cascading logic ensures proper filtering:
Reference Guide for Column Type Compatibility
Supported column types include:
Supported column types include:
Supported column types include:
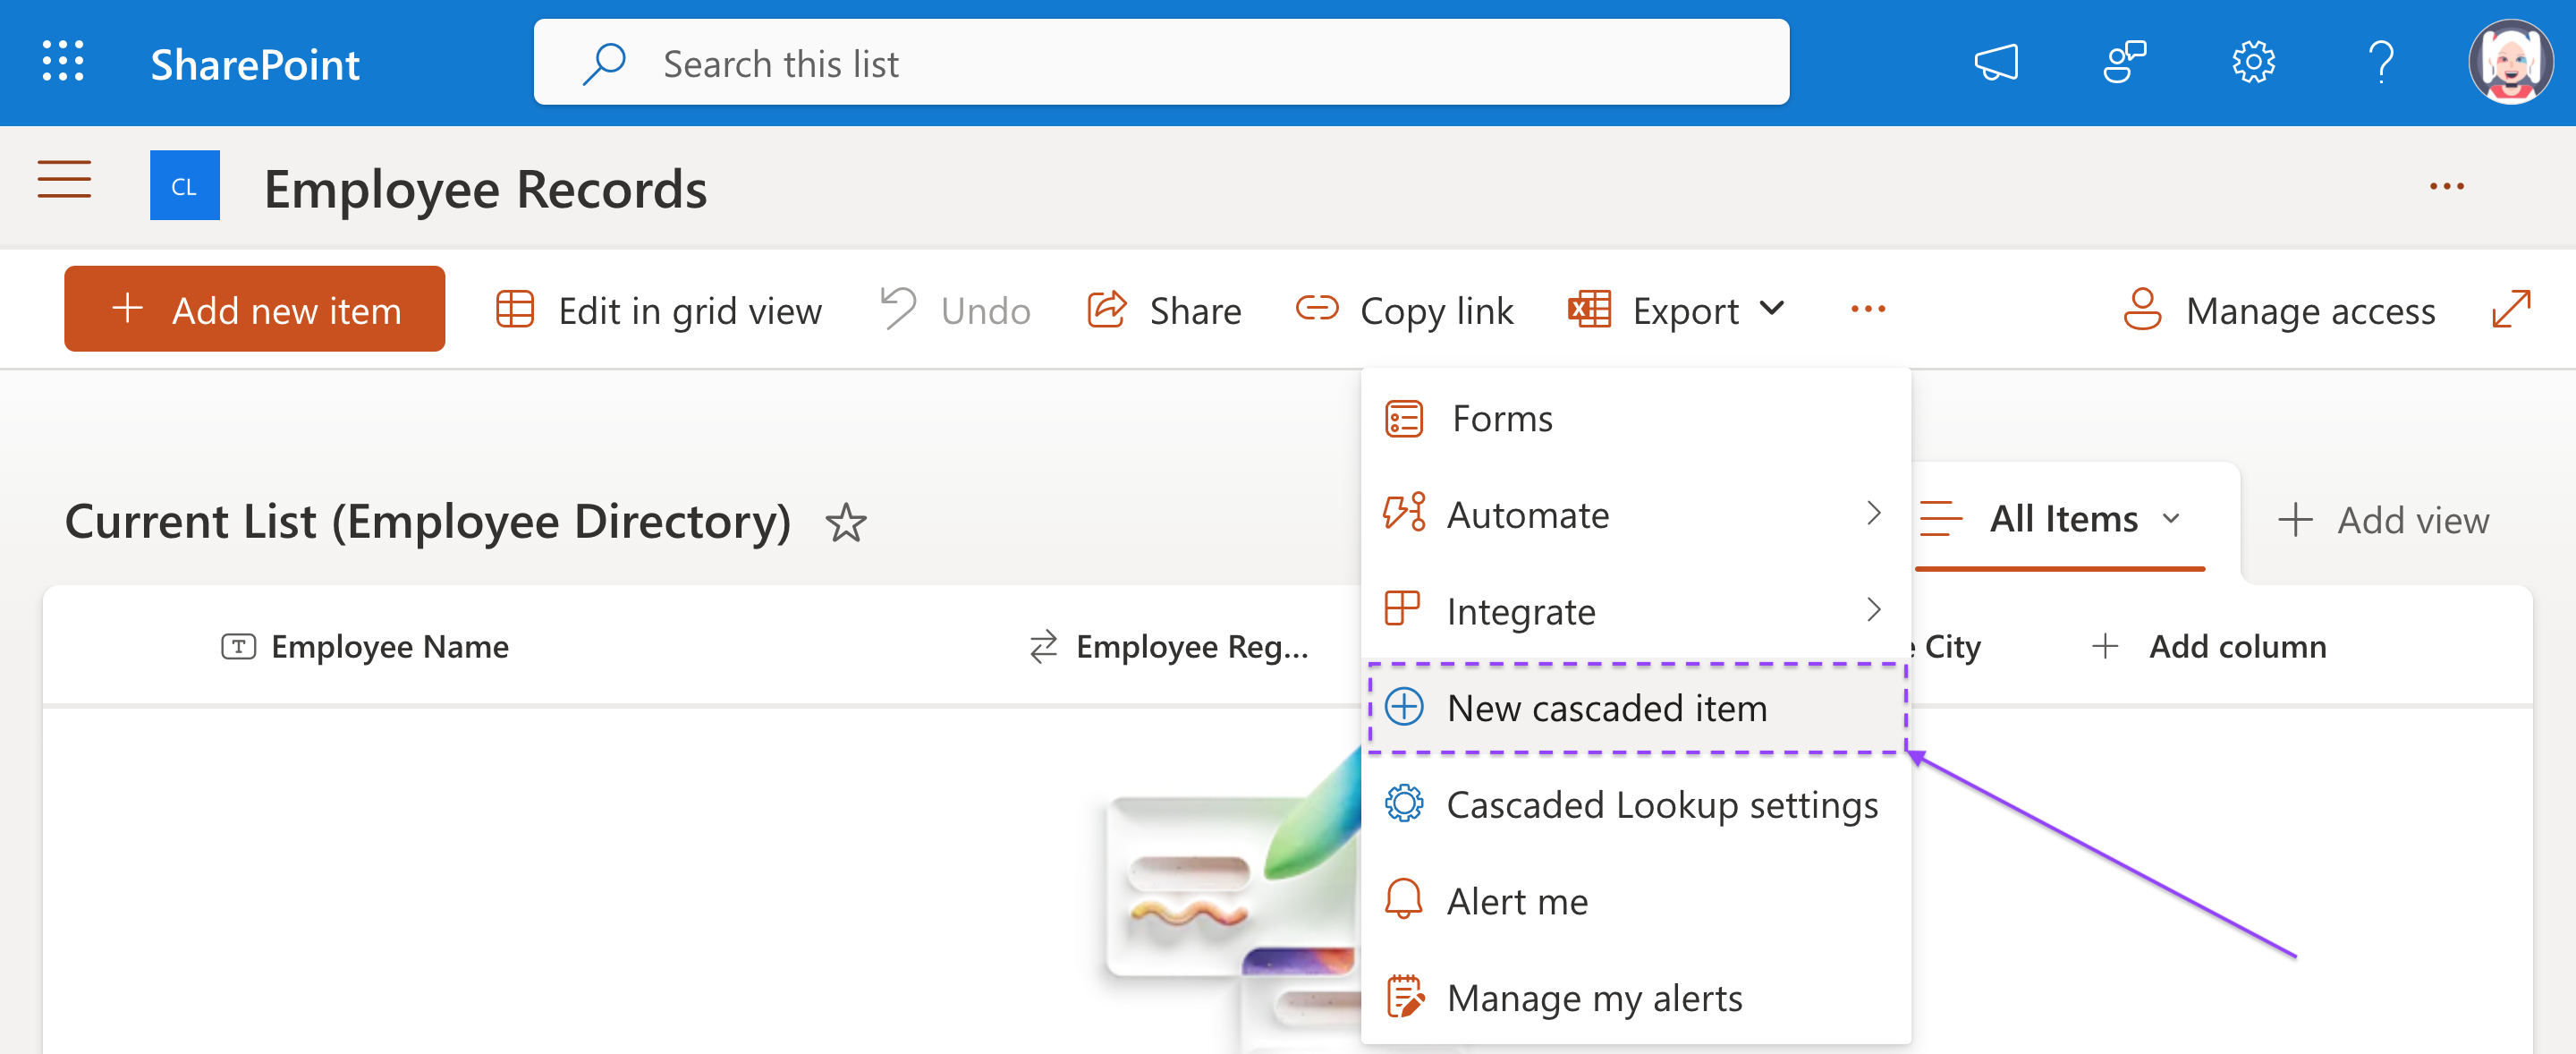
Initiate new item creation
Enter basic information
Test location selection
First Selection:
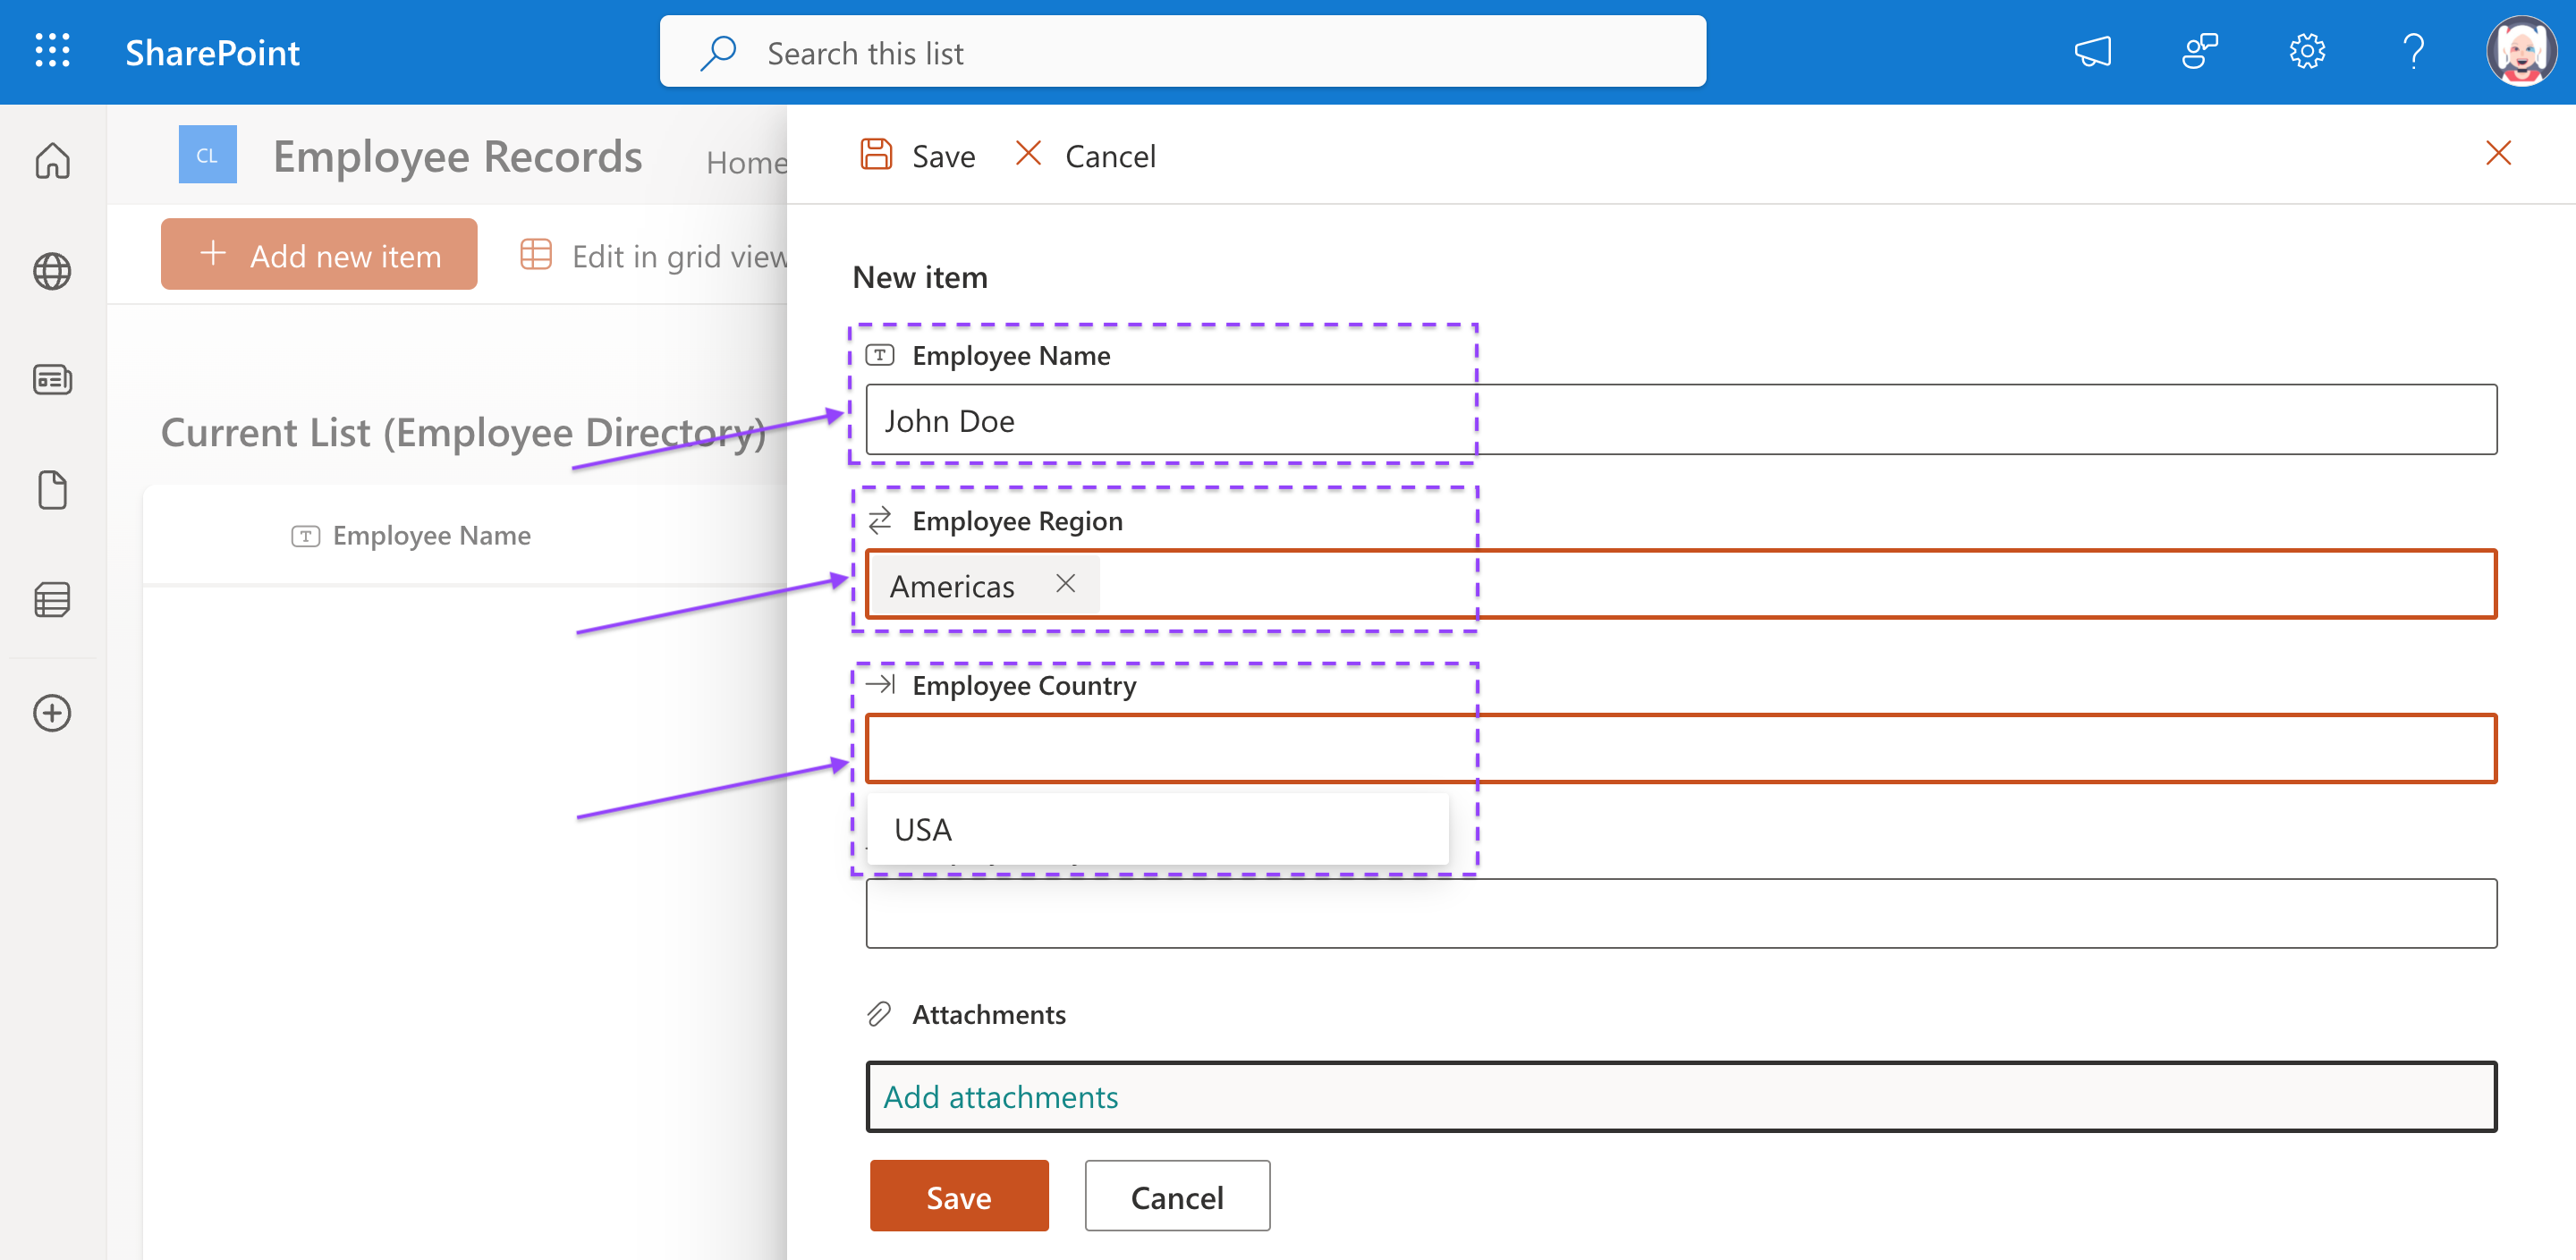
Second Selection:
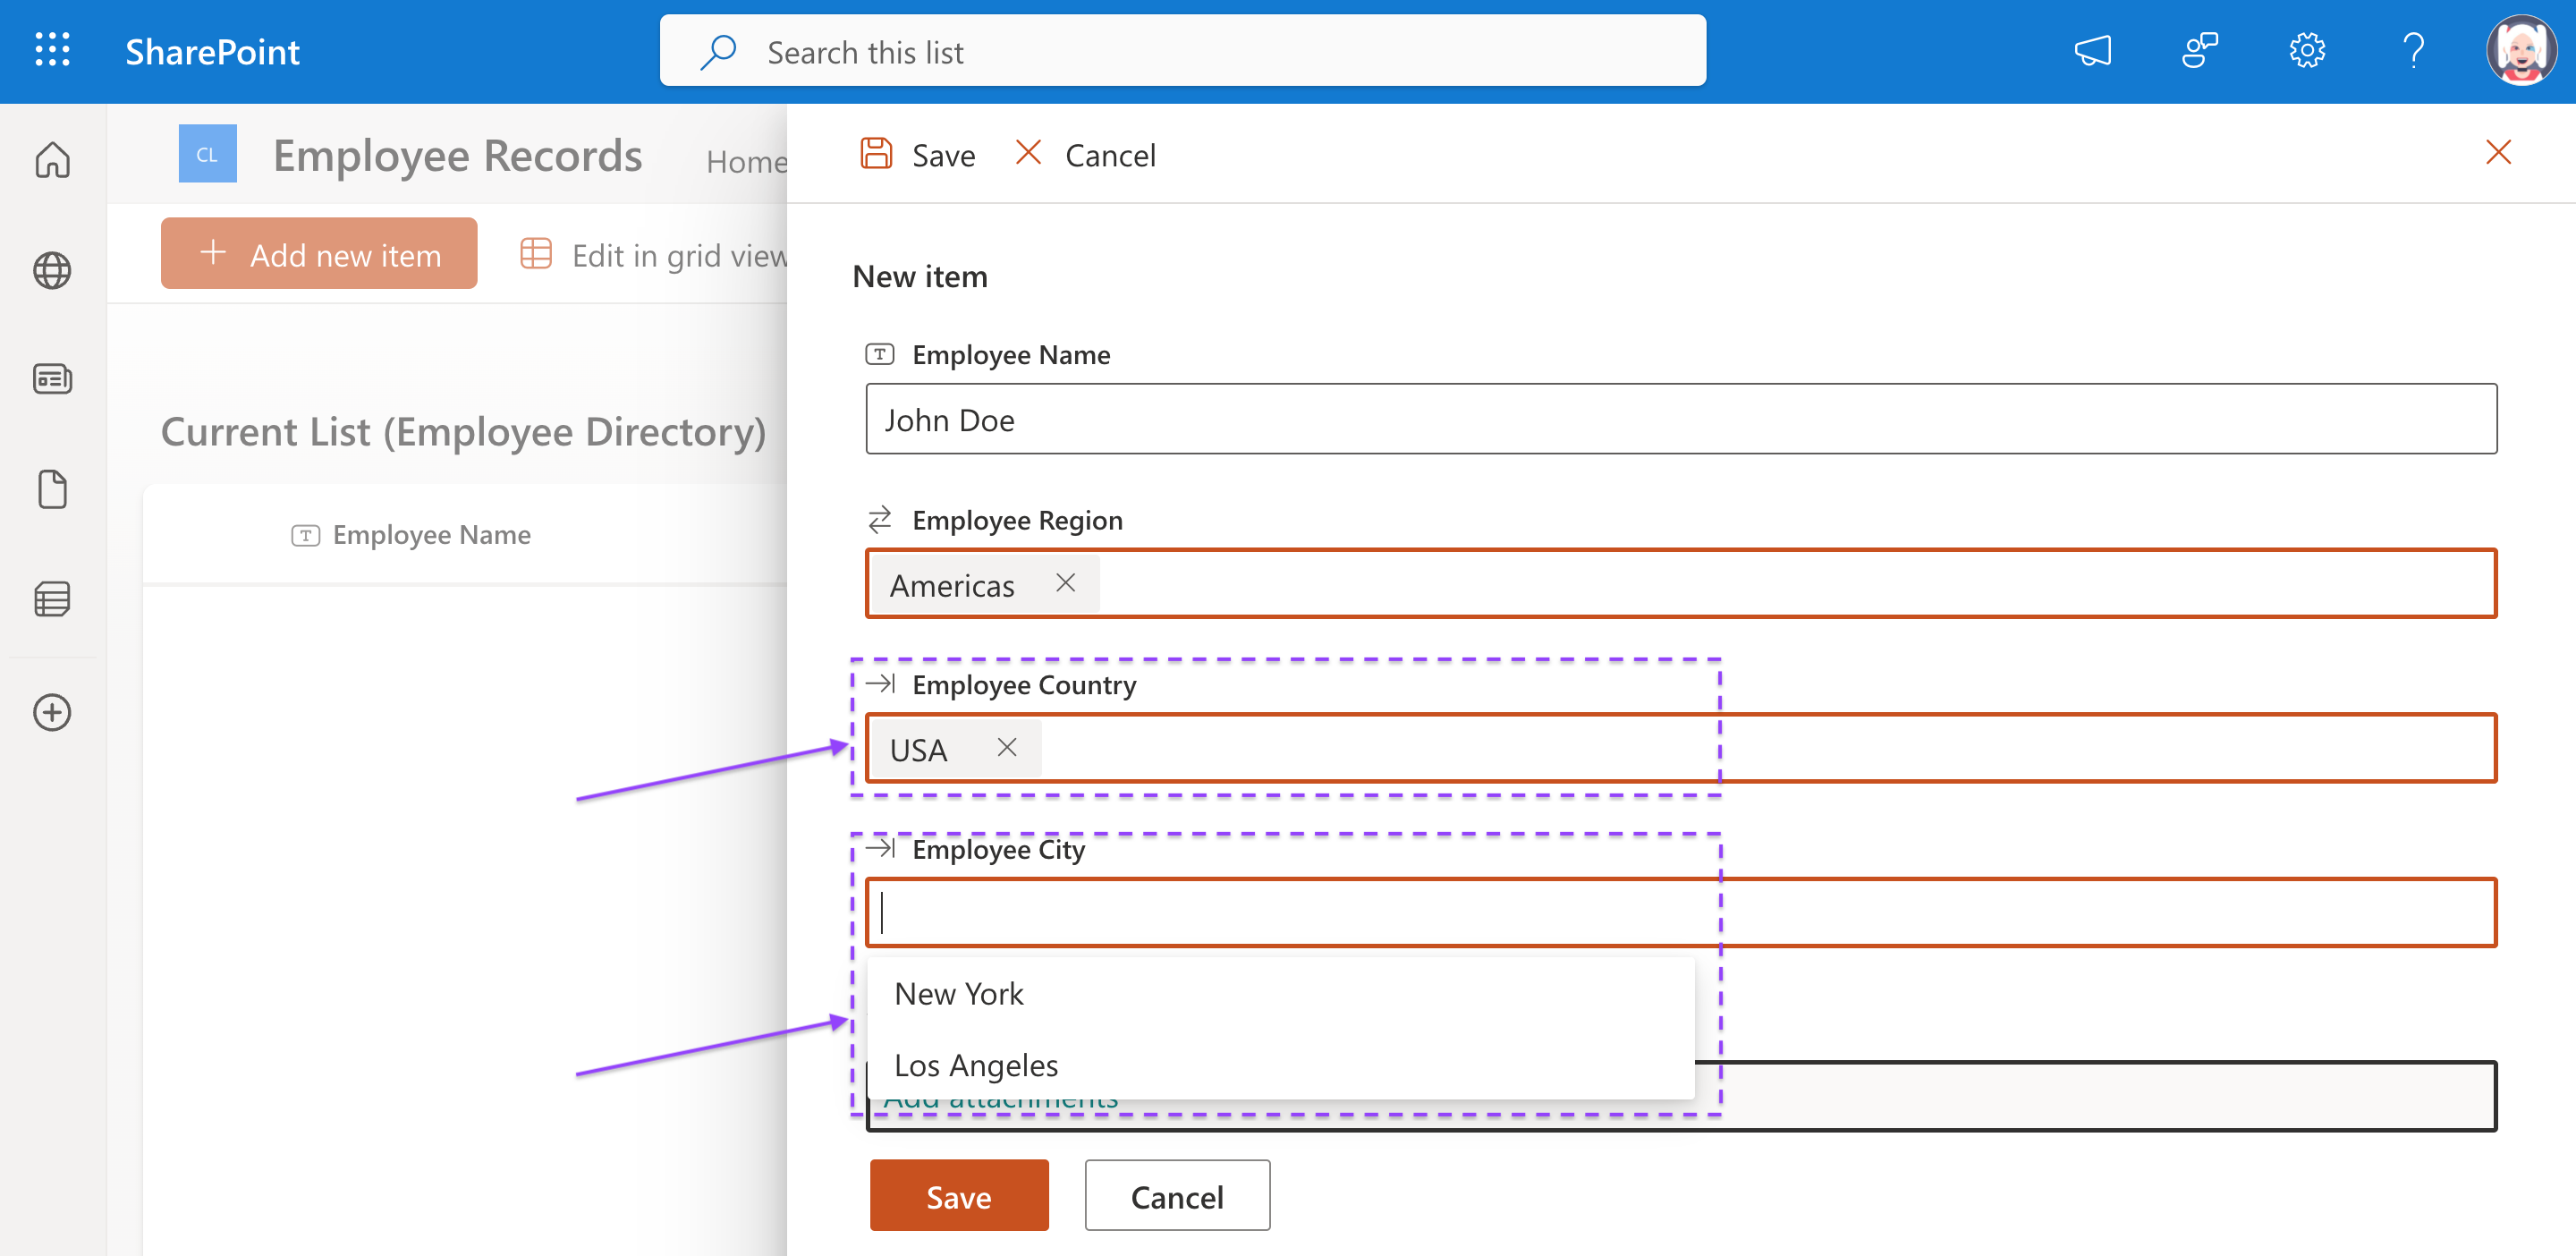
Final Selection:
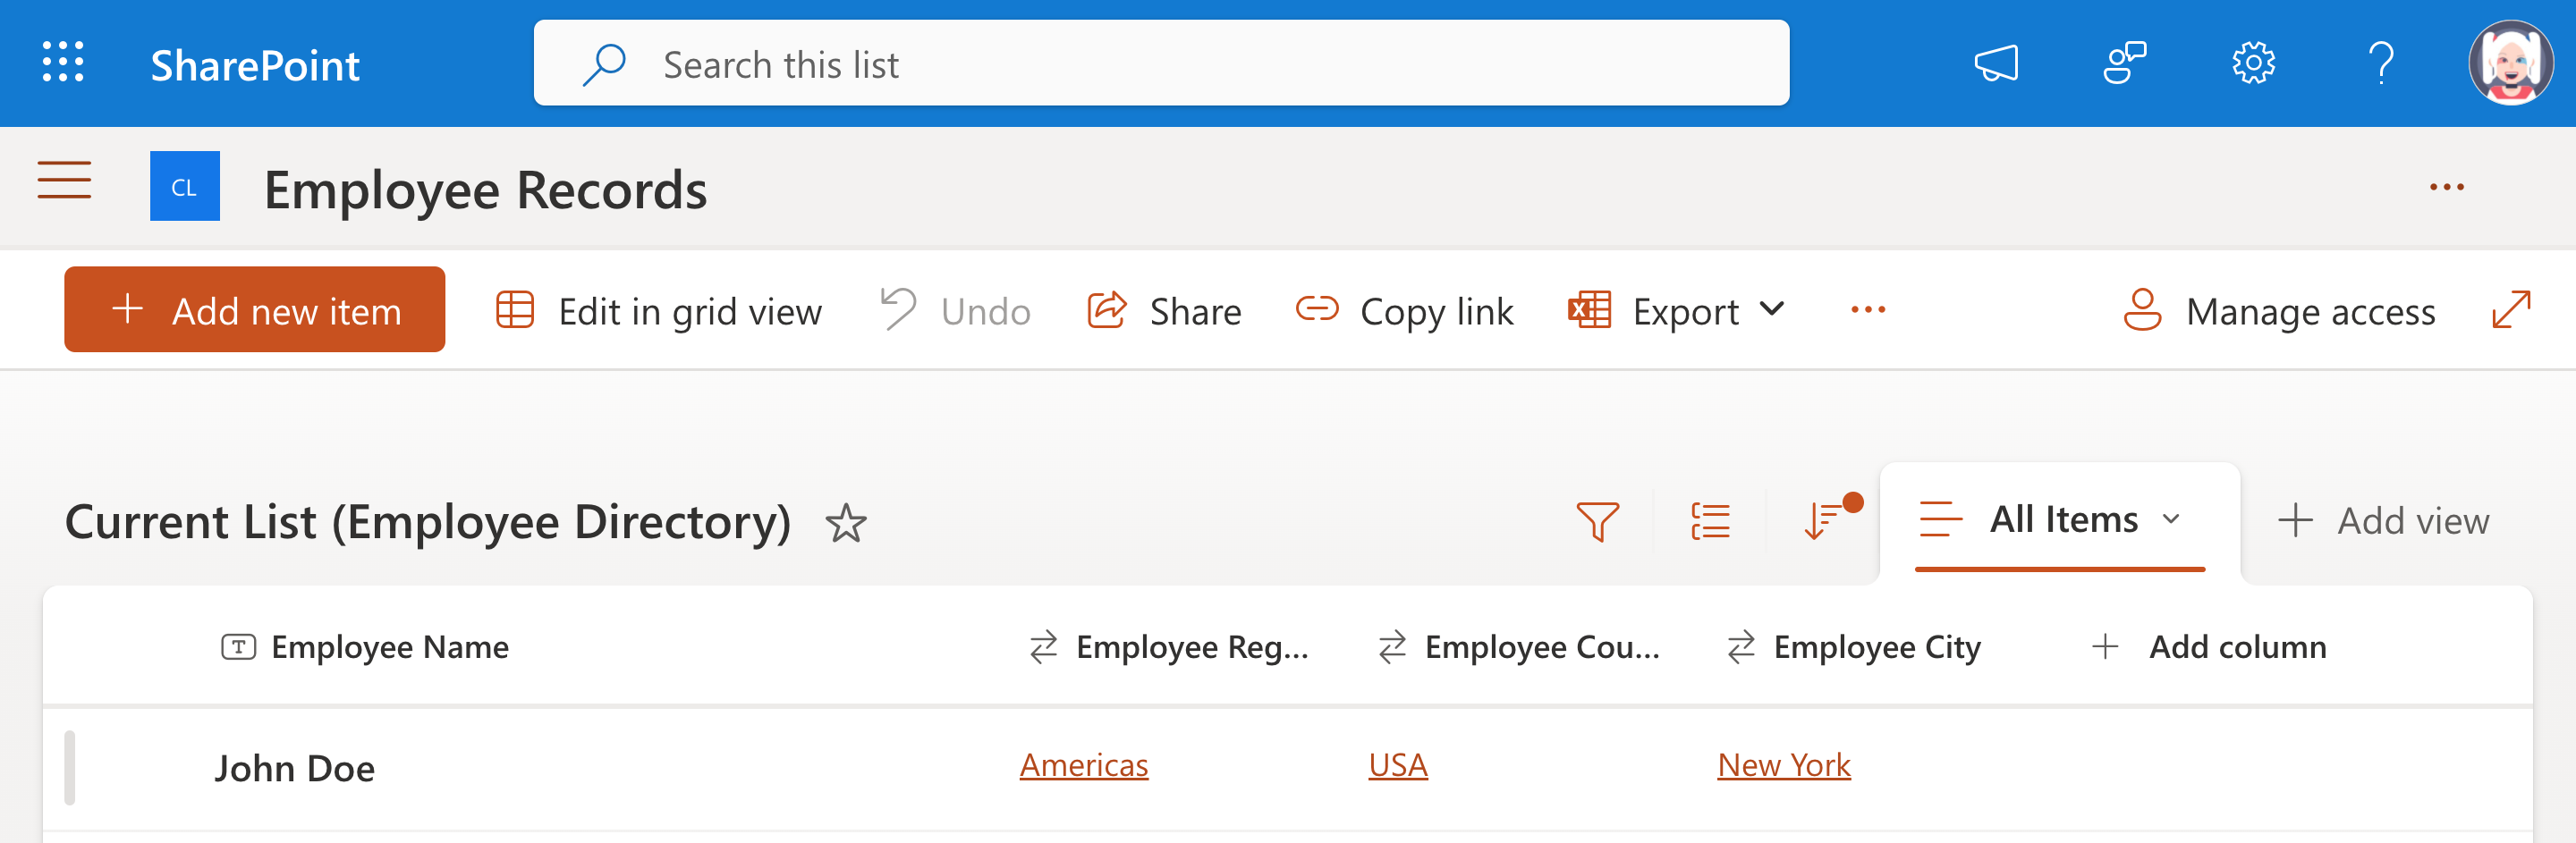
Save the new record
| Employee Name | Employee Region | Employee Country | Employee City |
|---|---|---|---|
| John Doe | Americas | USA | New York |
Initiate edit mode
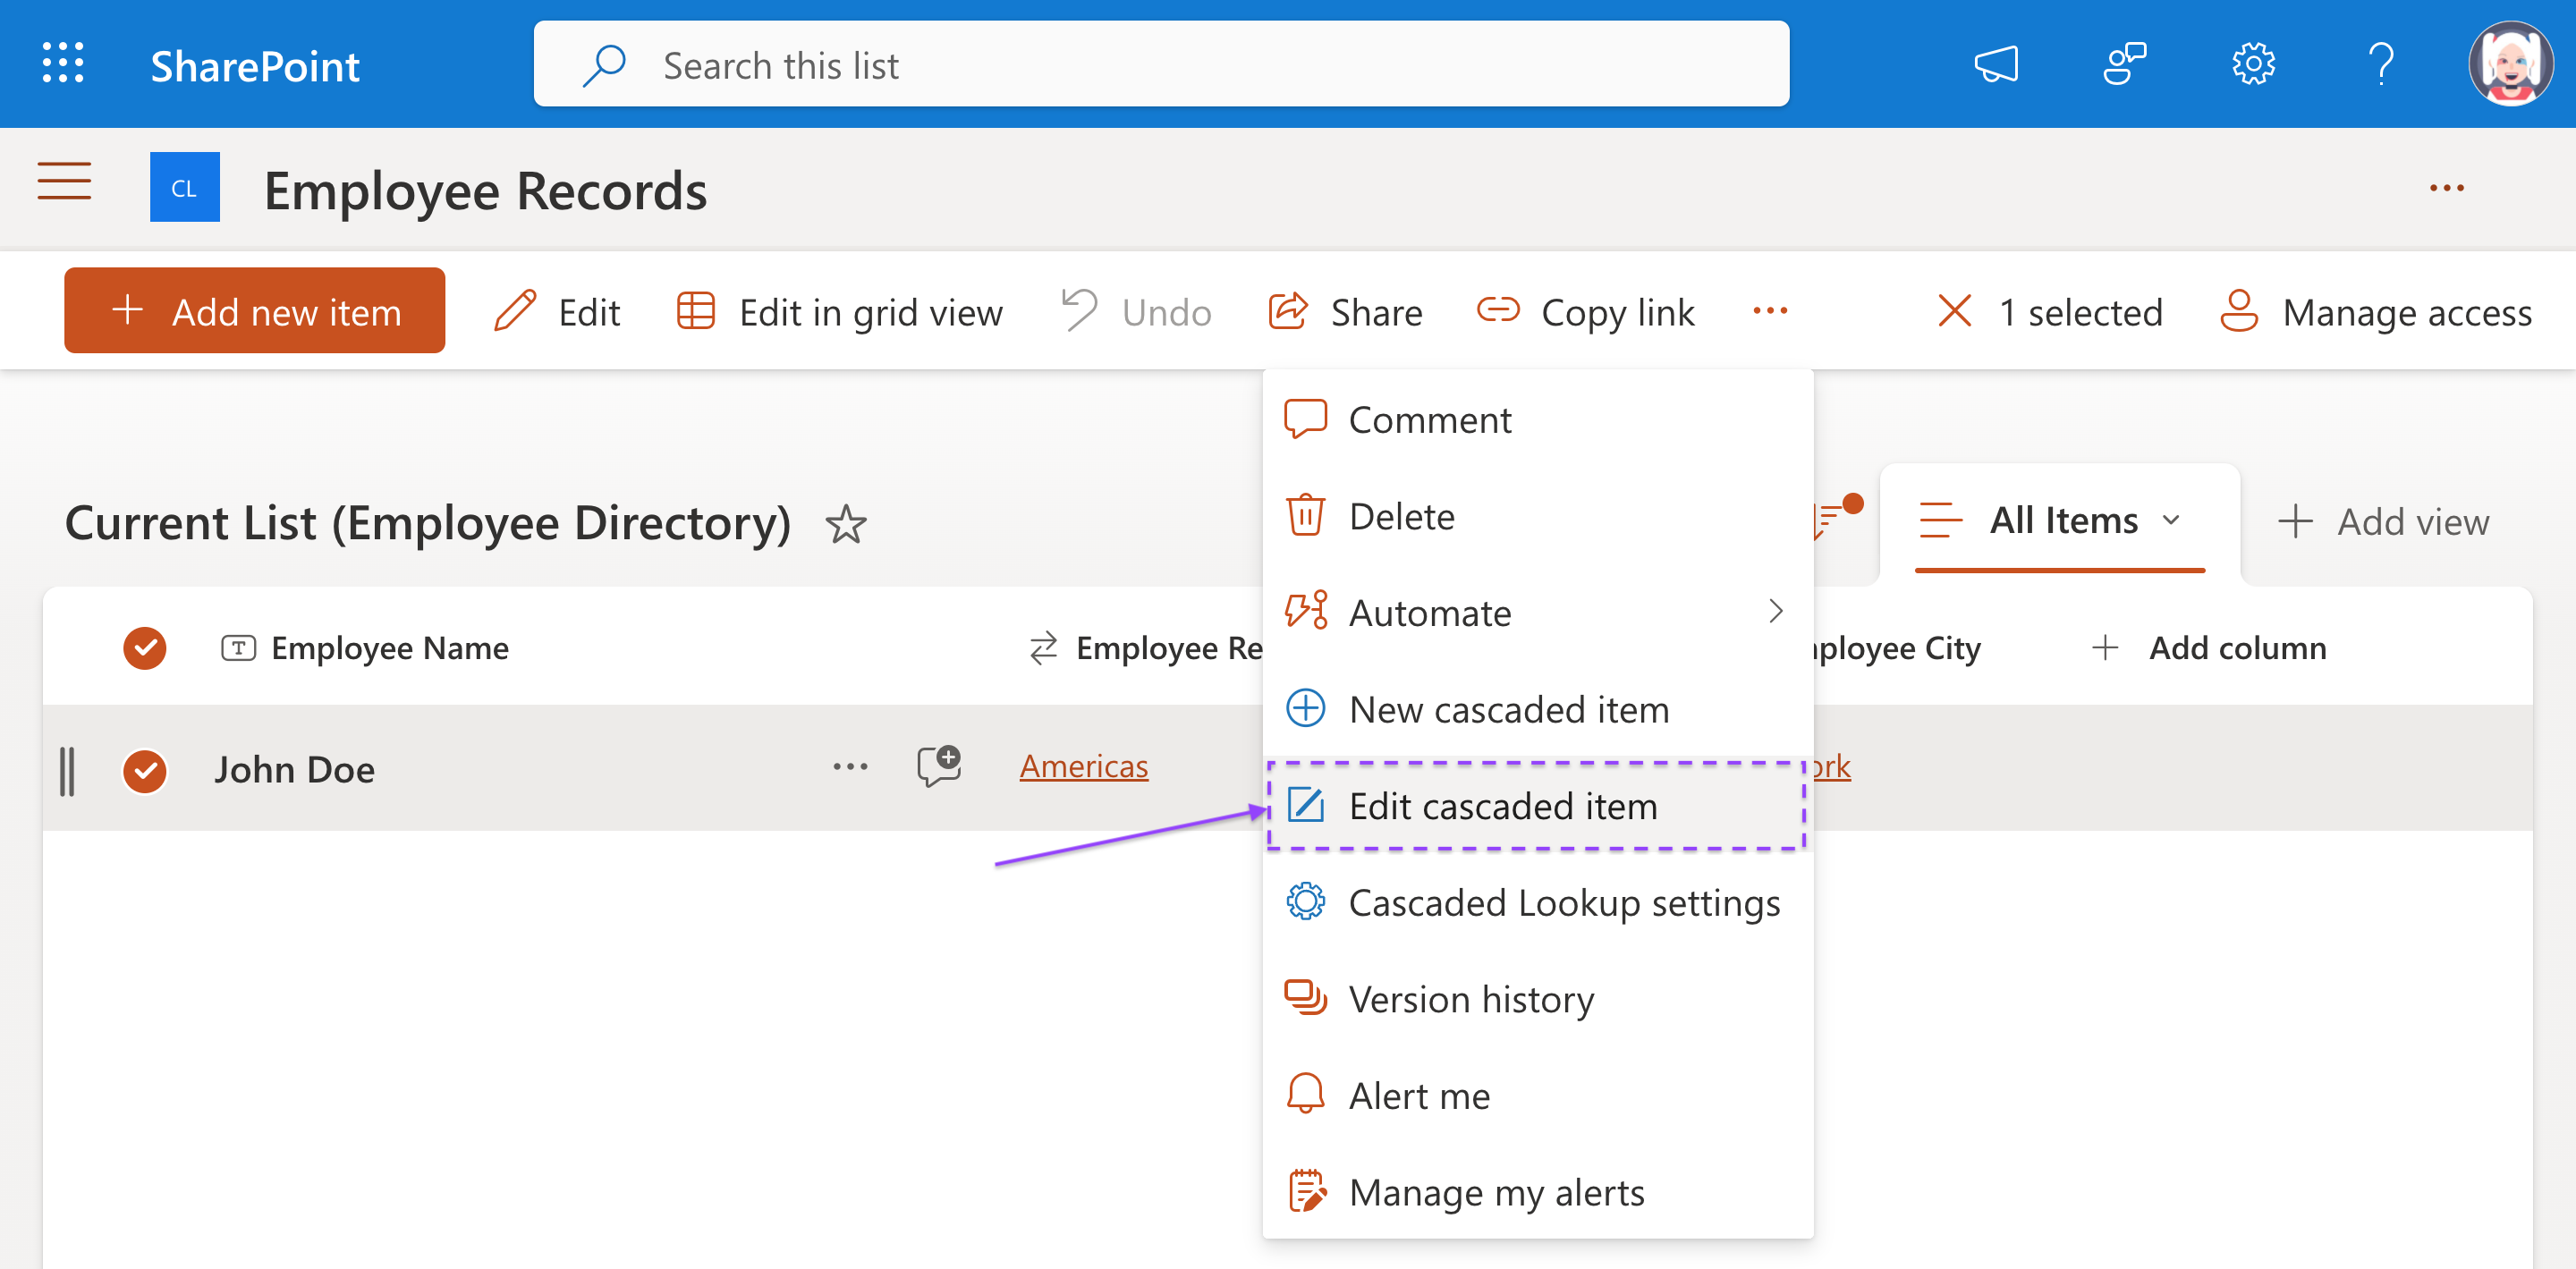
Test the cascading behavior
Current Values:
Modify the location data
Change Employee Region to "Europe"
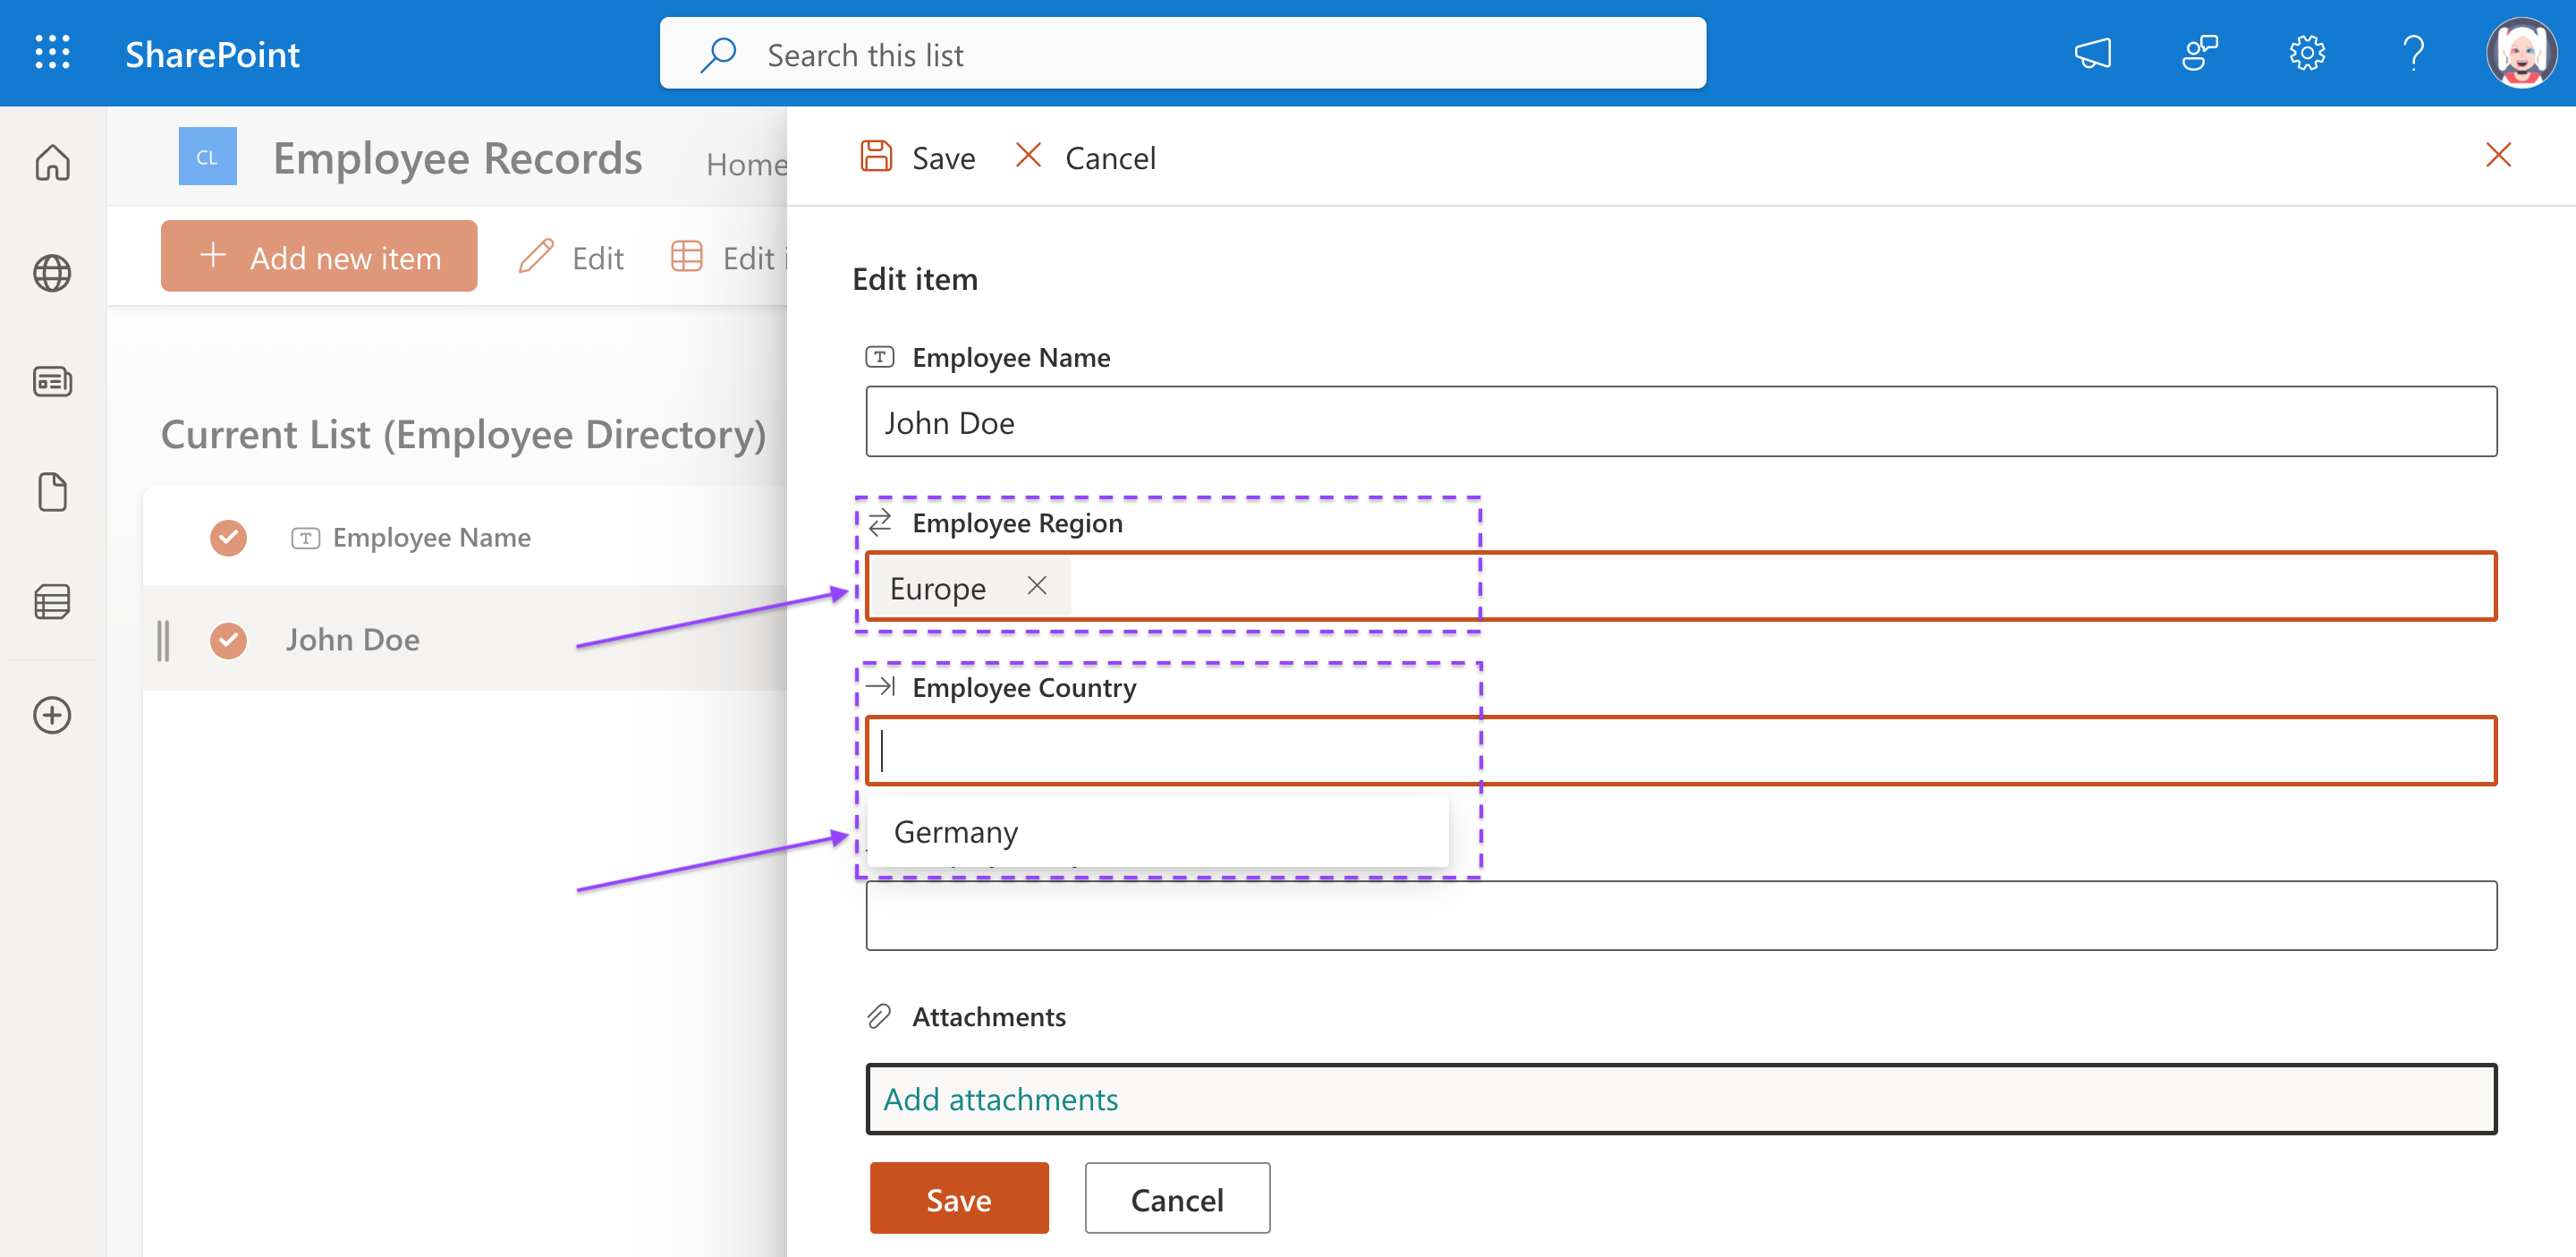
Select Employee Country: "Germany"
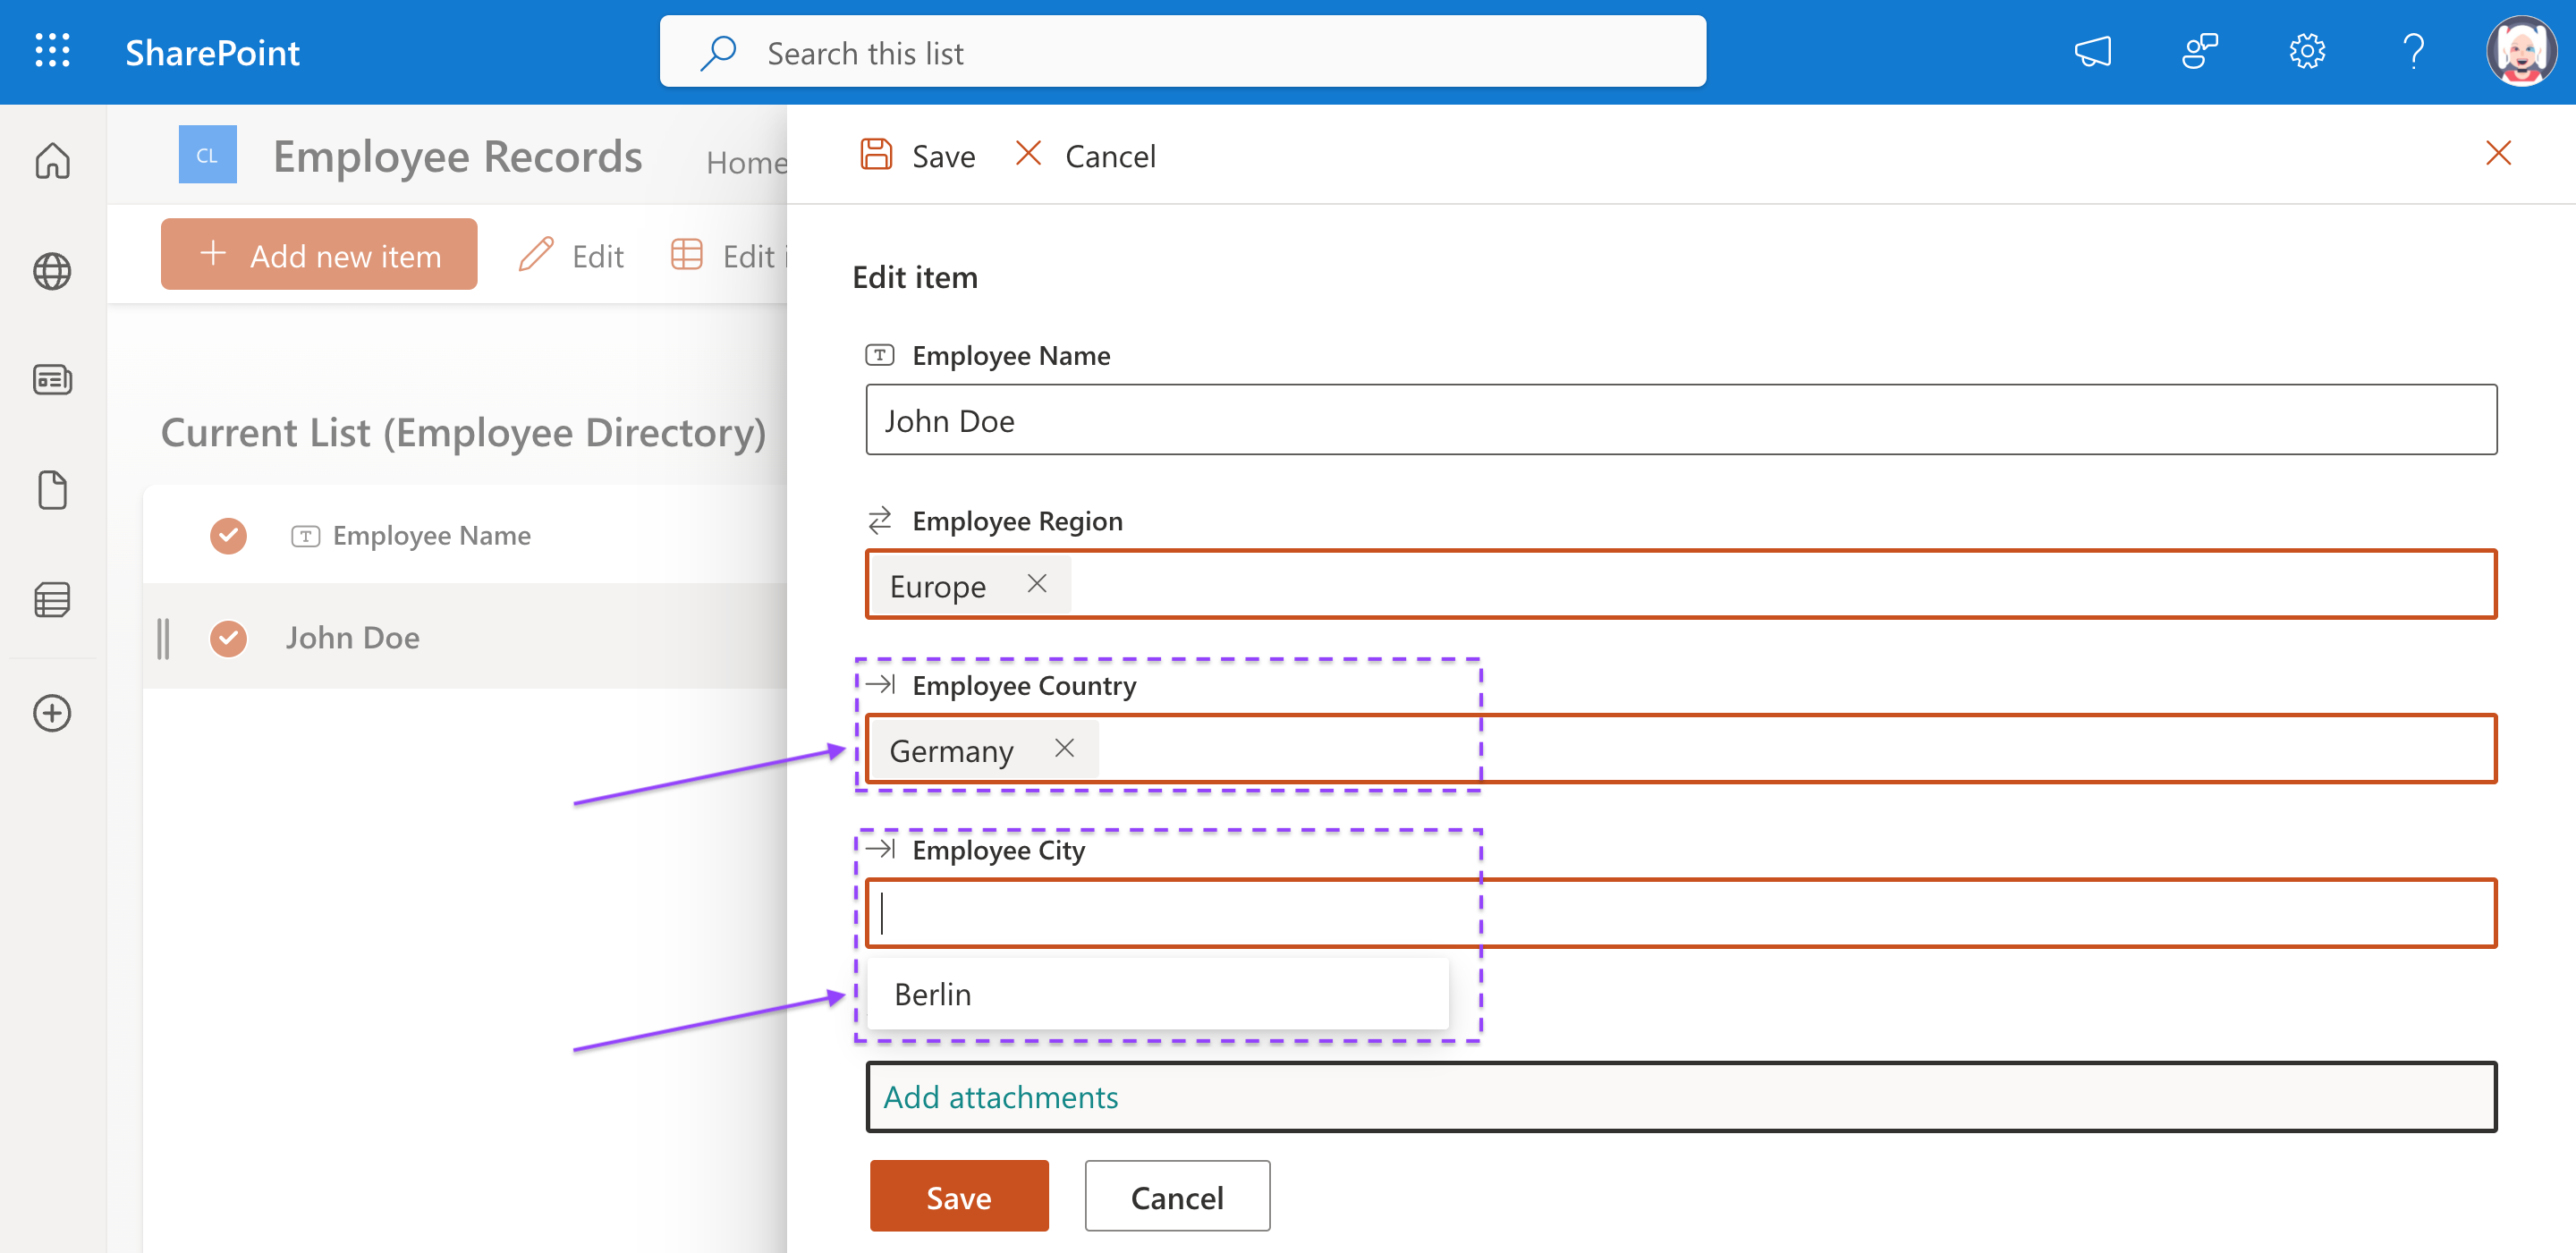
Save changes
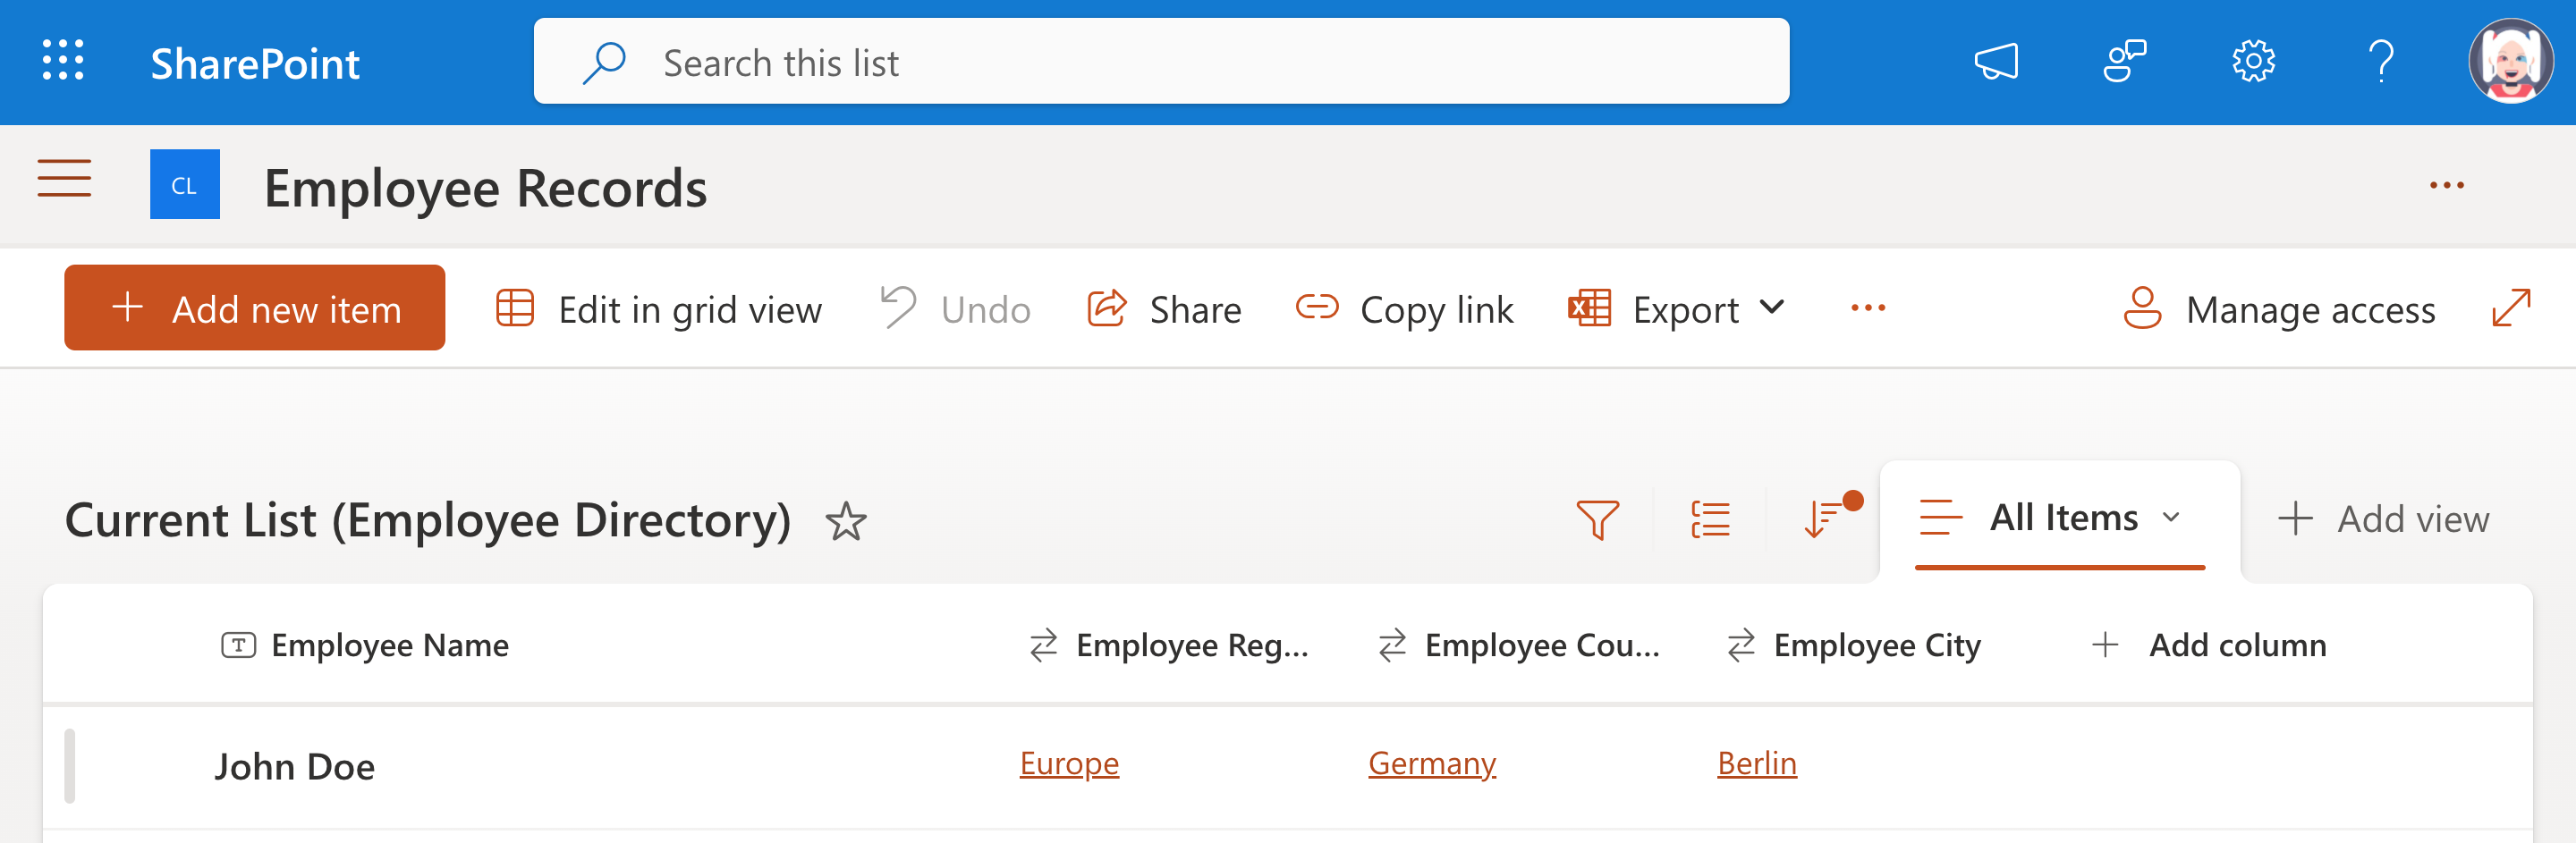
| Employee Name | Employee Region | Employee Country | Employee City |
|---|---|---|---|
| John Doe | Europe | Germany | Berlin |
| Cascaded Lookup Column (Current List) | Parent Column (Current List) | Filter by Column (Source List) | Purpose |
|---|---|---|---|
| Employee Region | None | None | Root level |
| Employee Country | Employee Region | Region (Source) | Filters Employee Country by Employee Region |
| Employee City | Employee Country | Country (Source) | Filters Employee City by Employee Country |
