- BoostSolutions
-
Products
-
- Microsoft Teams
- HumanLike Alert Reminder
- View All Apps
- Pricing
- Support
- Company
SharePoint Document Auto Title provides a SharePoint workflow to automatically set SharePoint document title with its file name when document is uploaded or modified. This function is not provided by default SharePoint.
NOTE: The Document Auto Title Workflow can only be applied to document libraries.
A complete tutorial of SharePoint Document Auto Title is as following.
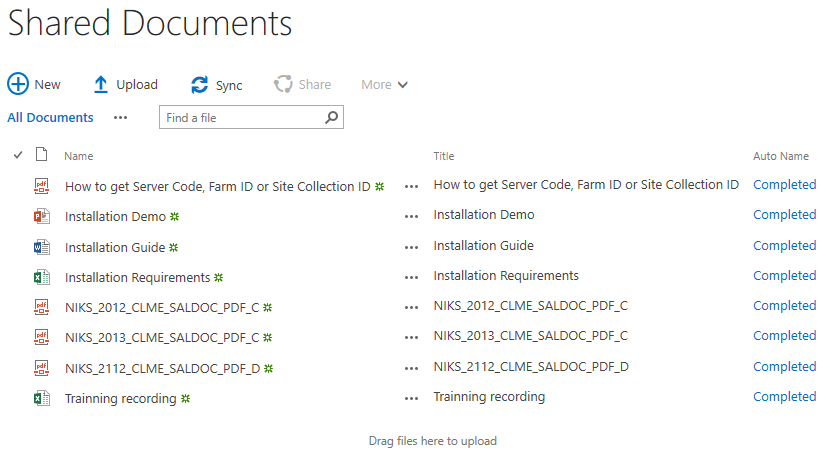
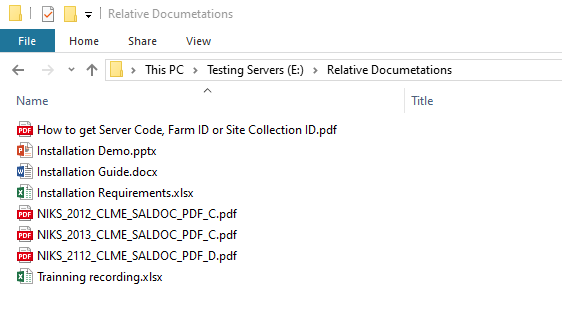
Here we need to upload a number of documents which has no titles to a SharePoint document library.
a. Open a Document library, go to Library > Workflow Settings, and click Add a workflow.
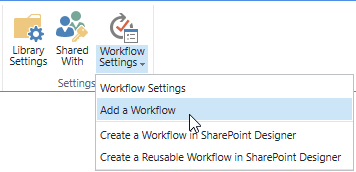
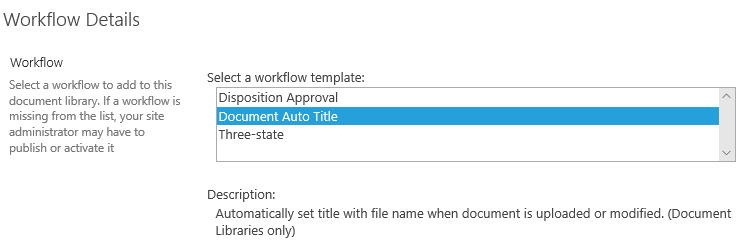
b. On the Add a Workflow Page, select Document Auto Title.
c. Give a name for this workflow and then select a task list and history list for it.
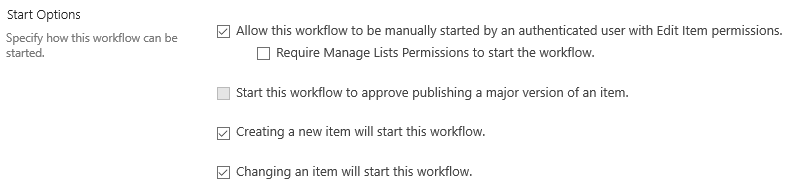
d. In Start Options section, tick Start this workflow when a new item is created and Start this workflow when an item is changed checkboxes if you wish to start this workflow automatically.
e. Click Next to enter the workflow settings page.
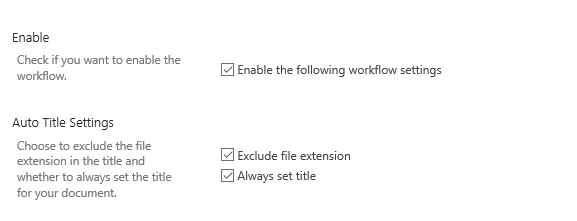
f. Set workflow configurations on Customize Workflow page. Here we select the Exclude file extension and Always set title check box.
g. Then, click OK to save the settings.
a. Navigate to the Documents library, upload multiple documents to the library.
b. After the status of Auto Name shows completed, the titles of documents are automatically added in the column Title as following.