- BoostSolutions
-
Products
-
- Microsoft Teams
- HumanLike Alert Reminder
- View All Apps
- Pricing
- Support
- Company
If you have an Excel spreadsheet with valuable data or records and want to put it on a SharePoint list to share with others, BoostSolutions’ Excel Import can help you import excel sheet into a SharePoint list, or create a new list from your Excel spreadsheet.
In this article, we will demonstrate how to create a new SharePoint list by importing an existing Excel spreadsheet.
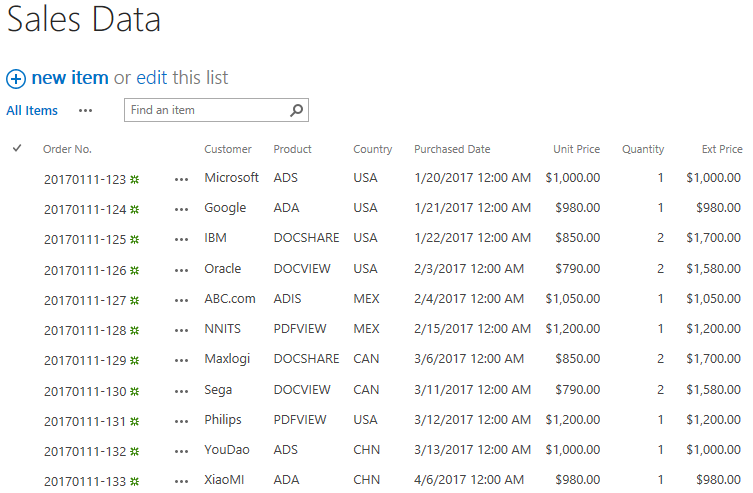
The SharePoint list Sales Data is created from the excel file – Sales Data
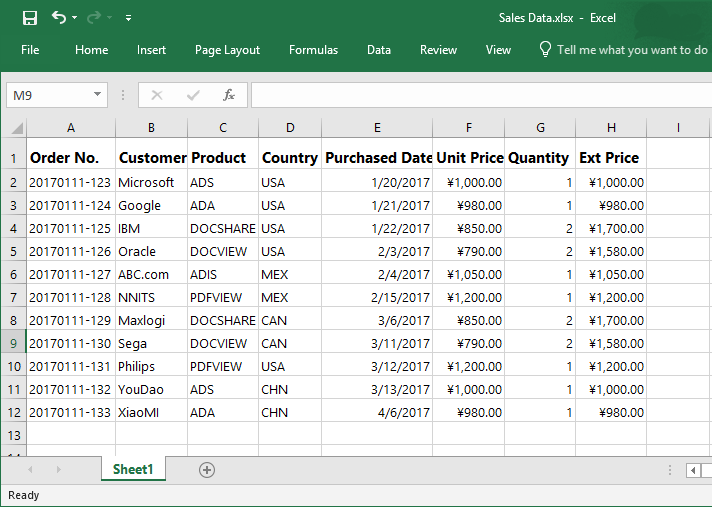
There is an Excel spreadsheet file which name is Sales Data, the Excel includes these columns and items as following.
Firstly, download the trial version of Excel Import and install it to your SharePoint server.
Navigate to site where you want to create a new list to.
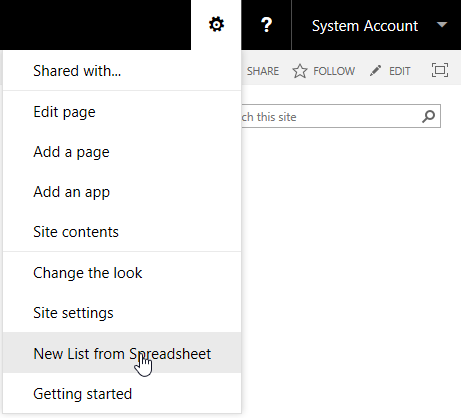
In the top right corner, click Settings and then click New list from Spreadsheet.
In the New List from Spreadsheet dialog box, choose an Excel spreadsheet or CSV file and configure import options.
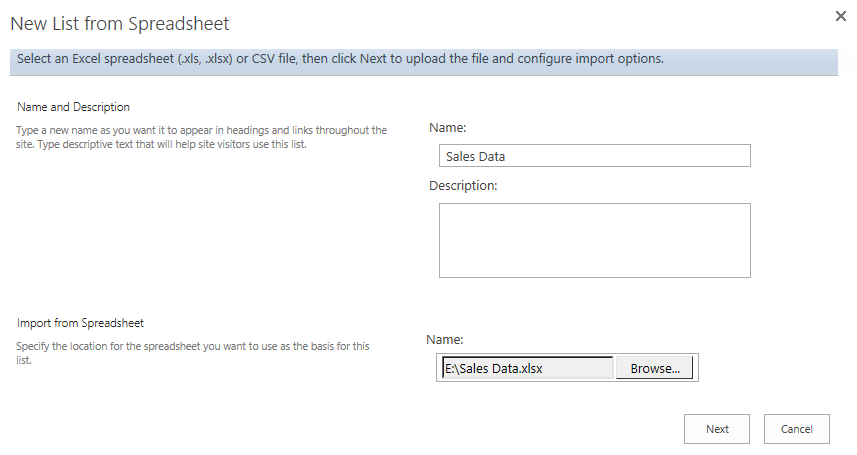
In the Name and Description section, enter a name for the new list and a description. Here we specify the name for the new list as Sales Data.
In the Import from Spreadsheet section, click Browse button to choose the Excel spreadsheet file – Sales Data.
Click Next button to for next step
In the New List from Spreadsheet dialog, configure import options.
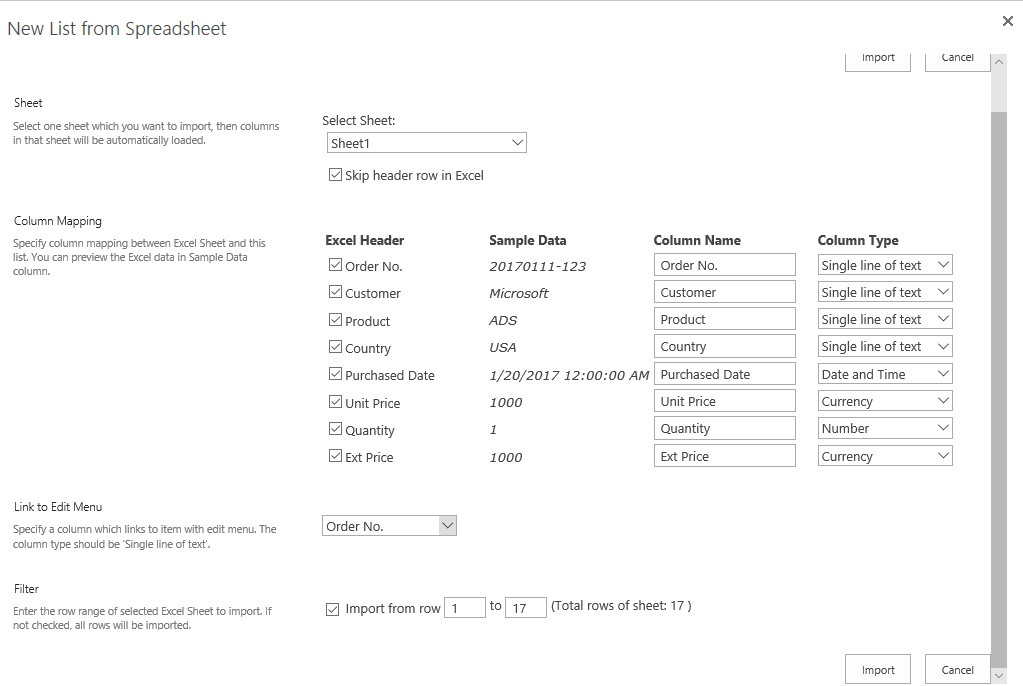
In the Sheet section, select Sheet 1 to import.
Unselect Skip header row in Excel option to decide not to import the first row.

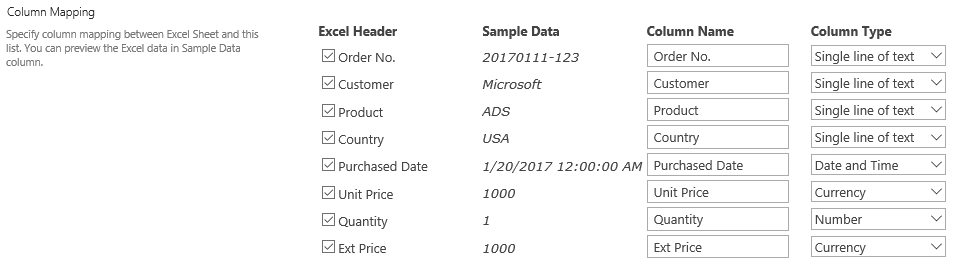
In the Column Mapping section, select all columns which means that all columns will be created in the new list.
By default, the Column Name are same as Excel Header, you can edit them and specify the column type based on your need. Here we keep the settings as default.
In the Link to Edit Menu section, select Order No., the Order No. column will be used to link to item with edit menu.

In the Filter section, select the data range and import the data you need. We plan to import all rows of sheet 1, so deselect this option.

Click Import.
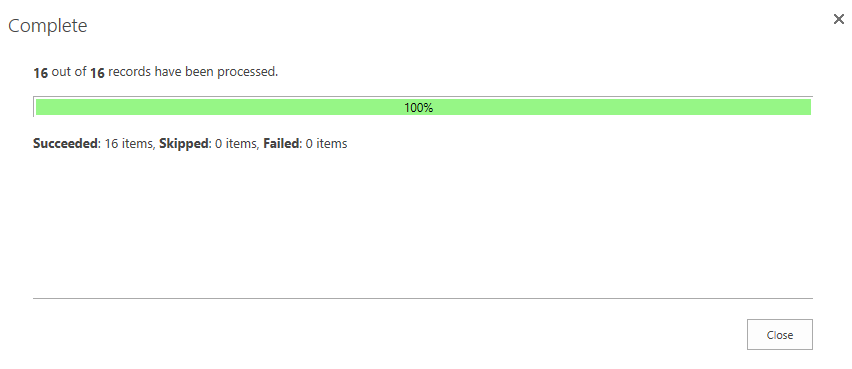
After importing process finished, click Close button to exit.
Then you will be navigated to Sales Data list, and you will find that the items of Excel Sheet 1 are imported into the list as following.
