- BoostSolutions
-
Products
-
- Microsoft Teams
- HumanLike Alert Reminder
- View All Apps
- Pricing
- Support
- Company
Column/View Permission contains two types of settings, column permission settings and view permission settings. This product has to be activated before it can be used. For further information and reference, please see our Product Installation Guide.
If you plan to upgrade Column/View Permission from version 3.x to 4.x, please see our Column/View Permission Upgrade Instruction.
1.1 Enable/Disable Column Permission
This function allows you to enable or disable Column Permission settings configured in the list globally.

To add Column Permission settings, click .
.
This function allows you to choose all users or specified users as follows:
You can also exclude the above listed users/groups/columns.
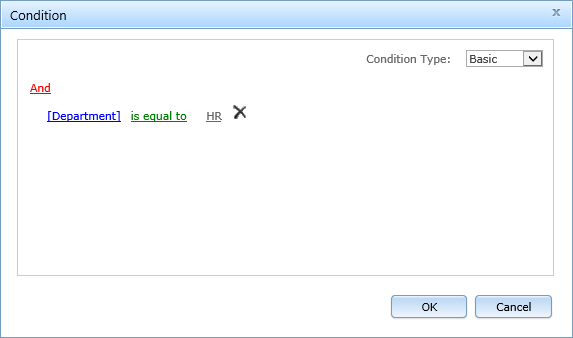
Allows the user to filter user/group columns and set column permissions based on conditions.
Both basic and advanced conditions are provided and administrators can customize conditions based on their individual business needs.
Basic condition settings are easier to set as shown in the screenshot below.
Advanced condition settings provide the administrator with more operators and functions to implement elaborate conditions as shown in the screenshot below.
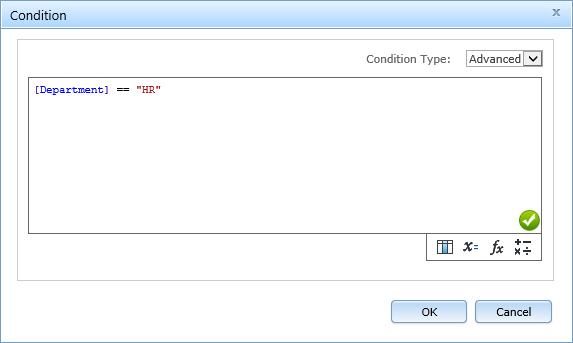
For further reference, please see our Condition Editor User Guide.
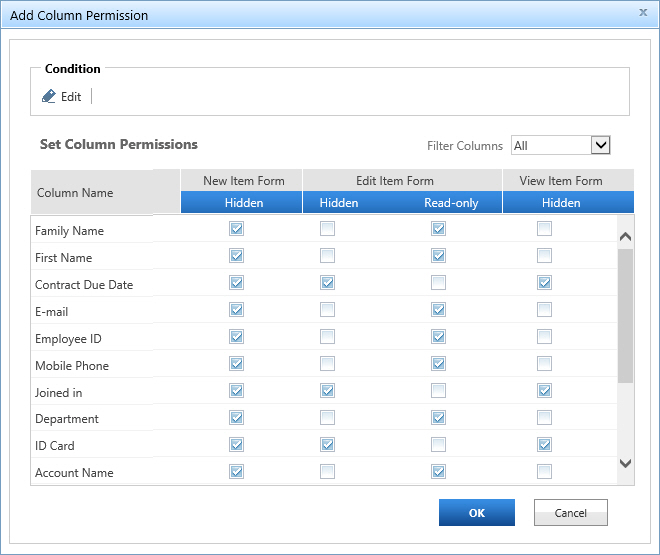
You can set columns as hidden or read-only in New Item Form, Edit Item Form and View Item Form.
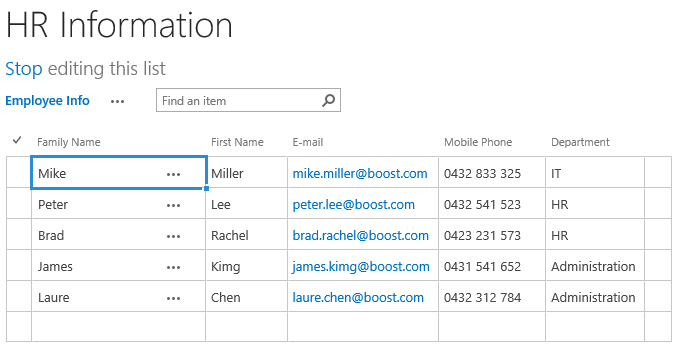
Here is a sample list of confidential HR information.
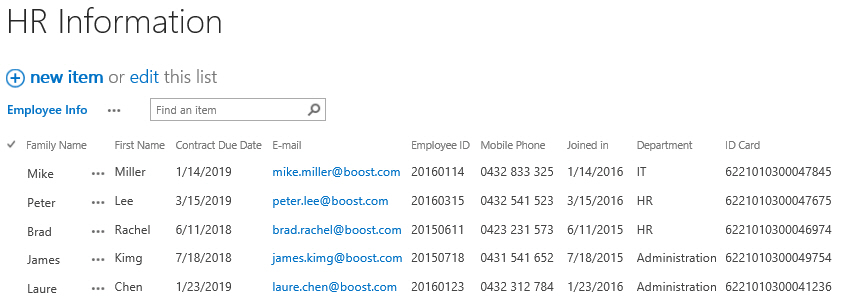
In the screenshot above, we can see that there is some information in this list that employees should not be able to view or change. In this example, we will show you how to set Column Permissions that allow full access to the HR department and limit other SharePoint Users from accessing confidential column information.
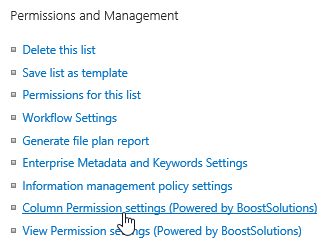
First, enter the List Settings page and click the SharePoint Column Permission Settings link.
Note: To configure the Column/View Permission, you should be a site owner, a site collection owner, or have Full Control permission on the current list.
Second, in the Include Users section, select the radio button All Users.

Third, we need to exclude the HR department from the general limitations that we will set for all users. To do this we expand the Exclude Users section and choose the HR department employees that we want to access all columns. Since the HR department employees account information is contained in another list, we need to click Select more users to expand the settings section and then click
 .
.
Next locate the User List as shown below and set the condition as [Department]=='HR'.

After this you need to specify the column permissions for users based on the item form. You can set the columns for users as hidden in the New Item Form and View Item Form or as hidden or read-only in the Edit Item Form.
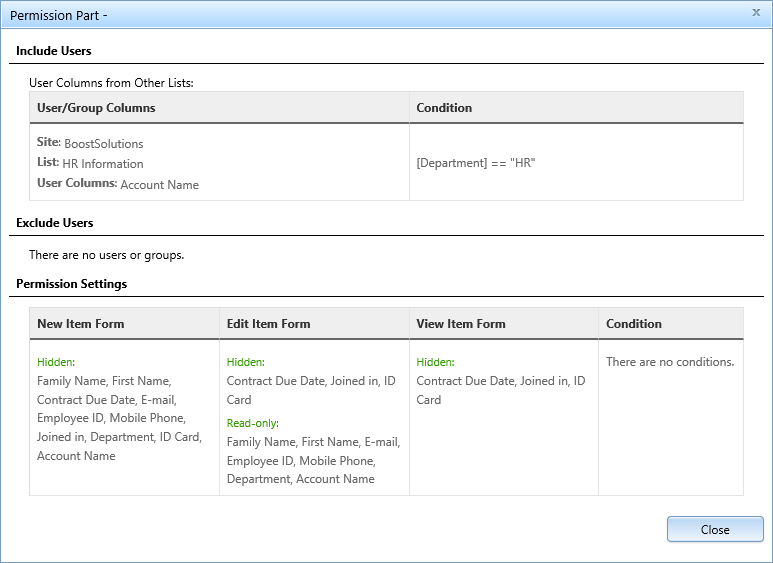
You can click the Preview button to look over the settings and ensure it is correct.
After all the settings have been made, click OK to save these settings. Next, log in as a user who is not working in the HR department. As you can see, the confidential columns are not going to show in the list for this user.

If the user accesses the datasheet view, the confidential columns are also hidden.
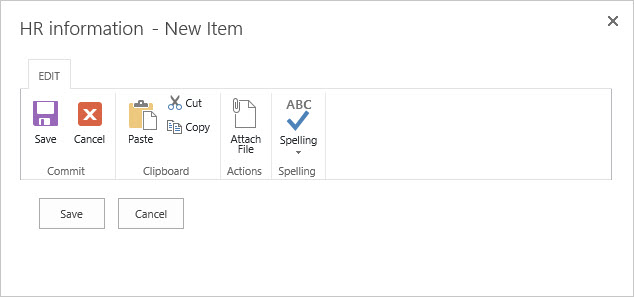
The New Item Form, now, does not display any columns to edit, based on the settings we selected, and as we can see it is completely empty.
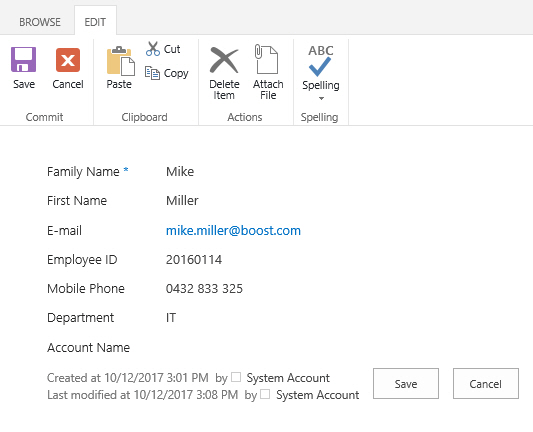
In the Edit Item Form, only the columns set as read-only are displayed and all other columns are not shown anymore. The columns that are displayed cannot be edited.
If you also want to hide columns in Alert Me emails, you can activate the Column Permission for Alert Me feature for web applications in Central Administration.

Once this feature is activated, columns will automatically be hidden in emails based on the Column Permission configuration.
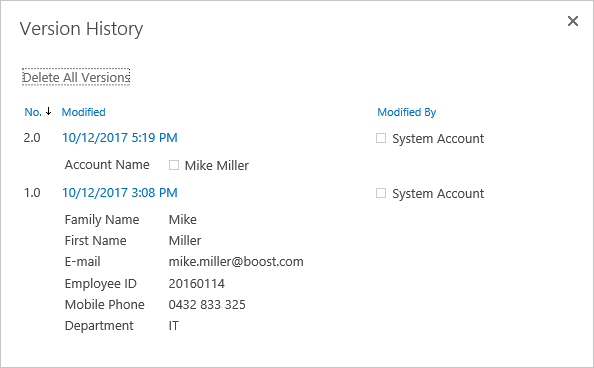
You can also set confidential columns as hidden in the version history.
3.1 Enable/Disable View Permission
This function allows you to enable or disable View Permission settings configured in the list globally.

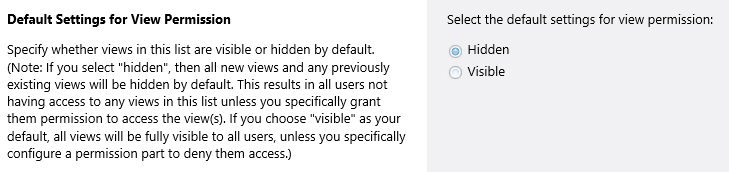
3.2 Default Settings for View Permission
This function defines the default behavior for View Permissions.
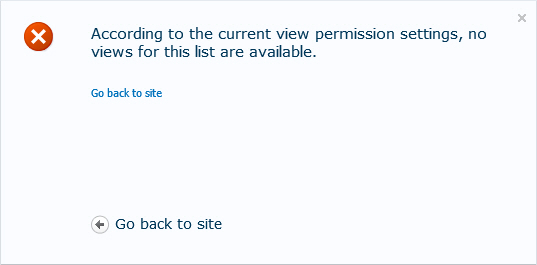
This page gives you the option to configure notifications if views are unavailable for users. Check the Use redirect page to use this feature. If activated, any users without sufficient permissions will be directed to a page as follows.
You can specify which users to include or exclude from the selection process. You have the option to:
You can also exclude the above listed users/groups/columns.
In the View Permission Settings, administrator can specify the permission level that users will have for each of the views in a list.
The Access Type defines whether the view should be fully accessible, read-only (Disable Edit View), or hidden for the selected users. (Please note that by setting a view as read-only will make the modify this view option in the Views dropdown menu unavailable).
You can check the Disable create view option to prevent users from creating views in the list, including public view and personal view.
You can specify the default view for selected users in the Include Users section.

In many companies there is information that should only be accessible by certain users. For example, only staff in the HR department should be able to access, read and modify employees' private information. Other employees in the company should not be able to access this kind of information. Thus views containing private information should be hidden for all users except the HR department.
To achieve this goal we need to define views that include the necessary information for targeted users, and restrict access on all levels to other users using BoostSolutions View Permission.
Administrators need to set two view permission parts, one for all employees in the company and one for users in the HR department.
First, we need to create a view that will be accessible for all employees, which is called "General Info", and will not contain any sensitive information.
To do this you need to enter the HR Information list, then navigate to the List tab, and click the Manage View Permission in the Settings group.
Note: To configure the Column/View Permission, you should be a site owner, site collection owner, or have Full Control permission on the current list.
Second, click to enter the permission part page. Then create a permission part named General View for all users.

Third, in the Include Users section, select the All Users radio button.

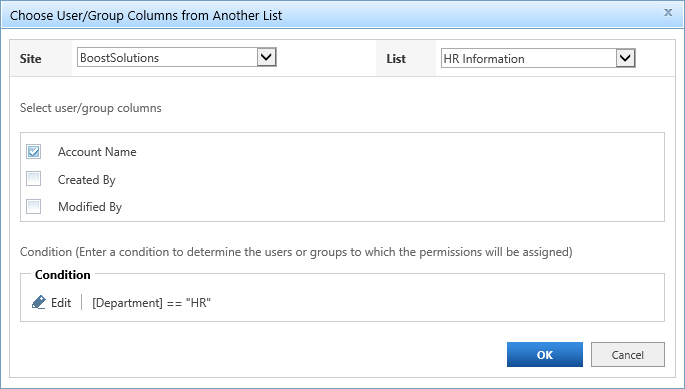
Fourth, we need to exclude the HR department from the general limitations that we will set for all users. To do this we expand the Exclude Users section and choose the HR department employees that we want to access all views.
Next locate the User List as shown below and set the condition as [Department]=='HR'.
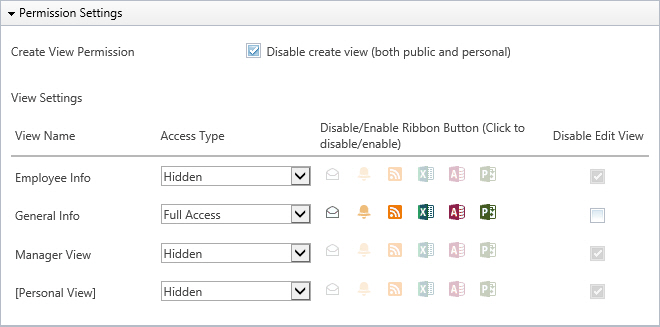
Then, select which views are available to the SharePoint users, and which permissions they have for these views. Based on this goal, you can set the following views as hidden: Employee Info, Manager View and Personal View.

Also, to limit users from creating both public and personal views, you need to check the Disable create view option.
Next, set the General Info view as the default view.

After all the settings are completed for general users, we can start creating additional settings for the HR Department. The view that we need to create is "Employee Info".
First, we need to create a new View Permissions settings part. In this example we will call it "Detail view".

Next, we need to select which users will be included. Remember here the view permission is only for the HR department, so select Select Only the Following Users option.
Secondly, select the employees working in the "HR" department using the following condition:

Then, specify the access type the HR employees should have for each view.
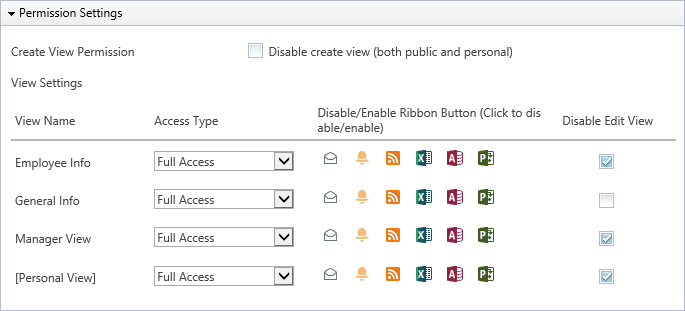
Next, select Employee Info view in the Set Default View section.

After all the settings have been made, click OK to save these settings.
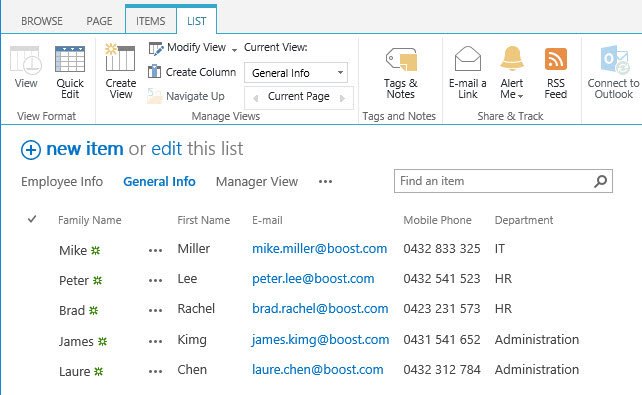
Log in as Mike from the Development department. As you can see, only the General Info view is available. Also note that the actions in ribbon are also disabled.

When Laura from HR department logs in, her default view is Employee View; she can access all views and has permissions to click all the ribbon buttons.
Column/View Permission publishes an Application Programming Interface (API) that provides easy compatibility with other applications.
For more details, please refer to the Column/View Permission API Documentation.
Column/View Permission will limit permissions of web service methods based on the Column/View Permission settings in the following list.
| Service | Methods | Description |
|---|---|---|
| Lists (Lists.asmx) |
AddAttachment DeleteAttachment GetListAndView GetListItems UpdateListItems GetListItemChanges GetAttachments |
Methods for working with Lists and List Data |
| Site Data (SiteData.asmx) |
data from sites or lists GetAttachments GetListItems |
Methods that return metadata or list |
| Views(Views.asmx) |
AddView DeleteView GetViewCollection GetViewHtml UpdateView UpdateViewHtml UpdateViewHtml2 |
Methods for working with list views |
To enable Column/View Permission on web services, you need to install Column/View Permission for Web Services on each web front end of farm.
For information on how to install Column/View Permission for Web Services, please refer to Column View Permission for Web Service Installation Guide.
