SharePoint Active Directory Import (AD Import) is one of the new features in SharePoint 2013. It enables you to import user information from Active Directory into SharePoint User Profile Application.
This article will introduce how to configure SharePoint Active Directory Import in Central Administration, what the limitations of this feature are and how AD Information Sync can overcome these limitations.
- How to configure SharePoint Active Directory Import
- Key Limitations of SharePoint Active Directory Import
- About AD Information Sync
I. How to configure SharePoint Active Directory Import
Before we begin, we will assume that you have already provisioned the User Profile Service, have created the User Profile service application and have gathered the required information about your environment.
This section has 4 parts that will help you to configure AD Import:

Enable Active Directory Import
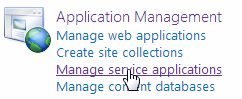
- Enter SharePoint Central Administration. Under the Application Management section, click Manage service applications.

- On the Manage Service Applications page, click User Profile Service Application.
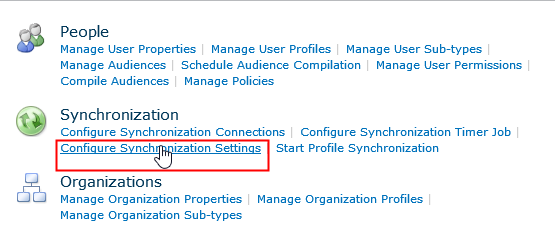
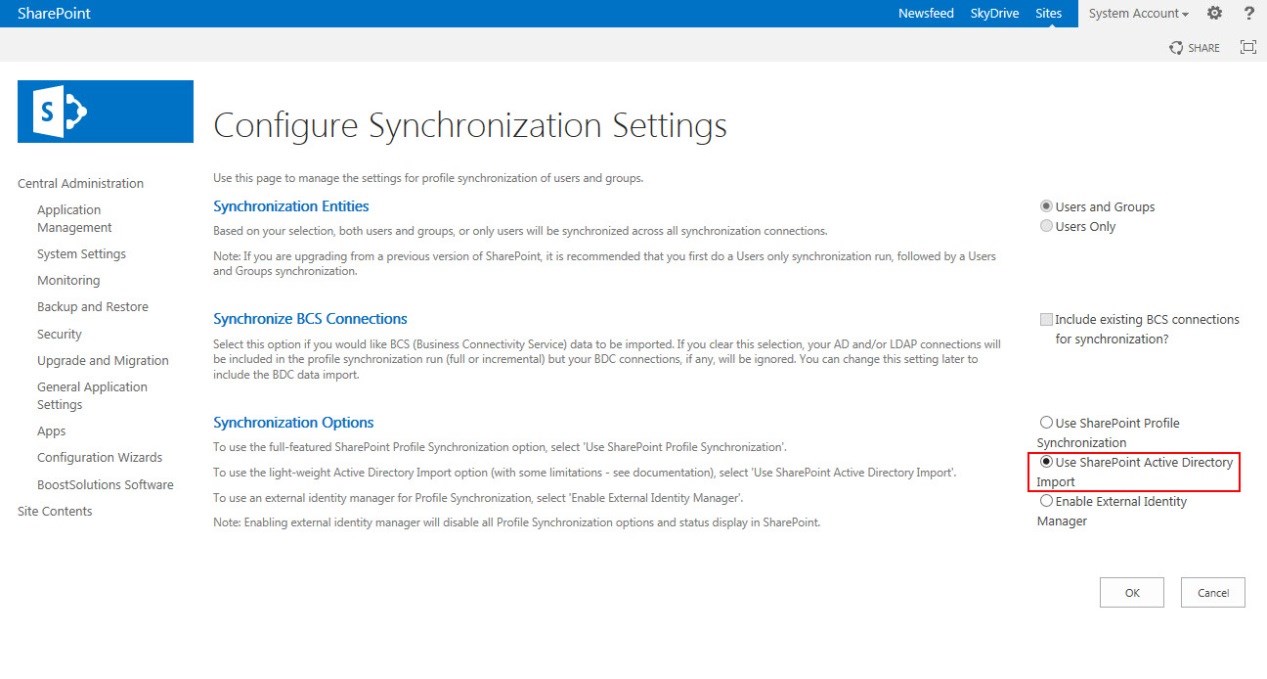
- On the Manage Profile Service page, in the Synchronization section, click Configure Synchronization Settings.
- On the Configure Synchronization Settings page, in the Synchronization Options section, select Use SharePoint Active Directory Import option, and click OK.
Configure Synchronization Connections
- On the Manage Profile Service page, click Configure Synchronization Connections. You will enter the Synchronization Connections page.
- On the Synchronization Connections page, click the Create New Connection button.
- On the Add new synchronization connection page, enter the connection name in the Connection Name text box.
- From the Type list, select Active Directory Import.
- Complete the Connection Settings section using the following steps:
- In the Fully Qualified Domain Name box, enter the Fully Qualified Domain Name of the domain.
- In the Authentication Provider Type box, select the authentication provider type.
- If you select Forms Authentication or Trusted Claims Provider Authentication, select an Authentication provider from the Authentication Provider Instance box. The Authentication Provider Instance box lists only the authentication providers that are currently used by a Web application.
- In the Account name box, enter the synchronization account in the form: DOMAIN\user_name. The synchronization account must have Replicate Directory permissions or higher in the root OU of Active Directory.
- In the Password box, enter the password for the synchronization account.
- In the Confirm password box, enter the password for the synchronization account again.
- In the Port box, enter the connection port.
- If a Secure Sockets Layer (SSL) connection is required to connect to the directory service, select Use SSL-secured connection.
- If you want to filter objects to be imported from the directory service, in the Filter in LDAP syntax for Active Directory Import box, enter a standard LDAP query expression to define the filter.

- In the Containers section, click Populate Containers and then select the containers from the directory service which you want to synchronize. All OUs selected will be synchronized along with their child OUs.
- Click OK and a newly created connection will be listed on the Synchronization Connections page.
Map AD attributes with User Profile Properties
- On the SharePoint Central Administration website, in the Application Management section, click Manage service applications.
- On the Manage Service Applications page, click User Profile Service Application.
- On the Manage Profile Service page, in the People section, click Manage User Properties.
- On the Manage user Properties page, right-click the name of the property that you want to map a directory service attribute to, and then click Edit.
- To remove an existing mapping, in the Property Mapping for Synchronization section, select the mapping that you want to remove, and then click Remove.
- To add a new mapping:
- In the Add New Mapping section, in the Source Data Connection list, select the data connection that represents the directory service to which you want to map the user profile property to.
- In the Attribute box, enter the name of the directory service attribute to which you want to map the property.
- Click Add.
- Click OK.
- Repeat steps 4 through 7 to map additional properties.
- On the SharePoint Central Administration website, in the Application management section, click Manage service applications.
- On the Manage Service Applications page, click User Profile Service Application.
- On the Manage Profile Service page, in the Synchronization section, click Start Profile Synchronization.
- On the Start Profile Synchronization page, select Start Full Synchronization if this is the first time that you are synchronizing or if you have added or modified any synchronization connections since the last time that you synchronized. Select Start Incremental Synchronization to synchronize only information that has changed since the last time that you synchronized.
- Click OK. The Manage Profile Service page will be displayed showing the profile synchronization status in the right pane.
II. Key limitations of SharePoint Active Directory Import
Although this feature can import AD profiles from Active Directory to SharePoint, there are some limitations:
- It is very complicated to configure the synchronization and it always gets stuck when starting.
- This feature can only import information to User Profile Application, but cannot import to other lists, such as Contact list.
- You cannot update your active directory with changes made in SharePoint; there is no “write back” function it only imports.
- After starting the synchronization, you have no idea if the synchronization is successful and you don’t know what problems, if any, occurred during synchronization.
- This feature is only supported on SharePoint Server 2013, not on SharePoint Foundation 2013.
III. About AD Information Sync
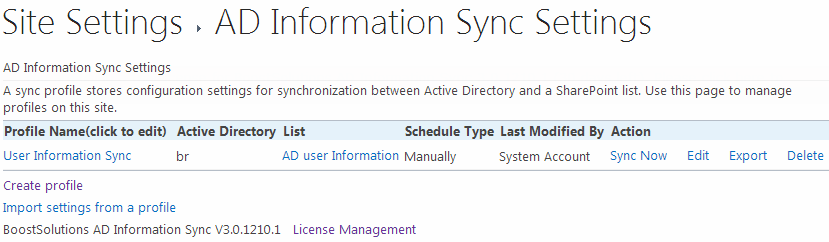
AD Information Sync is a flexible and powerful tool which syncs information between Active Directory and SharePoint. It supports many AD attributes from User, Contact and Computer objects. AD Information Sync overcomes many of the limitations found in SharePoint Active Directory Import.
- With AD Information Sync, you can create and configure a sync profile in one place with a simple user interface. It also helps you to get rid of the “stuck when starting” problem.
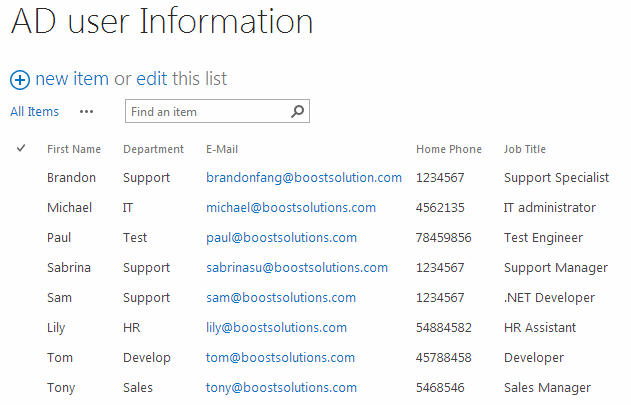
- AD Information Sync allows you to import Users Profiles from Active Directory to any SharePoint list. You can view and manage user profiles in SharePoint list.
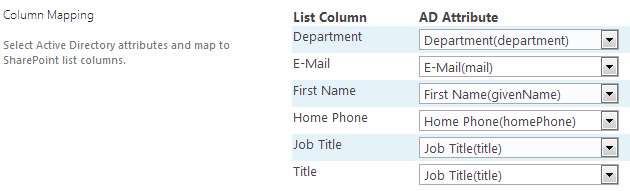
- AD Information Sync provides you with a powerful attributes mapping function; you can configure attribute mappings in one page quickly and easily.
- With AD Information Sync, any modifications made in SharePoint list can be written back to Active Directory. This is easily done with one click; all you need to do is select the option.

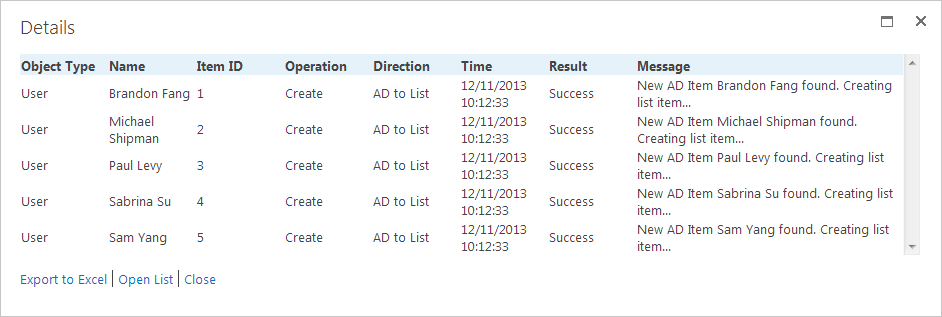
- With AD Information Sync, you can monitor sync activities by viewing the logs. Logs will quickly let you know what has happened during synchronization.