- BoostSolutions
-
Products
-
- Microsoft Teams
- HumanLike Alert Reminder
- View All Apps
- Pricing
- Support
- Company
SharePoint Excel Import allows business users to import any Excel spreadsheet (.xlsx, .xls, or .csv file) into SharePoint list and map data fields manually or automatically (by schedule). Also, it enables you to create a new SharePoint list directly from an Excel spreadsheet with field mapping.
As well, it is possible to use SharePoint Excel Import to update any SharePoint list using an Excel file and keep your information up to date.
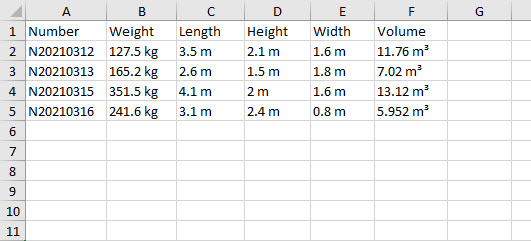
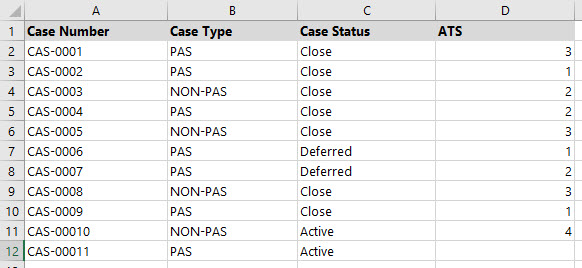
There is an Excel file which contains the following records.
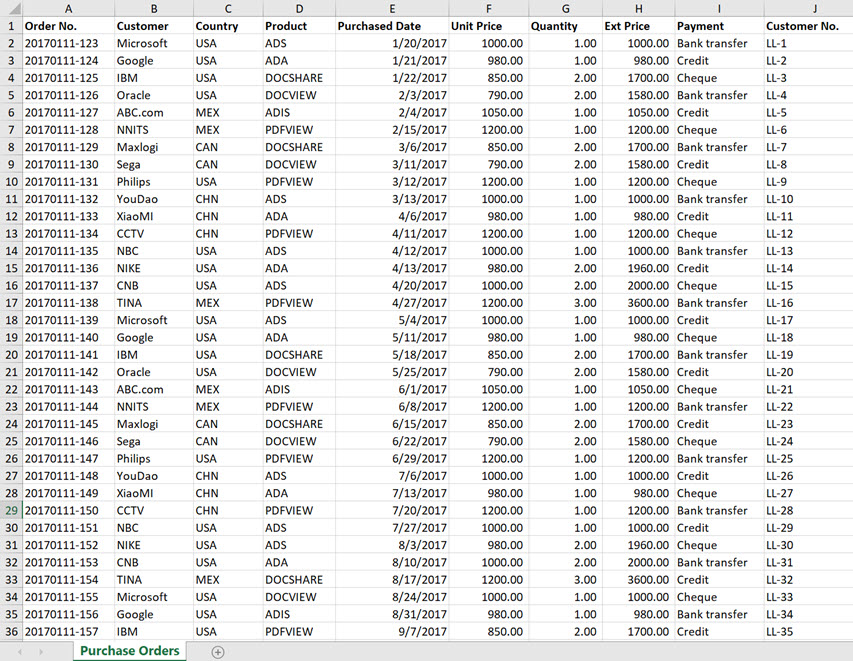
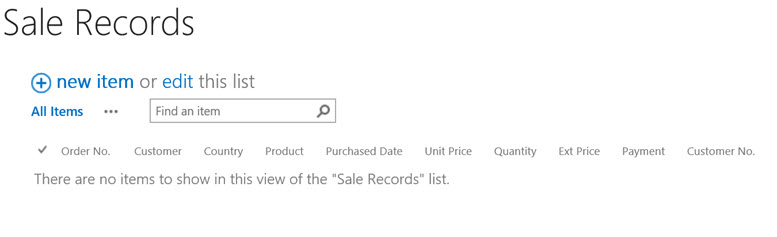
And this is a SharePoint list, which contains the same columns as in the Excel file.
Now we will demonstrate how to import the records from the Excel file in to the SharePoint list.
To import a Spreadsheet, you must have at least Contribute permission level on the list or be a member of the default SharePoint Members group for the site.
a. Enter the list that you want to import a spreadsheet from.
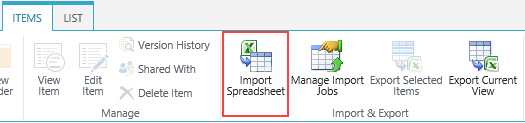
b. On the Ribbon, click the Items tab, and then click Import Spreadsheet in the Import & Export group.
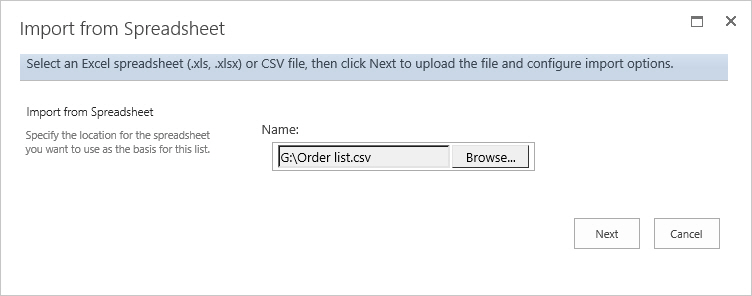
c. In the Import from Spreadsheet dialog box, choose an Excel spreadsheet or CSV file. Click Next to upload the file.
d. In the Import Spreadsheet dialog box you can configure import options.
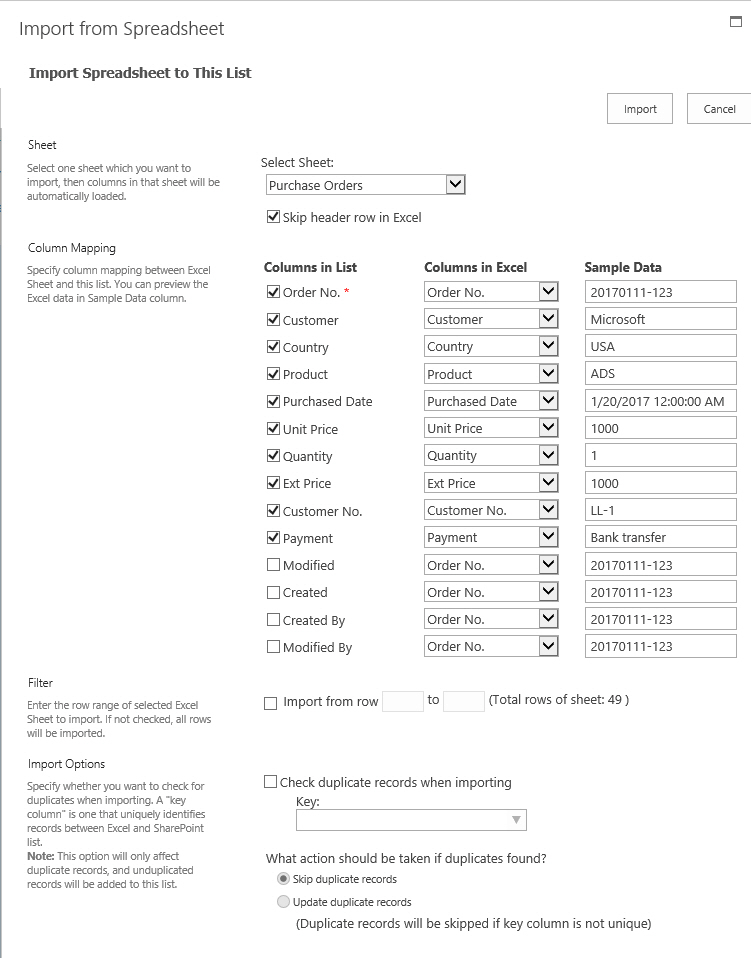
e. Once an Excel file is uploaded, the included sheets will be loaded and available for import. In the Sheet section, select a sheet which you want to import.
Use the Option Skip header row in Excel to decide whether or not to import the first row. This option is enabled by default and can be manually disabled if you don't have field titles in the first row or if you do not want to use the first row as field titles.

f. In the Column Mapping section, select the columns in Excel and map them to list columns.
By default, the columns with the same name and type will be automatically selected and mapped whenever a sheet is loaded. Additionally, required columns will be marked with a red asterisk and selected automatically.
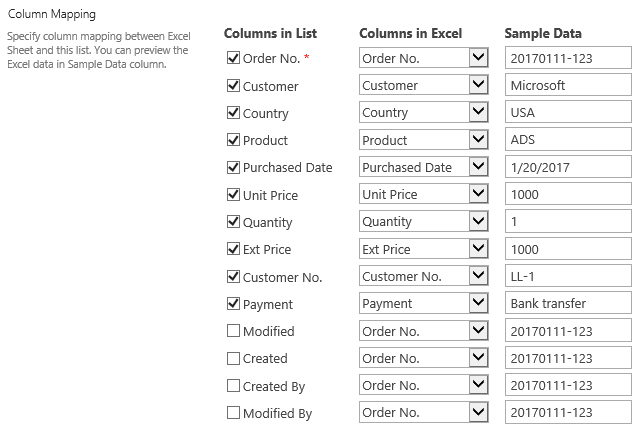
The Sample Data field is used to preview Excel data in a specific column in real time before importing the Excel spreadsheet to SharePoint. Only the first row of data (not including the field titles row) will be shown.
When you toggle between different Excel columns, the value in the Sample Data field will change correspondingly. Thus you don't need to switch back and forth between the Excel file and SharePoint. This ensures that you insert the right information into the right place.
| Note: All SharePoint columns are supported by Excel Import. However, if you select and map a Lookup column performance may be affected. |
g. In the Filter section, select the data range and import the data you need. If you deselect this option, all rows in the Excel sheet will be imported.

h. In the Import Options section, specify if you want to update SharePoint list using an Excel file.
Before doing this, you need to enable the Check duplicate records when importing option.
Duplicate records can exist in both SharePoint list and Excel Sheet. In order to duplicate records, a Key has to be specified to identify duplicate records.
A key column is one that uniquely identifies records between Excel and SharePoint list (like an ID column). In 3.6 and above versions, you can specify more than one key columns.
| Note: Only columns which have been selected in the Column Mapping section can be utilized as a Key column. Furthermore, Multiple Lines of Text column cannot be used as a key column. |
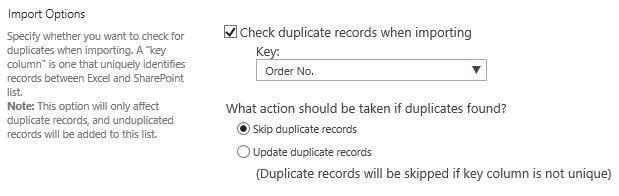
Once the Check duplicate records when importing option is enabled, there are two actions that can be taken if any duplicates are found when importing Excel to SharePoint.
Data which has been detected as duplicate records in an Excel spreadsheet will be skipped when importing and the remaining data will be imported.
Duplicate records will be filtered and then updated first. Secondly, Excel Import will replace information found in the duplicate records in SharePoint using the corresponding information from the Excel spreadsheet. Finally, the remaining data will be regarded as new records and imported accordingly.
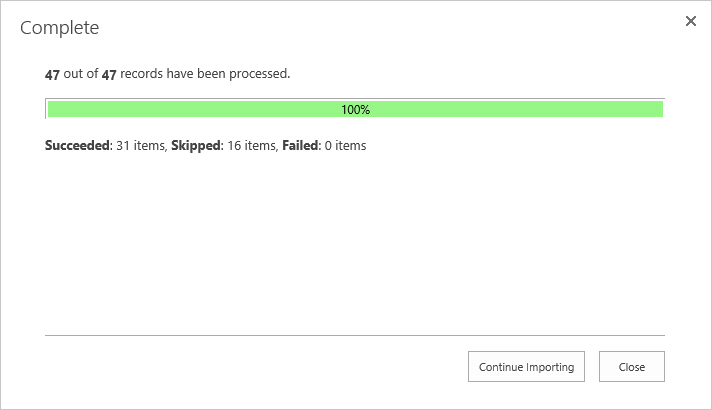
i. Click Import button.
j. After the importing process finished, click Continue Importing button to keep import other sheets; otherwise, click Close button to exit.
k. Return to the SharePoint list, all records are already imported in the list as following.

This is the Excel Spreadsheet which contains the records, now we will demonstrate how to create a new list from this spreadsheet.
To create a new list from an Excel Spreadsheet, you must have at least Design permission level for the site, or be a member of the default SharePoint Designer group for the site.
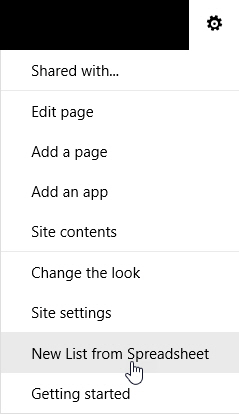
a. Click Settings and then click New List from Spreadsheet.
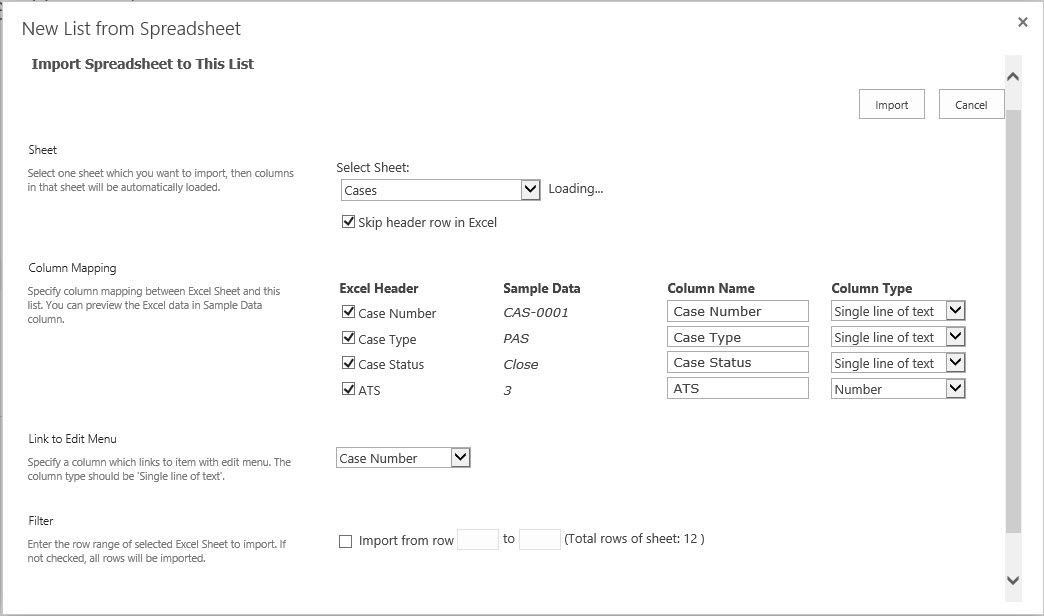
b. In the New List from Spreadsheet dialog box, you can choose an Excel spreadsheet or CSV file and configure import options.
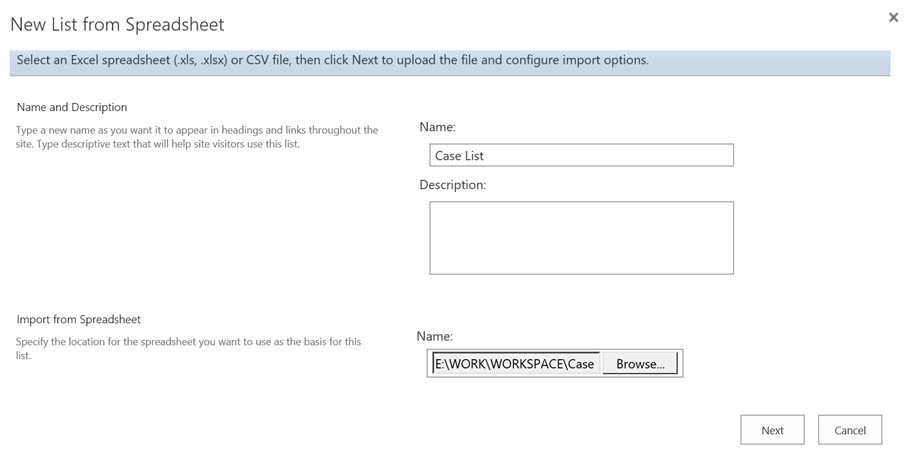
c. In the Name and Description section, enter the name that you want for the new list and a description, in the Description box, to help people understand the purpose of the list and what data it contains.
d. In the New List from Spreadsheet dialog box, choose an Excel spreadsheet or CSV file.
In the Column Mapping section, select the columns and specify the column name and type in the new list.
In the Link to Edit Menu section, select one column which is linked to the edit menu.
e. In the Import button.
f. After the importing process finished, click Close button to exit.
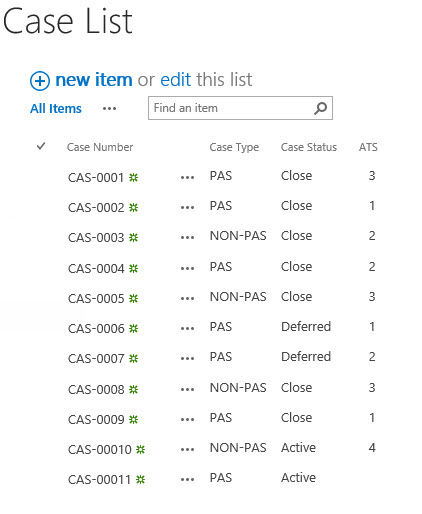
g. Then you will find a new SharePoint list is already created as following.
Excel Import enables you to import any Excel spreadsheet stored on remote file servers, including FTP, SharePoint document library, etc., to SharePoint list automatically. You need to create an import job first so that data will be imported based on a scheduled plan.
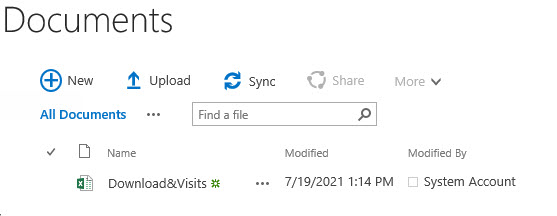
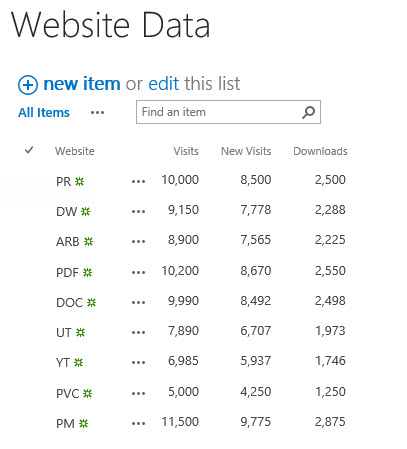
Supposed there is an Excel file in the SharePoint document library, it stores the website data.
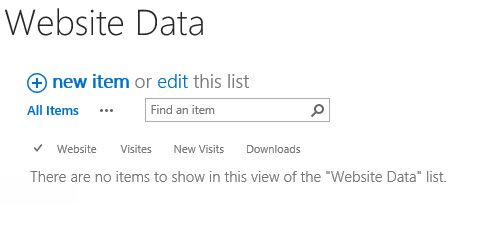
This is a SharePoint list which is used to store the website data.
Now we will demonstrate how to automatically import data from this Excel file into a SharePoint list.
a. Enter the list you want to create an import job for, here is the Website Data list.
b. In the Ribbon, click the Items tab and then click Manage Import Jobs in the Import & Export group.
c. The Manage Import Jobs dialog box will appear. In this dialog box, click Create New Import Job.
d. The Import Excel Spreadsheet from Remote Server dialog box will open. In this dialog box, enter the File URL.
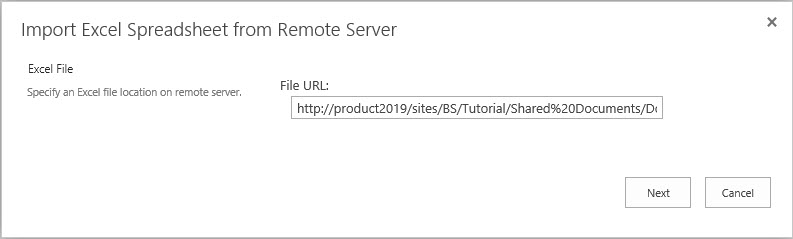
e. Click Next.
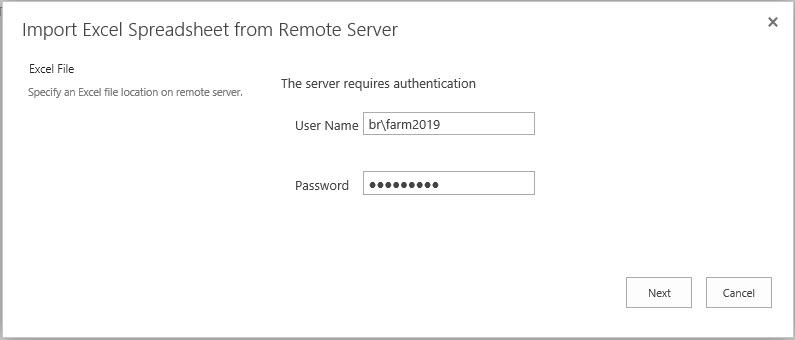
f. You will see the File System Requires Authentication dialog box. Enter the correct User Name and the Password and click Next.
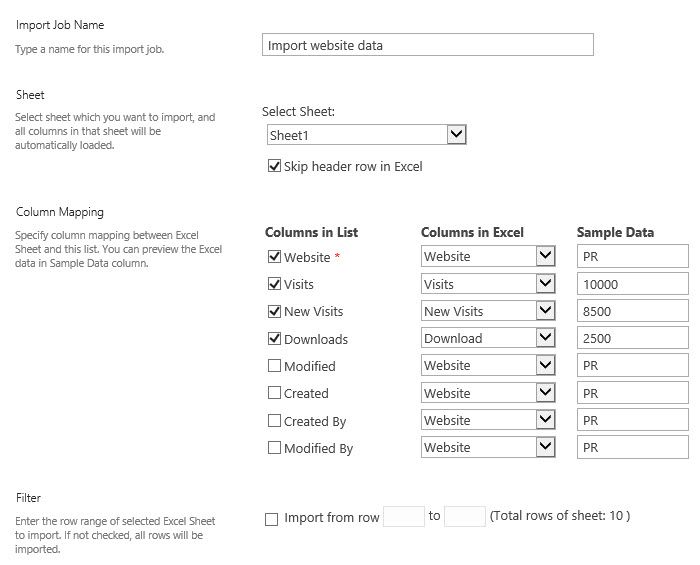
g. You will enter the Create New Import Job dialog box.
h. In the Import Job Name section, enter a name that you want for this import job.
In the Sheet section, select the sheet you want to import. And select the Skip header row in Excel if you do not want to use the first row as field titles.
In the Column Mapping section, select the column you want to import, and map the column as needed.
In the Filter section, specify the row range of the selected Excel sheet to import to list.
i. In the Import Options section, specify if you want to update SharePoint list using spreadsheet data.
j. In the Recurring Schedule section, you can further specify the scheduler to run this import job automatically according to your needs (manually, every number of minutes or hours or days).

k. Click Save button to return Manage Import Jobs dialog.
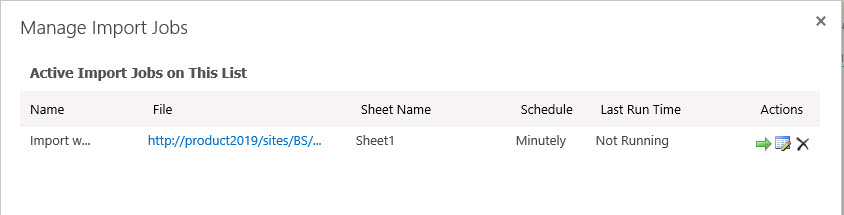
l. And then, the job will run based on the specified schedule. Or you can click  to run the job manually.
m. After the timer job run complete, the data is imported to the SharePoint list.
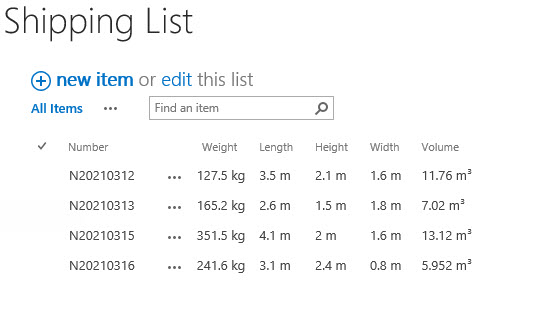
This is a SharePoint list; we will demonstrate how to export selected items.
a. Select the desired items in a list. Then click Export Selected Items on the ribbon.
b. An Export Selected Items dialog box will appear.
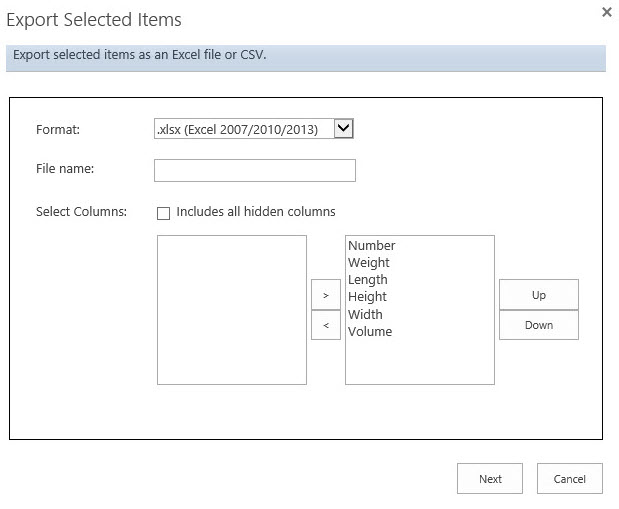
c. In this window, choose the desired Excel Format and enter a File name.
There are three formats for export: .xlsx (Excel 2007/2010/2013), xls (Excel 2003) and .csv.
d. By default, all columns in the current view will be selected for export. You can also choose the columns that you want to export and change the columns position by clicking Up or Down button.
Select the Includes all hidden columns option if you want to export the columns that do not display in the current view.
e. Click OK.
f. A file download dialog will appear. Click Save to save the file to your computer.
g. The items are exported to the Excel file as following.