This Learning Note documents an example of using Windows PowerShell to export a site, list, or document library manually.
Preparations:
1. Run Windows PowerShell as Administrator.
2. Before you begin, create a folder on the local computer or the network to store the backups.
Actions:
1. On the Start menu, click All Programs.
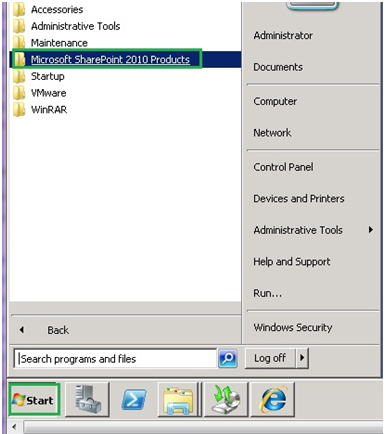
2. Click Microsoft SharePoint 2010 Products.

3. Click SharePoint 2010 Management Shell.
4. At the Windows PowerShell command prompt, type the following command:
Export-SPWeb -Identity <Site URL> -Path <Path and file name> [-ItemUrl <URL of site, list, or library>] [-IncludeUserSecurity] [-IncludeVersions] [-NoFileCompression] [-GradualDelete] [-Verbose]
I ran the above command in the below steps for the clearer understanding. ^_^
(1) Input Export-SPWeb.

(2) Specify the Identity.

(3) Specify the Path.

5. Waiting for the command to complete, the backups should be in the target folder.

Note:
If the <Site URL>, <Path and file name>, or <URL of site, list, or library> contain any spaces, you must surround these in double quotes (“”) or else the Windows PowerShell command will return errors.
This is only a short learning note. For more information, please see
http://technet.microsoft.com/en-us/library/ee428293.aspx
Thanks.