Introduction
PerformancePoint Services(PPS) has one major mission in life: to enable you to create rich, context-driven dashboards that aggregate data and content to provide a complete view of how your business is performing at all levels.
PerformancePoint used to be an independent product with the earlier version of SharePoint. In SharePoint 2010, it has been integrated in the form of PPS. But in order to effectively use PerformancePoint Services in SharePoint 2010, it should be properly configured.
Solution
For configuring the PerformancePoint Service, one should complete the following four steps to use PerformancePoint features. The four important steps are:
1) Configure the Secure Store Service.
2) Ensuring that the PerformancePoint Service is turned on.
3) Creating and configuring the PerformancePoint service application.
4) Relating the web application with the created service application.
The Secure Store Service is a new addition to SharePoint 2010. Basically it replaces the Single Sign On feature. It is a service that has a secure database which stores the credentials associated with application ID’s which can be used to authorize access to the external data sources.
To configure the Secure Store Service, enter CA > Application Management > Manage service applications.

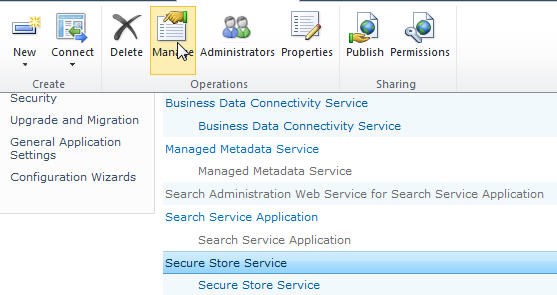
Scroll down and find a Service Application named “Secure Store Service“. Select it and click on “Manage” on the top ribbon.

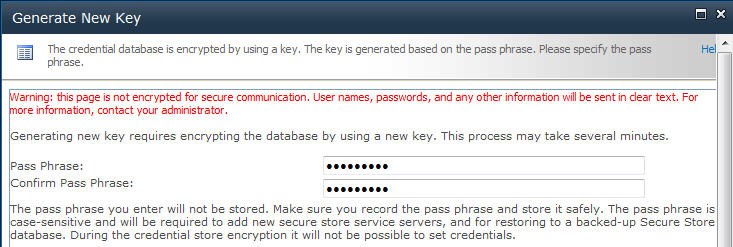
If one is configuring the Secure Store Service, there would be no key generated which would encrypt the credentials. To create a new key, click on “Generate new key” on the top ribbon.

A pass phrase needs to be created to encrypt the key. Accept the check to Re-encrypt the Database Using the New Key and click OK.

Sometimes, when we trying to manage the Secure Store Service, we may be get the following message “Cannot complete this action as the Secure Store Shared Service is not responding.? Please contact your administrator.” So, we need to solve this problem first.

Firstly, go to CA > System Settings > Manage services on server to see if secure store service is started. If no, please start it and try again.

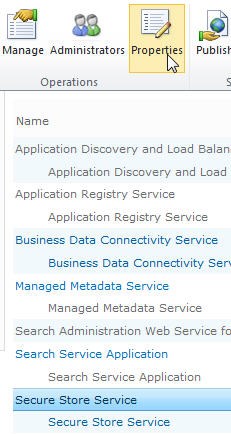
Secondly, go to CA > Application Management > Manage service applications, select secure store service application (not into it), then click properties on top ribbon. In application pool section, find its application pool.


Then go to CA > Security > Configure service accounts, select the application pool you just find and check the service account. If this account has not proper permission, please change the service account to the one with enough rights and try again.

Lastly, if the Secure Store Service database is set to read-only, the audit log file must be disabled. To disable audit, please go to CA > Application Management> Manage service applications, select secure store service application (not into it), then click properties on top ribbon. In Edit Secure Store Service Application window, make sure “Audit log enabled” section is unchecked.

So, the first step is completed. The next step is to start PerformancePoint Services on server. PerformancePoint Services is the service that all PPS requests would pass through. To start with the second step, enter System Settings > Manage services on server.

Scroll down and find “PerformancePoint Service”. Make sure the status of the service is displayed as “Started”. If it is stopped, then start it. Starting the service would activate the service which is a requirement prior to creating it’s relative service application.

To create and configure the PerformancePoint service application, re-enter CA > Application Management > Manage service applications.

By default every web application takes the default service application, but for our purpose we need to create a new PerformancePoint service application. On the ribbon, Click on the arrow below “New” and select “PerformancePoint Service Application”.

Enter an appropriate application name. In the “Application Pool” area, we can create a new application pool or choose an existing one. For our purpose, we will create a new application and configure it with an appropriate security account. We need to make sure the service account has sufficient rights on all data sources as well as network sources. After filling in all details, click on “Create“.

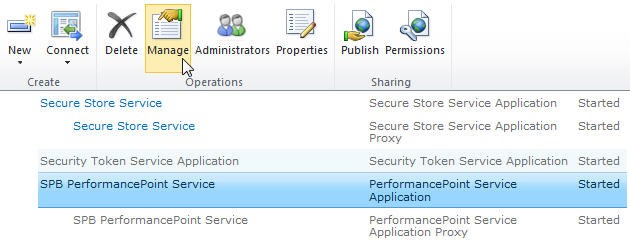
A PerformancePoint service application will be created, which in our case is “SPB Performance Point Service”. We need to set up an unattended service account so that we can use a single shared account to access external data source. To do so, Select “SPB PerformancePoint Service” and click on “Manage” on the ribbon.

There will be several options such as defining the trusted data source location or content locations, importing PPS content and others. For our purpose, Click on “PerformancePoint Service Application Settings“.

By default the Secure Store Service name will be pre-populated. In order to configure the unattended account, provide an appropriate username and password and Click OK.

After the service application is created, we need to complete the last step of attaching the web application to the newly created service application. To do so, go back to CA > Application Management. Under “Service Applications” section, click “Configure service application associations“.

By default, the “default” connection will be selected. You can change it to “custom” and select all the service applications required for the web application including the custom PerformancePoint service application i.e. “SPB Performance Point Service”. You can even set the custom service application as the default PerformancePoint service application. After selecting all the required service applications, click OK, and web application associations will be updated.


You can cross check whether the PerformancePoint service application is properly configured by accessing PPS sites, Dashboard designer and other PPS first class objects in Business Intelligence Center Site. Before that, ensure to activate the PPS feature in Site Settings > Site collection features.